background image


Directions 


Meanings of icons: 

 
Forbidding: forbid improper operations to avoid damaging the 
Notebook PC. 

 
Caution: cautions for operators to avoid potential damages. 
Please note and remember. 

 
Importance: important information, common notes, definitions, 
general knowledge and references, etc. 


Other trademarks and trade name may be used in this manual to refer 
to either the entities claiming the marks and names or their products. 
The manufacture disclaims any proprietary interest in trademarks and 
trade names other than its own. 
 
Information in this manual is subject to change without notice. 


Reproduction in any manner whatsoever without the written 
permission from the manufacture is strictly forbidden. 

Product images in this manual are for your reference only. 

Содержание PC-88002

Страница 1: ...etc Other trademarks and trade name may be used in this manual to refer to either the entities claiming the marks and names or their products The manufacture disclaims any proprietary interest in tra...

Страница 2: ...armful interference to radio or television reception which is found by turning the equipment off and on the user is encouraged to try to correct the interference by one or more of the following measur...

Страница 3: ...er the suspend mode 11 4 Keep the data for future possible use 12 4 1 HDD Partition 12 4 2 Class the data in the HDD 12 5 Getting Started 13 5 1 Install the Rechargeable Battery 13 5 2 Remove the Batt...

Страница 4: ...2 8 3 Power Saving 22 8 3 1 Connect the Adapter without using Battery Pack 22 8 3 2 Adjust the brightness of LCD Screen 22 9 Upgrading Your Notebook PC 23 9 1 Connect the External Monitor 23 9 1 1 How...

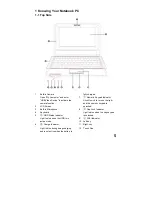
Страница 5: ...ccur some heat during operating or charging DO NOT leave the Notebook PC on your lap or any part of the body in order to prevent discomfort or injury from heat exposure 11 INPUT RATING Refer to the ra...

Страница 6: ...Status Indicator Light is blue when the HDD is in active mode 6 Charge Indicator Light is blue during being charging and is not active when the battery is fully charged 7 Numeric Keypad Indicator Cli...

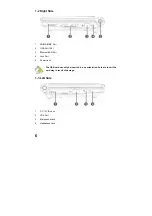
Страница 7: ...USB Port 2 0 3 Ethernet LAN Port 4 Lock Port 5 Power Jack The USB card can only be inserted in one orientation Force to insert the card may in result of damage 1 3 Left Side 1 DC 12V IN Jack 2 VGA Por...

Страница 8: ...Bottom Side 1 Lithium Rechargeable Battery 2 Battery Latch 3 Exhaust Jack 4 Speaker 5 Memory Shield Replace the memory bank by unfolding the shield It only supports the max memory resolution DDR1 400M...

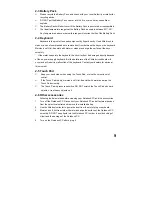
Страница 9: ...down the LCD Screen if the Notebook PC will not be used for a long time DO NOT clean the LCD Screen with chemical cleaners The LCD Screen DOES NOT come into contact with hard objects E g cloth button...

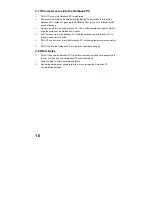
Страница 10: ...oard But the deteriorate of the Printed circuit board will occur and will result in malfunction of the keyboard Contact your dealers for advise at this moment 2 5 Touch Pad Keep your hand clean when u...

Страница 11: ...the Notebook PC lightly Use the fanner to dry the Notebook PC and the accessories and then send it to the service center for advice DO NOT use hair drier to dry the Notebook PC or the high temperature...

Страница 12: ...you drive your car with the Notebook PC DO NOT leave the Notebook PC facing the sun Place it in the shady and cool area DO NOT remove the HDD immediately while or after operating Set the Notebook PC i...

Страница 13: ...o avoid losing the data In order to improve the performance of your Notebook PC the HDD of your Notebook PC can be formatted with some partitions C D and so on Save files to the any partitions except...

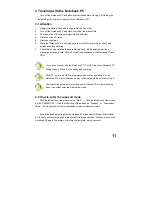
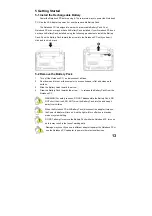
Страница 14: ...ct all lines 2 Shut down and turn over the computer to access its base in flat and clean work surface 3 Slide the Battery Latch toward the arrow 4 Draw the Battery Pack towards the arrow to release th...

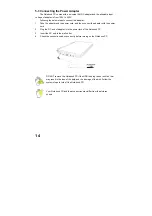
Страница 15: ...apter with the power cord 2 Plug the DC end of adapter into the power jack of the Notebook PC 3 Insert the AC end to the wall outlet 4 Check the connections above correctly before turning on the Noteb...

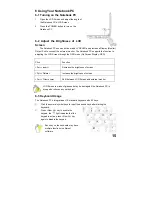
Страница 16: ...lay OSD Click Function Fn insert Decrease the brightness of screen Fn Delete Increase the brightness of screen Fn Prtscr sysrq Shift between LCD Screen and external monitor LCD Screen is made of glass...

Страница 17: ...12 Other Key Combinations Click Ctrl Shift Esc or Ctrl Alt Del to open Task Manager windows Click Windows Key R to open Run windows Click Windows Key F to open Search Results windows Click the left bu...

Страница 18: ...then eject the card in by lightly the card will exit from the port 7 Internet Connection 7 1 Connect the Lineate LAN Before connecting the network with your computer setup your network system first a...

Страница 19: ...Protocol TCP IP Property windows Select the General label on the Internet Protocol TCP IP Property windows and enter the address of your IP and DNS or select Obtain an IP address automatically 7 2 Wir...

Страница 20: ...capability Battery Pack 8 1 1 Checking Battery Power Click the left button of the mouse on Start click the left button of the mouse on Control Panel and click the left button of the mouse doubly on P...

Страница 21: ...al power and the Charge Indicator light will turn on When the Battery Pack charges completely the Charge Indicator light will turn off Save your working data or connect the adapter when the battery po...

Страница 22: ...Pack will be damaged it must continue to be charge every three months as well as the spare Battery Pack Purchase an additional Battery Pack DO NOT often plug or pull the Adapter from the electric out...

Страница 23: ...outlets When the power is used up the Notebook PC will exit the standby mode and turn off Store your working data before using up the power of the Battery Pack 8 2 4 Restart the System Press POWER bu...

Страница 24: ...want to use the external keyboard or mouse connect the external keyboard and external mouse by the USB port When you disconnect the external keyboard or external mouse from the computer grasps the co...

Страница 25: ...fixed object 9 2 Enter the BIOS Setup Menu Follow the below steps to enter the BIOS Setup Menu 1 Click F1 button quickly during loading the system then the system will enter the below menu 2 Click the...

Страница 26: ...e USB basic Optical Disc device d Start up from the USB basic floppy device e Start up from Network 3 Click ESC key to exit from the submenu and enter the main menu then select Save values and Exit to...

Страница 27: ...m as show below 3 Then click the ESC key to return the main menu click the direction keys to select Save values and Exit click the Enter key to save the setting and exit the BIOS setup menu 4 Install...

Страница 28: ...enter for advice 5 DO NOT place the Notebook PC into the dirty carrying case to again Q4 After entering the standby mode why the system cannot reactivate and how to check this problem A Definition Sta...

Страница 29: ...wer Management menu Q8 If the image isn t clear A Check that the lens is clear or not if not clean with the soft cloth Q9 If the mobile moves slowly A The camera needs some light when gathering the da...

Страница 30: ...e Size 64 KB I cache 64 KB D cache L2 Cache Size 128 KB Memory 256MB 512MB Memory Type DDR1 DRAM Memory Access Time 400MHz GPU GPU AMD Geode LX processor s Graphics Processor Cache Size Share EMS Memo...

Страница 31: ...rd Type AC97 Codec Network Card 100Mbps I O Device Mouse Touch Pad Keyboard U S 80 key keyboard Condition Operating Voltage 12V 10 10 Operating Temperature 5 35 Operating Humidity 35 85 Storage Temper...

Страница 32: ...crophone Microphone Port USB Port USB A Port x2 USB2 0 SD Card Port Support SD MS MMC Card VGA Port D 15 Output Physical Features No battery About 0 82Kg Weight With battery About 1 05Kg Dimension 227...

Отзывы: