


Upgrade
131
Mode” field needs to be set to HTTP, respectively. “Firmware Server Path” needs to be set to a
valid URL of a HTTP server, server name can be in either FQDN or IP address format. Here are
examples of some valid URL.
e.g. firmware.mycompany.com:5688/Hanlong
e.g. www.mycompany.com:5688/fm/ Hanlong
e.g. 218.2.83.110
Instructions for firmware upgrade via HTTP:
(1)
End users can choose to download the free HTTP server from http://httpd.apache.org/ or use
Microsoft IIS web server. Then setup HTTP server.
(2) Unzip the firmware file and put all of them under the
root
/fm directory of the HTTP server.
(3) Visiting “HTTP:\\192.168.0.254\fm\fw8xx.rom on localhost by browser” to verify the HTTP
Server. If visiting “HTTP: \\192.168.0.254\fm\fw8xx.rom on other computer is no prompt to
download fw8xx.rom file, please check the firewall (Suggest close the firewall).
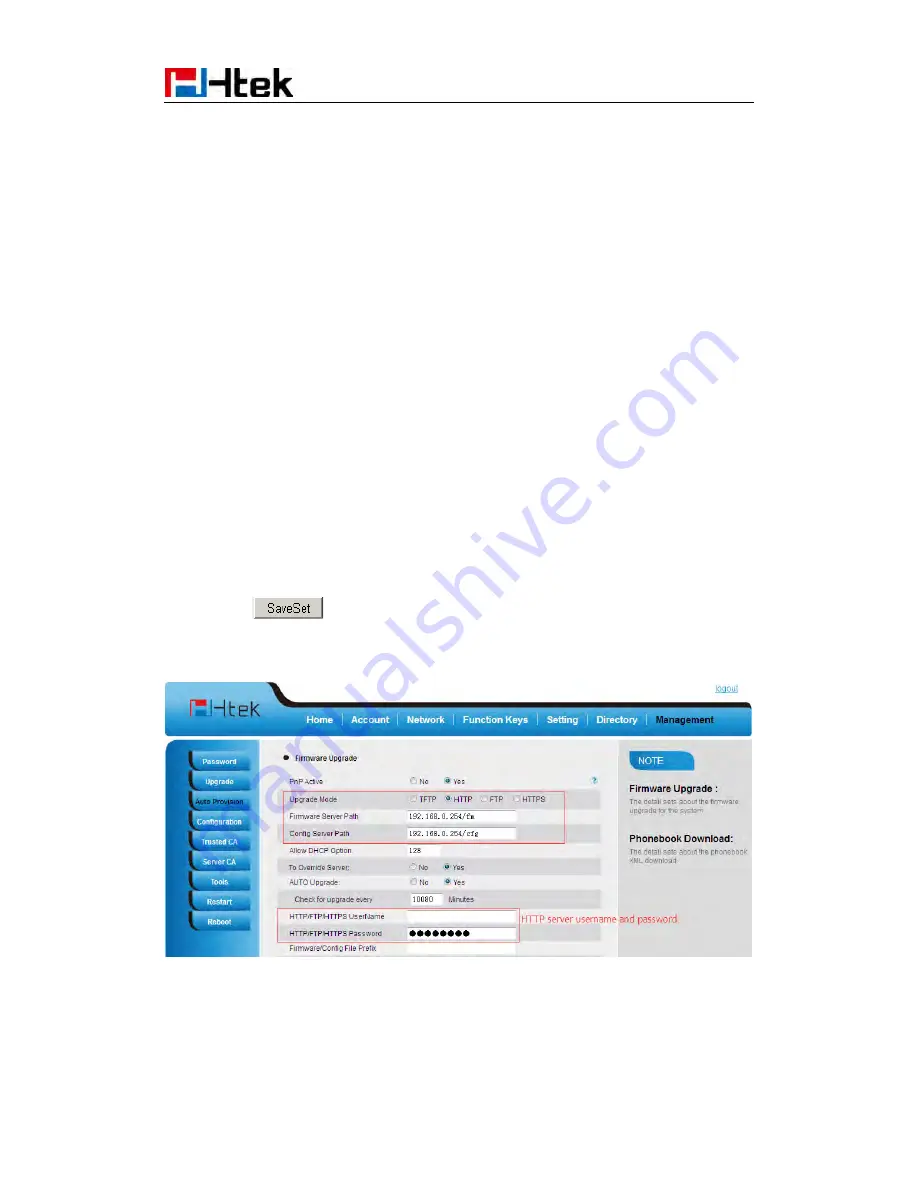
To configure the server path via web interface:
1.
Click Management
Auto provision:
2.
Select the upgrade mode in the upgrade mode field
3.
Enter the Firmware server path and config server path (192.168.0.254 is HTTP server).
4.
Enter the HTTP server’s username and password (optional).
5.
Click the
button to save the configuration.
6.
Restart the UC8xx, IP Phone will restart and auto-get firmware files from HTTP server.
NOTES:
Hanlong recommends end-user use the Hanlong HTTP server. For large companies, we
recommend to maintain their own TFTP/HTTP/FTP/HTTPS server for upgrade and
provisioning procedures.
Once a “Firmware Server Path” is set, user needs to update the settings and restart the IP
Содержание UC862
Страница 9: ...Getting Started 8 4 Headset cord 5 Power adapter 6 Ethernet cable...
Страница 10: ...Getting Started 9 7 Quick installation reference Phone Installation 1 Attach the Foot stand...
Страница 11: ...Getting Started 10 2 Connect the Handset and optional Headset 3 Connect the Network and Power...


