background image

Page 50

6-2-5

Monitor Test

1.

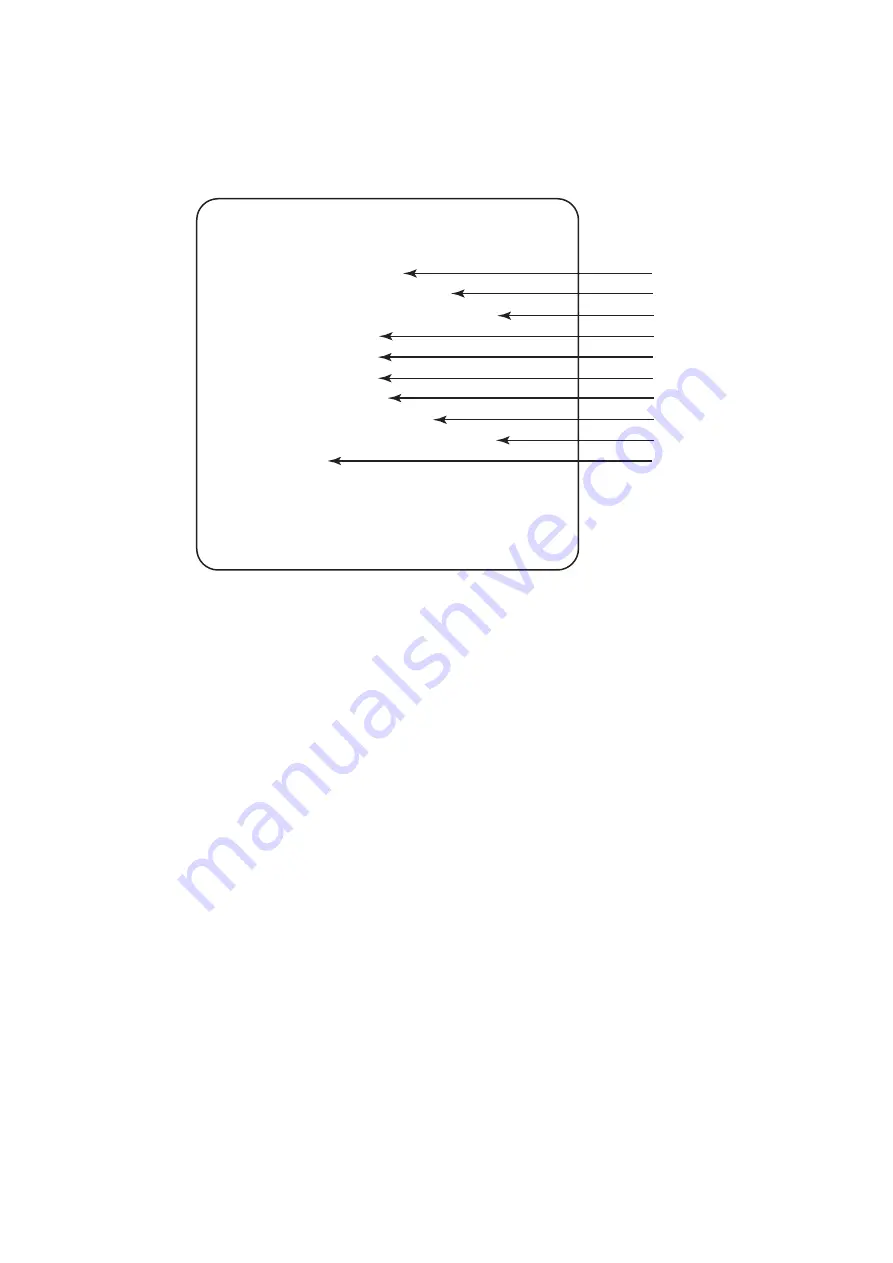
Select “MONITOR TEST” on the menu screen to check and adjust the Monitor.
The following scren is displayed.

2.

Use the Select Up/Down switch to choose the required item, then press the Enter
button. To return to the Monitor Test Menu from a test pattern, press the Enter
button

3.

Select “EXIT” and press the Enter button to return to the ‘Game Options’ screen.

(a)

Displays a colour bar pattern.

(b)

Displays a crosshatch pattern for CRT monitors.

(c)

Displays a crosshatch pattern for Projection monitors. (not used on this game)

(d)

Displays a bright white windoe.

(e)

Displays a medium white window.

(f)

Displays a dark white windoe.

(g)

Displays an interlace pattern.

(h)

Displays an adjustment screen for CRT monitors.

(i)

Displays an adjustment screen for Projection monitiors. (not used on this game)

(j)

Displays a full white screen.

 MONITOR 

TEST 


GRADATION PATTERN

CROSSHATCH PATTERN (CRT)

CROSSHATCH PATTER (PROJECTOR)

WHITE WINDOW (H)

WHITE WINDOW (M)

WHITE WINDOW (L)

INTERLACE PATTERN

VIEW ANGLE ADJUST (CRT)

VIEW ANGLE ADJUST (PROJECTOR)

FULL WHITE

 EXIT

 SELECT SW : CHOOSE 

ENTER SW : ENTER

(a)

(b)

(c)

(d)

(e)

(f)

(g)

(h)

(i)

(j)

Содержание GUN SURVIVOR 2

Страница 1: ...This document has been downloaded from The largest resource for amusement machines documentation on the world wide web...

Страница 2: ...ANUAL IT IS THE RESPONSIBILITY OF THE OPERATOR TO MAINTAIN CUSTOMER SAFETY AT ALL TIMES AND IT IS IMPERATIVE THAT THE DETAILS SET OUT IN THIS MANUAL ARE FOLLOWED PRECISELY Part No 90500129 Issue 1 GUN...

Страница 3: ...ALLISUUN K KODAT 26 1 SPECIFICATIONS 28 2 HOW TO PLAY 29 4 MOVING THE MACHINE 31 5 INSTALLATION 31 5 1 Fitting the Seat Assy to the Monitor Cabinet 35 5 2 Fitting the Header Display Panel 37 5 3 Adjus...

Страница 4: ...g the Pitch Potentiometer 65 7 4 2 Replacing the Roll Potentiometer 67 7 4 3 Replacing the Yaw Potentiometer 69 7 5 Replacing the Monitor 70 7 6 Replacing the Fluorescent Tube or Starter 72 7 7 Replac...

Страница 5: ...rt of the equipment and must be available to the operating or service personnel at all times This equipment is for indoor use only and should only be used for the purpose intended Namco Europe Ltd bea...

Страница 6: ...le MOVING THE EQUIPMENT This equipment is fitted with castors to make it easier to move Take care when moving the equipment on an inclined surface The fitting position of the Header Assembly is high a...

Страница 7: ...g f r Unf lle Verletzungen oder Besch digungen die auf nicht genehmigte Ver nderungen oder unsachgem en Betrieb des Ger tes zur ckzuf hren sind SICHERHEITSHINWEISE Folgende Sicherheitsbegriffe werden...

Страница 8: ...gro er H he montiert Daher mu aus Sicherheitsgr nden eine Steighilfe wie z B eine Leiter ein Tritt oder hnliches verwendet werden Die Gesamth he de Ger tes betr gt 2 08m Daher Vorsicht bei tiefer h n...

Страница 9: ...b r kun bruges til det beregnede form l Namco Ltd b rer intet ansvar for ulykker eller skader som er et resultat af uautoriserede ndringer eller fejlagtig brug af denne rnaskine SIKKERHEDSREGLER De f...

Страница 10: ...inen uden godkendelse det kan f re til uforudset fare Der b r kun bruges dele specificeret af Namco Europe Limited n r der skiftes eller repareres dele inklusiv skruer S rg for at str mmen til maskine...

Страница 11: ...e para aquello para lo que ha sido creada Namco Ltd queda exenta de cualquier responsabilidad por accidentes heridas o da os causados por cambios no autorizados o uso indebido de esta m quina NOTAS DE...

Страница 12: ...incipal de la m quina o la clavija de alimentaci n del enchufe de la red agarre siempre la clavija y no el cable NOTAS DE INSTALACI N JAM S ENCIENDA la m quina antes de haber completado la instalaci n...

Страница 13: ...t devra tre utilis comme tel Namco Ltd ne sera aucunement tenu responsable en cas d accidents de blessure ou de dommage quelconque r sultant de modifications non autoris es ou d usage impropre du jeu...

Страница 14: ...un levateur quelconque pour en effectuer le montage La hauteur totale de l assemblage principal est de 2080 mm prendre garde aux encombrements de la partie sup rieure ex illuminations du bandeau DEPL...

Страница 15: ...NAMCO EUROPE LIMITED NAMCO EUROPE LIMITED 89 336 72 23 55014 1 55014 2 60335 2 82 CE reset processor 89 392 56789 01 34567 8 9...

Страница 16: ...50cm or more 50cm or more 2m50cm or more 1m or more 2m50cm or more 50cm or more 50cm or more Playing Area Pathway ABC DEF GD H8I 500LL 230 46 6FG 500II 2080LL...

Страница 17: ...sata solo per gli scopi per cui progettata Namco Europe Ltd non si assume responsabilit per incidenti ferite o damni risultanti da cambiamenti non autorizzati o da uso improprio della macchina CONSIDE...

Страница 18: ...zione preventiva Il fare questo pu causare un pericolo non prevedibile Quando si rimpiazza o si riparano delle parti incluse le viti si possono usare solo parti approvate dalla Namco Europe Ltd Assicu...

Страница 19: ...er rettet p Installasjon service justering eller rutine vedlikehold skal bare utf res av kvalifiserte personer For fortsatt beskyttelse mot brann forsikre deg at hoved sikringen bare byttes ut med en...

Страница 20: ...ed koplingene fra maskinen eller hoved pluggen fra st pselet ta bestandig tak i pluggen og ikke ledningen Spillet har montert hjul for gj re det letter flytte p Hver forsiktig n r det skal flyttes p e...

Страница 21: ...ongeoorloofde veranderingen aan of onjuist gebruik van deze machine ALGEMENE VEILIGHEIDSOVERWEGINGEN Stel deze machine alleen in gebruik nadat gecontroleerd is of de machine correct en overeenkomstig...

Страница 22: ...r schade of letsel Delen van de voeding en de monitor blijven warm of behouden hoogspanning zelfs nadat de machine UITgeschakeld is en zouden verbrandingen of electrische schokken kunnen veroorzaken B...

Страница 23: ...executadas por tecnicos ou pessoas devidamente qualificadas para o efeito Afim de garantir uma prote o anti fogo permanente nesta maquina certifique se que os fusiveis de prote o s o sempre substitui...

Страница 24: ...ser o aceites responsabilidades por danos causados ou ferimentos Algumas zonas da fonte de alimenta o e do monitor ficam quentes e transportam correntes de alta voltagem mesmo depois de a maquina ter...

Страница 25: ...nget ansvar f r olyckor eller skador som orsakats av icke auktoriserade ndringar i maskinen eller felaktigt anv ndande av densamma ALLM NNA S KERHETSBEAKTANDEN S tt inte ig ng maskinen utan att ha kon...

Страница 26: ...ficerad personal G r inga ndringar p denna maskin utan ett godk nnande i f rv g Detta kan f rorsaka of ruts gbar fara Endast delar som r specificerade av Namco Europe Ltd ska anv ndas vid utbyten elle...

Страница 27: ...oksista laitteen v r st k yt st YLEISET TURVALLISUUN K KODAT Varmista ett laite on asennettu oikein ja ohjekirjan mukaisesti ennen k ytt nottoa Laite sis lt toimiessaan liikkuvia osia On paikkoja joss...

Страница 28: ...rke ett tarvittavalle korkeudelle p st n vaivattomasti ilman venytt mist esim k yt tukevia tuoleja tai tikkaita Laitteen kokonaiskorkeus on yli 2080 mm Varmista ettei katossa ole esteit esim valaisimi...

Страница 29: ...IMENSIONS Assembled 1490 w x1480 d x 2180 h Monitor Cabinet 1490 w x 780 d x 1850 h Seat Assembly 1020 w x 770 d x 1140 h WEIGHT Assembled 340kg Monitor Cabinet 250kg Seat Assembly 90kg ACCESSORIES Ke...

Страница 30: ...t level will begin On level 5 only the player will have to defeat the Boss within the given time limit to clear the level In the case of a 2 player game only on e player has to reach the exit for both...

Страница 31: ...Page 30 3 MAJOR COMPONENNTS Gun Cabinet Gun Assy Header Rear Display Panel Monitor Cabinet Monitor Header Perspex Coin Door Assy NAOMI Game PCB Power Supply Assy Mains In Assy...

Страница 32: ...t customers are not injured ensure that there is at least 500mm separation between other machines or walls CAUTION In order to avoid damage to the machine due to mis operation ensure that the voltage...

Страница 33: ...inen m ikke renses med en vandstr le eller monteres et sted hvor det er muligt at bruge en vandstr le ESTA M QUINA ESTA DISE ADA NICAMENTE PARA USO EN INTERIORES NO INSTALE LA M QUINA EN LOS SIGUIENTE...

Страница 34: ...s zones de proximit des sorties de secours ou d acc s aux quipements d extinction du feu 4 Dans des emplacements instables ou soumis de fortes vibrations 5 Dans des endroits d nivel s 6 Ne nettoyez pa...

Страница 35: ...nna maskin f r inte reng ras med en vatten str le eller monterad inom ett omr de d r en vatten str le kan anv ndas T M LAITE ON SUUNNITELTU VAIN SIS K YTT N L ASENNA LAITETTA SEURAAVIIN PAIKKOIHIN 1 U...

Страница 36: ...Cabinet up to the Monitor Cabinet and connect the connectors 3 Fit 2off ea hex head screws M10x30 to retain the Joint Brackets to the Monitor Cabinet 4 Tighten fully all hex head screws M10x30 Joint B...

Страница 37: ...6x20 and remove the Gun Cabinet Rear Access Door 6 Fit 2off 1each side hex head screrw M10 x50 with flat washer 7 Refit the Rear Access Doors Security screw M6x20 Rear Access Door Security screw M6x20...

Страница 38: ...l 1 Slide the Header Display Panel down into the Grooves in the Monitor Cabinet 2 Fit 3off security screw M4x15 with flat washer Groove Header Display Panel Header Display Panel Monitor Cabinet Securi...

Страница 39: ...castors are raised from the floor by approx 5mm Tighten the lock nuts with a spanner to ensure that the Level Adjusters do not move Note If the location site of this game has a polished floor it is re...

Страница 40: ...r glage ou la maintenance doivent tre effectu s uniquement par les personnes qualifi es Regolazioni e manutenzione su questa macchina devono essere fatti solo da personale specializzato Justering elle...

Страница 41: ...ON to enter test mode Test mode allows testing and the changing of game settings Refer to section 6 2 Test Mode page 41 3 Select Up Down Switch This switch is used to select the test required when in...

Страница 42: ...communication play 2 player mode any adjustments made to CPU ID CLAIRE will automatically be made to CPU ID 2 STEVE see 6 2 3 page 43 6 2 1 Menu Screen 1 Open the coin door and press the test switch...

Страница 43: ...lay on this machine is set within the Cashflow Coin Mech Ensure that the Game Cost is set to 1 Coin 1 Credit COIN OPTIONS DEFAULT IN GREEN GAME COST 1 COIN 1 CREDIT a CONTINUE COST 1 COIN 1 CREDIT b F...

Страница 44: ...v i t c e f e d r o g n i s s i m s i B C P n o i t a c i n u m m o C 2 E D O M N O I T A C I N U M M O C 4 4 e g a p 1 3 2 6 e e s n o i t p o n o i t a c i n u m m o c e h t s t e S 3 Y T L U C I F...

Страница 45: ...n i t t e s e d o m r e y a l p 2 N O e d o m r e y a l p e l g n i S F F O N O b D I n o i t a c i n u m m o C g n i t t e s E V E T S 2 r o E R I A L C 1 o t n o i t a c i n u m m o c r o f t n e r...

Страница 46: ...press the Enter button to return to the menu screen I O TEST LINK ON 1 I O PCB CHECK a HOW TO I F INITIALIZE b SWITCH TEST c SOLENOID OFF d EXIT SELECT SW CHOOSE ENTER SW ENTER M E T I N O I T P I R C...

Страница 47: ...following screen is displayed If the I O board is not connected CONNECT NG is displayed 2 Select EXIT and press the Enter button to return to the I O TEST menu screen I O TEST LINK ON 1 I O PCB Conne...

Страница 48: ...TIALIZE on the I O TEST menu screen The following screen is displayed 2 Select GO TO I F INITIALIZE and press the enter button The following screen is displayed 3 Select INITIALIZE and press the Enter...

Страница 49: ...XIT UP SELECT SW ENTER SW Each time a switch is operated the corresponding display will change from OFF to ON The numbers next to Pitch Roll and Yaw will change as the gun is turned moved left right a...

Страница 50: ...and the display change from OFF to ON each time the Enter button is pressed Operating the Enter button again will turn the Solenoid Off 3 Press both the Up Select switch and the Enter switch together...

Страница 51: ...r CRT monitors c Displays a crosshatch pattern for Projection monitors not used on this game d Displays a bright white windoe e Displays a medium white window f Displays a dark white windoe g Displays...

Страница 52: ...st default 80 b Volume setting for sound during Attract Mode Settable between 000 127 with 000the quietest and 127 the loudest default 70 c Sound level of non playing position during a single player g...

Страница 53: ...ime the game has been switched on b Displays the total time the game has been played c Displays the length of the average playing time d Displays the ratio between the total power on time and the tota...

Страница 54: ...d When set to ON the display will pause each time the Select switch is pressed IP Resume normal display by pressing the Select switch UP again No sound will be produced while the screen is paused f Fo...

Страница 55: ...o de esta m quina deben ser realizados s lo por personal cualificado Aseg rese de que la m quina est desconectada antes de comenzar cualquier trabajo de mantenimiento reparaciones resoluci n de proble...

Страница 56: ...pessoal qualificado Certifique se que a maquina se encontra desligada sempre que iniciar qualquer tipo de trabalho de manuten o identifa o de avarias repara o etc Justeringar och underh ll p denna ma...

Страница 57: ...greased every 6 months 1 Remove 6off security screw M6x16 1off security screw M6x16 with flat washer and remove the Front Vac Form 2 Apply grease to the areas shown below Use silicon grease Part No 95...

Страница 58: ...un Assy 1 Remove 4off security screw M6x20 with flat washer 2 Remove the Top Vac Form by lifting it up and over the Gun Assy Flat washer Security screw M6x20 Top Vac Form Security screw M6x20 Security...

Страница 59: ...ity screw m6x16 and remove the Front Vac Form 4 Remove 40ff pozi head screw M6x35 and remove the Gun Assy Cover Security screw M6x16 Security screw M6x16 Front Vac Form Pozi head screw M6x35 Pozi head...

Страница 60: ...crews M6x20 slacken the 2off lower security screws M6x20 and remove the Rear Access Panel 6 Remove 1off hex head screw M8x35 with flat washer Security screw M6x20 Security screw M6x20 loosen Rear Acce...

Страница 61: ...5 with flat washers and withdraw the Gun Assy while lifting up the Gun Assy Cover 9 Reassemble in reverse order Note After refitting the Gun Assy ensure that the Gun is reinitialized see 6 2 4 2 page...

Страница 62: ...un Case R 2 Reassemble in reverse order 7 3 2 Replacing the Bush Switch 1 Separate the Gun see 7 3 1 above 2 Disconnect the connector 3 Remove the retaining nut and withdraw the Bush Switch 4 Reassemb...

Страница 63: ...On terminals 3 Remove the Trigger Switch by pulling it off the Locating Posts 4 Reassemble in reverse order Note When refitting the Trigger Switch ensure that the correct colour wire is reconnected t...

Страница 64: ...the Gun Cover L 3 Disconnect the connector 4 Remove 2off socket cap screw M4x6 2off pozi flange screw M4x16 and remove the Solenoid complete with Plunger and Slide Guide 5 Reassemble in reverse order...

Страница 65: ...Page 64 Note When reassembling the Solenoid ensure that all components are refitted in their correct positions Solenoid Plunger E Rings Spacers Solenoid Slide Guide...

Страница 66: ...Assy see 7 2 page 57 2 Disconnect the connectors 3 Remove 1off pozi flange screw M4x6 and disconnect the Earth Connector 4 Untwist the cable retainers Connector Earth connector Cable clip Pozi flange...

Страница 67: ...ometer Ensure that the correct colour wire is fitted to the correct terminal and that the Grub screw engages on the flat of the Potentiometer shaft 8 Reassemble in reverse order Movement Bracket Pot B...

Страница 68: ...oll Potentiometer 1 Remove the Gun Assy see 7 2 page 57 2 Untwist the cable retainers 3 Slacken the Grub screw and remove the Movement Bracket Cable clip Movement Bracket Grub screw Wrench Roll Potent...

Страница 69: ...tted to the correct terminal and that the Grub screw engages on the flat of the Potentiometer shaft 5 Reassemble in reverse order Nut Spring washer Flat washer Roll Potentiometer Potentiometer Bracket...

Страница 70: ...se the adaptor 3 Replace the Potentiometer 4 Replace the Potentiometer Ensure that the correct colour wire is fitted to the correct terminal and that the Grub screw engages on the flat of the Potentio...

Страница 71: ...urity screw m6x40 and remove the Lower Closing Bracket 4 Remove 2off security screw M6x20 and remove the Upper Closing Bracket 5 Remove the Monitor Glass by tilting it forwards from the top and liftin...

Страница 72: ...washers and large flat washer 7 Remove the Monitor by tilting it forwards from the top and withdrawing from the front 8 Reassemble in reverse order Pozi head screw M6x25 with flat and spring washers F...

Страница 73: ...Remove 4off security screw M6x25 2 Slacken the 4off pozi head screws M6x16 and remove the Header Acrylic Support 3 Replace the Fluorescent Tube Header Acrylic Support Flat washer Security screw M6x25...

Страница 74: ...Page 73 4 Remove 4off pozi head screws M6x16 and remove the Filter Base 5 Replace the Starter 6 Reassemble in reverse order Pozi head screw m6x16 Filter Base Pozi head screw M6x16 Starter...

Страница 75: ...e Monitor Cabinet see 5 1 page 35 2 Disconnect the connectors on the FCA PC Board 3 Remove 4off pozi flange screws M5x12 and remove the FCA PC Board 4 Reassemble in reverse order Gun Cabinet Pozi flan...

Страница 76: ...e 10off pozi flange screws M4x6 and remove the NAOMI panel 2 Disconnect the 8 connectors from the NAOMI board Note The communication cables are fibre optic cables Do not bend excessively Pozi flange s...

Страница 77: ...Page 76 3 Remove 2off pozi head screws M5x12 and withdraw the NAOMI base assy 4 Remove 12off pozi flange screws M4x6 and remove the NAOMI cover...

Страница 78: ...Take care when reconnecting the communication cables Ensure that they are connected as follows Connect the end marked R or coloured Red to the right hand connector Connect the end marked T or coloure...

Страница 79: ...Page 78 8 PARTS 8 1 Monitor Cabinet 22 CASHFLOW 54 47...

Страница 80: ...1 e l l i r G r e k a e p S 8 8 4 0 0 0 7 4 8 1 S H L l a c e D t n o r F 0 7 6 0 0 0 0 4 9 1 S H R l a c e D t n o r F 1 7 6 0 0 0 0 4 0 2 S H L l a c e D e d i S 2 7 6 0 0 0 0 4 1 2 S H R l a c e D...

Страница 81: ...Page 80 8 2 Gun Cabinet 12...

Страница 82: ...0 0 0 0 4 8 S H R l a c e D r e n n I t e n i b a C n u G 8 7 6 0 0 0 0 4 9 l a c e D e r t n e C t e n i b a C n u G 9 7 6 0 0 0 0 4 0 1 l a c e D t n o r F m r o F c a V n u G 0 8 6 0 0 0 0 4 2 1 d...

Страница 83: ...2 0 5 3 0 7 2 S G X 6 g n i r p S r e g g i r T 4 2 3 0 7 2 2 S G X 7 r e c a p S 2 2 4 6 9 2 2 S G X 8 r e b b u R n o i t c u d e R e s i o N 8 2 4 6 9 2 2 S G X 9 e u l B r e g g i r T 2 2 0 8 9 6...

Страница 84: ...4 3 0 7 2 S G X 9 B t e k c a r B R V 9 8 4 3 0 7 2 S G X 0 1 r o t p a d A R V 0 9 4 3 0 7 2 S G X 1 1 r e p p o t S g n i w a Y 3 9 4 3 0 7 2 S G X 2 1 r e d l o H t o o B 4 9 4 3 0 7 2 S G X 3 1 d...

Страница 85: ...8 4 3 0 7 2 S G X 7 r e l o R R V 3 8 4 3 0 7 2 S G X 8 d o R R V 4 8 4 3 0 7 2 S G X 9 A t e k c a r B R V 7 8 4 3 0 7 2 S G X 0 1 k o o H e d i l S 7 9 4 3 0 7 2 S G X 1 1 g n i r p S R L 0 0 5 3 0...

Страница 86: ...L l i a R 6 0 5 3 0 7 2 S G X 5 d o R R V 4 8 4 3 0 7 2 S G X 6 C t e k c a r B R V 9 8 4 3 0 7 2 S G X 7 k o o H e d i l S 7 9 4 3 0 7 2 S G X 8 l l a W r a e R 8 9 4 3 0 7 2 S G X 9 e s a B n u G 9...

Страница 87: ...i r c s e D o N t r a P 1 h c t i w S k c o l r e t n I 6 0 0 0 0 0 0 6 2 y s s A r e t l i F n I s n i a M r e n f f a h c S 0 1 0 0 0 5 2 6 3 t o o B r e n f f a h c S 7 1 0 0 0 0 6 6 4 r e v o C h...

Страница 88: ...1 PLAYER 2 m e t I n o i t p i r c s e D o N t r a P 1 r e d l o H e s u F t n u o M l e n a P 6 8 7 0 0 5 3 6 m m 0 2 B Q A 2 e s u F 1 0 5 0 0 5 3 6 2 h c t i w S n o t t u b h s u P 9 5 0 0 0 0 0 6...

Страница 89: ...w S A 5 8 v 2 1 0 2 0 0 0 0 3 8 y l p p u S r e w o P e d o M h c t i w S v 2 1 v 5 v 3 3 4 1 0 0 0 0 3 8 y s s A B C P e m a G B C P E M A G 2 S G X B C P k n i L I M O A N B C P K N I L K W X e l b...

Страница 90: ...Red Yellow Black Black Yellow Red Yellow Grey Red Grey Yellow White Black JST VHR 6N JAE PS60P JST XHP 5 JST VHR 6N JST XHP 5 JAE PS60P GUN CABINET ASSEMBLY SCHAFFNER MAINS IN ASSY 230vAC MAINS IN MON...

Страница 91: ...The Vale London W3 7QE www namco co uk For Technical Support Warranty and Advance Replacement Parts 44 0 20 8324 6120 For Consumable Parts 44 0 20 8324 6102 Fax for both 44 0 20 8324 6126 Copies of N...

Отзывы: