background image

2

4 General Installation

Naim equipment is designed to offer the finest sound 
quality possible avoiding compromise wherever 
practical. This can lead to circumstances that may 
be unfamiliar. The notes that follow contain advice 
specifically related to Naim equipment as well as 
more general warnings about the use of domestic 
audio products. Please read them carefully.

4.1 Siting The Equipment

In order to reduce the risk of hum audible from the 
loudspeakers, power supplies and power amplifiers should be 
located a reasonable distance away from other equipment. The 
maximum separation distance for connected equipment is that 
allowed by the standard interconnect lead.

Some Naim equipment is extremely heavy. Ensure that your 
equipment rack or table can easily support the weight and is 
stable.

4.2 Switching On

Source components and power supplies should be switched on 
before the power amplifiers. Always switch amplifiers off and 
wait a minute before connecting or disconnecting any leads. 
Always use the power switch on the product rather than a mains 
outlet switch.

A “thump” may be heard from the loudspeakers as power 
amplifiers are switched on. This is normal, will not cause any 
loudspeaker damage and does not point to any fault or problem. 
A mild “pop” may also be heard shortly after power amplifiers 
are switched off.

4.3 Running In

Naim equipment takes a considerable time to run in before 
it performs at its best. The duration varies, but under some 
conditions the sound may continue to improve for over a month. 
Better and more consistent performance will be achieved if 
the system is left switched on for long periods. It is worth 
remembering however that equipment left connected to the 
mains can be damaged by lightning.

4.4 Radio Interference

In some circumstances, depending on where you live and the 
earthing arrangements in your home, you may experience 
radio frequency interference. Controls on broadcasting in some 
territories allow very high levels of radio frequency radiation 
and both the choice and exact siting of equipment may be 
critical. Susceptibility to radio frequency interference is related 
to the wide internal bandwidth necessary for high sound quality. 
Systems incorporating moving coil phono preamplifiers and 
active crossovers are more likely to suffer. A radio frequency 
filter kit is available for some Naim equipment but sound quality 
will be progressively compromised as more elements of the 
kit are fitted. In situations of extreme radio interference Naim 
equipment may be unsuitable.

4.5 Non-standard Cables

Use of non-standard speaker cables or interconnects may 
invalidate your guarantee.

4.6 Lightning Precautions

Your Naim hi-fi system can be damaged by lightning. Power 
amplifiers are particularly at risk and should be turned off and 
disconnected from the mains when there is risk of lightning 
strike. For complete protection all mains plugs and any aerial 
cables should be disconnected when not in use.

4.7 Liquid Precautions

Equipment must not be exposed to dripping or splashing and no 
objects filled with liquid, such as vases, should be placed on the 
equipment.

4.8 Equipment Fuses

Mains powered Naim Audio equipment is fitted with a mains 
input fuse on the rear panel adjacent to the mains input socket. 
Replace it if necessary only with the spare fuse supplied or 
with identical fuses. Repeated failure of this fuse points to an 
equipment or system fault that should be investigated by your 
dealer or at the factory by Naim itself.

4.9 Problems?

Consumer protection varies from country to country. In 
most territories a dealer must be prepared to take back 
any equipment he has sold if it cannot be made to work 
satisfactorily. A problem may be due to a fault in the system or 
its installation so it is essential to make full use of your dealer’s 
diagnostic skills. Please contact your local distributor, or Naim 
Audio directly, if any difficulties cannot be resolved.

Some Naim equipment is made in special versions for 
different territories and this makes it impracticable to arrange 
international guarantees. Please establish the local guarantee 
arrangements with your dealer. Contact Naim Audio directly for 
help and advice if necessary.

4.10 Repairs and Updates

It is essential that repairs and updates are only carried out 
by an authorised Naim dealer or at the factory by Naim itself. 
Many components are custom made, tested or matched and 
appropriate replacements are often unobtainable from other 
sources.

Direct contact to Naim for service or update information should 
be made initially through the Service Department:

Tel:             

+44 (0)1722 332266

Email:         

[email protected]

Please quote the product serial number (found on its rear panel) 
in all correspondence.

Introduction

Содержание CD5I - MANUAL 2

Страница 1: ...WO RLD CL AS S H I F I O W N E R S M A N U A L CD Players CDS3 CDX2 CD5x CD5i ...

Страница 2: ...ective earthing connection Where the mains plug or an appliance coupler is used as the disconnect device the disconnect device shall remain readily operable To disconnect the equipment from the mains remove the mains plug from the mains outlet The following label is attached to all mains powered equipment NOTE This equipment has been tested and found to comply with the relevant EMC and Safety Stan...

Страница 3: ...ld Information given here is not intended to reduce this responsibility in any way Introduction Naim Audio products are conceived with performance as the top priority Careful installation will help ensure that their full potential is achieved This manual begins with general installation notes and statutory safety warnings for all Naim Audio products Product specific information begins in Section 5...

Страница 4: ...s are more likely to suffer A radio frequency filter kit is available for some Naim equipment but sound quality will be progressively compromised as more elements of the kit are fitted In situations of extreme radio interference Naim equipment may be unsuitable 4 5 Non standard Cables Use of non standard speaker cables or interconnects may invalidate your guarantee 4 6 Lightning Precautions Your N...

Страница 5: ...ing will re start the track pause Pauses play Pressing pause a second time will resume replay If play is selected while the player is paused replay will resume at the start of the paused track when pause is deselected The pause button indicator will flash when pause is selected If the CDS3 is paused for more than 10 minutes it will enter a static pause mode in which the transport laser deactivates...

Страница 6: ...prevent the disc from sitting properly and cause it to slip To clean the transport platter take a piece of Blu tack and lightly apply it to the top surface of the magnetic metal hub picking up any material attached to it Brush the plastic outer edge lightly with your finger or a soft brush to ensure that it is dust and particle free Similarly clean the puck with Blu tack to remove debris from the ...

Страница 7: ...connect Cables cable direction marker Remove the four underside transit screws keep safe Always replace them before moving or shipping the player Do not invert the player for this operation or once the transit screws are removed 7 1 Transit Screws mains input and fuse ...
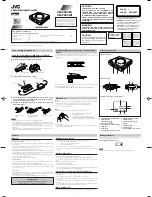
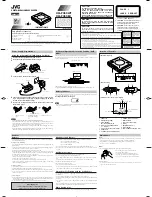
Страница 8: ...ays replace them before moving or shipping the player Do not invert the player once the transit screws are removed 7 2 Transit Screws 7 3 Disc Loading Lift the lid place a compact disc centrally on the platter Place the puck centrally on the disc and close the lid ...

Страница 9: ...ition Pressing and holding stop will clear any programmed play order or if no play order is programmed will return the player display to its default state track indication play Plays a disc from track one unless another track has been selected Play operated while a track is playing will re start the track All CD control functions are duplicated on the Flash NARCOM 3 and CD5i remote handsets The ha...

Страница 10: ...short while the CDX2 will function as normal 8 7 Player Maintenance It is important for reliable operation of the CDX2 to ensure that the surfaces of the transport platter and the underside of the puck are free of dust or debris which can prevent the disc from sitting properly and cause it to slip To clean the transport platter take a piece of Blu tack and lightly apply it to the top surface of th...

Страница 11: ...S Power Supply CDX2 XPS Burndy Interconnect Cables cable direction marker mains input and fuse Note When used with an XPS the CDX2 must be disconnected from the mains Always switch off the CDX2 when connecting or disconnecting an XPS ...

Страница 12: ...ayer to its start condition Pressing and holding stop will clear any programmed play order or if no play order is programmed will return the player display to its default state track indication play Plays a disc from track one unless another track has been selected Play operated while a track is playing will re start the track All CD control functions are duplicated on the Flash NARCOM 3 and CD5i ...

Страница 13: ...ed Switch on both the CD5x and the Power Supply from their respective power buttons 10 7 Player Maintenance It is important for reliable operation of the CD5x to ensure that the surfaces of the transport platter and the underside of the puck are free of dust or debris which can prevent the disc from sitting properly and cause it to slip To clean the transport platter take a piece of Blu tack and l...

Страница 14: ...atcap 2 Power Supply 240 5 to 5 pin DIN Interconnect Cables cable direction marker mains input and fuse power switch mains input and fuse power switch Note Both the Flatcap 2 and CD5x must be connected to a mains supply and switched on ...

Страница 15: ...mation 12 3 Front Panel Control Modes The CD5i has an optional front panel control mode This multi function mode provides an alternative front panel interface in which fast forward fast reverse and pause are selected by pressing and holding next previous and play respectively To select multi function mode press and hold next while the player is switched on To select the standard control mode press...

Страница 16: ... a piece of Blu tack and lightly apply it to the top surface of the metal hub picking up any material attached to it Brush the plastic outer edge lightly with your finger or a soft brush to ensure that it is dust and particle free Similarly clean the puck with Blu tack to remove debris Do not under any circumstances use any solvents or fluids for the cleaning process 13 1 CD5i Rear phono output le...

Страница 17: ... replace the screw before transit or shipping Do not invert the player once the transit screw is removed 14 1 Transit Screw Open the drawer and place a compact disc centrally on the platter Place the puck centrally on the disc and close the drawer 14 2 Disc Loading ...

Страница 18: ...ed audio CD CDR CDR W Frequency Response 10Hz 20kHz 1 0dB Distortion and Noise 0 1 10Hz 18kHz at full level Output Level and Impedance 2 0V rms at 1kHz 10Ω Mains Supply 100 120V or 220 240V 50 60Hz Case Size H x W x D 87 x 432 x 314 mm 16 3 CD5x Media Supported Red Book and copy protected audio CD CDR CDR W Frequency Response 10Hz 20kHz 1 0dB Distortion and Noise 0 1 10Hz 18kHz at full level Outpu...

Страница 19: ...y functions within each page is described in the following paragraphs PRE preamplifier mode Page 1 of 2 source Selects the next input source source Selects the previous input source bal Adjusts balance to the left bal Adjusts balance to the right prog Enters programming mode on preamplifiers disp Selects display options on appropriately equipped preamplifiers mono Sums the left and right channels ...

Страница 20: ...ates that this is the only track remaining and therefore cannot be deleted A random play order can be programmed from stop with no play order already in place by pressing prog followed by 1 Similarly to program a reverse play order press prog followed by 2 Play orders can be reviewed by pressing prog while the player is either stopped or playing The player display will then scroll through the sele...

Страница 21: ...In tuner mode the numeric keys will select tuner presets or tuner frequency In record mode the numeric keys will switch between record inputs on appropriately equipped preamplifiers 18 5 CD Track Programming In CD mode the prog key enables specific tracks and their play order to be programmed To program a play order select a track number from the numeric keys followed by the prog key until the des...

Страница 22: ...ent Key setting numeric keys In preamp mode the numeric keys will switch between the preamplifier inputs In cd mode the numeric keys will select tracks disp Selects the component front panel display mode prog Provides access to component programming functions 19 5 CD Track Programming To program a play order select a track number from the numeric keys followed by the prog key until the desired sel...

Страница 23: ...Electromagnetic immunity of broadcast receivers and associated equipment In accordance with CISPR 16 1 Radio disturbance and immunity measuring apparatus CISPR 16 2 Methods of measurement of disturbances and immunity IEC 801 2 8kV air gap 4kV contact performance criterion B IEC 801 3 3V m 20dB performance criterion A IEC 801 4 1kV AC lines 0 5kV signal lines performance criterion B HDCD system man...

Страница 24: ...4 0 1722 332266 Fax 44 0 1722 412034 www naim audio com Part No OWMDV Drawing No NA102001 400 Naim Audio Limited Southampton Road Salisbury England SP1 2LN Telephone 44 0 1722 332266 Fax 44 0 1722 412034 www naim audio com Part No 0WMCD 12 001 0041 Drawing No NA101003 400 3 ...

Отзывы: