background image


NAGRA – CLASSIC PREAMP 


30 

INSTALLATION OF YOUR CLASSIC PREAMP 

__________________________________________________________ 

Choosing a location 


The CLASSIC PREAMP is designed for indoor use exclusively.  


The CLASSIC PREAMP must be installed horizontally on a flat, firm 
and stable stand. Take care that the ventilation slots in the bottom 

are unobstructed and allow enough clearance above the unit. 

We recommend  you  to  ask  your  Nagra  dealer for  a  demonstration 

of  the  VFS-L  isolation  base  that  offers  a  perfect  match  for  your 

Nagra CLASSIC PREAMP.


Powering the CLASSIC PREAMP 


The CLASSIC PREAMP can be powered: 


-


either  with  its  own  internal  power  supply  and  the  provided  AC 


power cord  

-


or with an external Nagra MPS power supply  


Connection to the mains 


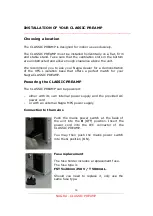
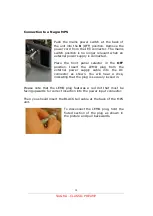
Push  the  mains  power  switch  at  the  back  of 

the  unit  into  the 

0

  (OFF)  position.  Insert  the 

power  cord  into  the  IEC  connector  of  the 

CLASSIC PREAMP. 

 
You  may  then  push  the  mains  power  switch 

into the 

1

 position (ON). 


Fuse replacement 


The fuse holder includes a replacement fuse. 

The fuse type is 

FST 5x20mm 250V / T 500mA L


Should  you  need  to  replace  it,  only  use  the 

same fuse type. 


Содержание CLASSIC PREAMP

Страница 1: ...P N 2055026159 All rights reserved 2020 rev1 CLASSIC PREAMP MANUEL DE L UTILISATEUR OWNER S MANUAL BEDIENUNGSANLEITUNG ...

Страница 2: ...NAGRA CLASSIC PREAMP 2 ...

Страница 3: ...E VOTRE CLASSIC PREAMP mise sous tension 13 réglages 14 comment accéder au menu 14 utilisation du bouton CONTROLLER 14 arborescence du menu 15 réglage de la langue 15 renommer les entrées 16 réinitialiser le nom des entrées 17 réglage de la balance 17 fonctionnement en stéréo ou mono 17 changer la télécommande 18 à propos 18 entrée bypass 19 modulomètre Nagra 20 sélecteur de gain 20 réglage lumino...

Страница 4: ...N OF YOUR CLASSIC PREAMP power on 34 settings 35 how to access the menu 35 how to use the CONTROLLER knob 35 menu tree structure 36 setting the language 36 input renaming 37 reseting input name to default name 38 adjusting the balance 38 stereo ou mono mode 38 changing remote control 39 about 39 bypass input 40 Nagra modulometer 41 gain selection 41 LED and modulometer light intensity adjustment 4...

Страница 5: ...AMP Auf ON schalten 55 Einstellen ihres CLASSIC PREAMP 56 Einstieg in die menüs 56 Bedienung des Controller drehknopfs 56 Menübaum karte 57 Einstellen der sprache 57 Eingänge benennen 58 Löschen eines eingangs namen 59 Einstellen der Balance 59 Stereo oder Mono Modus 59 Fernstueuerung 60 Über 60 Bypass Eingang 61 Nagra modulometer 62 Gain einstellung 62 LED und modulometer stärken anpassung 63 Fer...

Страница 6: ...odifiée qu à l usine Assurez vous d avoir la bonne tension d alimentation avant d utiliser votre amplificateur Garantie Audio Technology Switzerland SA certifie que cet appareil a été inspecté et testé selon un protocole extrêmement exigeant avant de quitter notre entreprise Chaque Nagra passe par notre laboratoire d essais Le résultat des mesures est consigné dans le document appelé Protocole Il ...

Страница 7: ... entreprise a reçu un grand nombre de récompenses pour ses innovations techniques et pour l excellence de ses produits Parmi les plus prestigieuses Nagra a reçu trois Oscars et un Emmy Les gammes professionnelles et Hi Fi sont conçues par un seul et même département de Recherche et Développement Nagra a lancé une gamme Hi Fi pour faire profiter le grand public d avancées technologiques souvent rés...

Страница 8: ...our 100 120VAC ou 220 240 VAC selon le pays Une 1 télécommande avec 2 piles AAA Merci de contacter votre revendeur Nagra s il devait manquer l un de ces éléments Selon votre pays le câble secteur est équipé d une prise de type Europe Suisse ou US ...

Страница 9: ...S L qui offre une combinaison parfaite avec votre CLASSIC PREAMP Mise en service du CLASSIC PREAMP Le CLASSIC PREAMP peut être alimenté de deux façons Soit par la tension secteur avec son propre cordon d alimentation Soit par une alimentation externe Nagra MPS Raccordement au secteur Positionner l interrupteur secteur placé à l arrière de l appareil sur la position 0 OFF Insérer le cordon secteur ...

Страница 10: ...12 Insérer le connecteur LEMO du câble de l alimentation externe dans l embase DC du CLASSIC PREAMP comme sur la photo Vous entendrez un clic qui indique que le connecteur est enclenché et verrouillé Veuillez noter que la marque rouge sur le connecteur LEMO doit être placée sur le dessus pour qu il puisse être correctement inséré dans l embase du CLASSIC PREAMP Vous pouvez alors insérer l extrémit...

Страница 11: ...urs d entrée sont plus complexes à réaliser et par conséquent plus chers Tous nos transformateurs sont conçus et bobinés à la main dans nos propres locaux de Romanel sur Lausanne Suisse Afin d obtenir des performances optimales nous vous conseillons de laisser le CLASSIC PREAMP allumé pendant au moins 15 minutes avant de l utiliser de manière à ce que les composants aient atteint leur température ...

Страница 12: ... gain Position standard 0 dB position haute 12 dB 6 Potentiomètre de volume 7 Sélecteur de sortie XLR RCA et casque PHONES 8 Commutateur rotatif principal Nagra 9 Sortie casque sur jack 6 35 mm 10 Récepteur IR et LED de télécommnade À la mise sous tension un préchauffage temporisé de 2 5 minutes débute Elle permet une mise en température progressive des tubes et des composants critiques du CLASSIC...

Страница 13: ... commutateur rotatif principal typique à Nagra offre 4 positions OFF équivalente à un STANDBY L appareil est toujours alimenté mais avec une consommation très faible R mise sous ou hors tension par la télécommande Remote MUTE l appareil est allumé mais reste muet ON l appareil fonctionne normalement il est opérationnel Ce tableau résume les différentes positions Interrupteur secteur Commutateur ro...

Страница 14: ...er ou appuyer dessus En appuyant pendant 3 secondes sur le CONTROLLER vous accéderez au menu Vous pouvez ensuite naviguer dans l arborescence du menu en tournant le bouton Chaque fois que vous voulez quitter le menu appuyez sur le CONTROLLER pendant au moins 2 secondes Utilisation du bouton CONTROLLER Bouton Hors menu Dans le menu Rotation Changement d entrée Faire défiler Appuyer et maintenir 3s ...

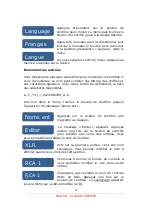
Страница 15: ... Ent Edit Editer XLR Restore Restaure RCA 1 RCA 2 RCA 3 RCA 4 Balance Balance R 3 5dB R 0 5dB L R L 0 5dB L 3 5dB Channel Stéréo Mono NB pas de balance en Mono Remote Appareil RC 5 DEVICE 1 En référence à la DEVICE 2 télécommande DEVICE 3 Nagra RCU II DEVICE 4 DEVICE 5 DEVICE 6 About À propos Soft V Version Op Time T total Tube Time Reset S Number N Série Réglage de la langue Vous voudrez peut êtr...

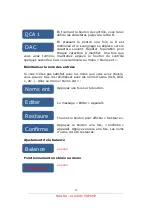
Страница 16: ...actères disponibles a z_ 0123456789_A Z Une fois dans le menu tournez le bouton de contrôle jusqu à l apparition du message Noms ent Appuyez sur le bouton de contrôle afin d accéder au réglage Le message Editer apparaît Appuyez encore une fois sur le bouton de contrôle pour accéder aux noms des entrées Vous pouvez maintenant éditer le nom de l entrée XLR est la première entrée c est son nom techni...

Страница 17: ...ci vous ramènera au menu Noms ent Réinitialiser le nom des entrées Si vous n êtes pas satisfait avec les noms que vous avez choisis vous pouvez tous les réinitialiser avec les noms d usine XLR RCA 1 etc Allez au menu Noms ent Appuyez une fois sur le bouton Le message Editer apparaît Tournez le bouton pour afficher Restaure Appuyez le bouton une fois Confirme apparaît Appuyez encore une fois Les no...

Страница 18: ...tre CLASSIC PREAMP Puis appuyez une fois pour valider votre choix À propos Cette partie du menu vous donnera des informations utiles concernant votre CLASSIC PREAMP Version software indique la version du software de votre CLASSIC PREAMP En cas de mise à jour nous en informerons votre revendeur et nous le notifierons également sur notre site web Durée d utilisation indique la durée pendant laquelle...

Страница 19: ...me home cinéma par exemple à l amplificateur qui est connecté à votre CLASSIC PREAMP L entrée BYPASS n est active que lorsque le CLASSIC PREAMP est sur OFF qu il soit connecté à une alimentation externe ou non Quand le CLASSIC PREAMP est sur ON seules les entrées de niveau ligne sont actives Chaque contact des connecteurs XLR BYPASS entrée et sortie sont directement raccordés autorisant une liaiso...

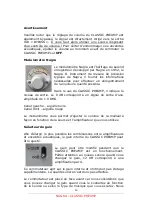
Страница 20: ... 0 dB correspond à un signal de sortie d une amplitude de 1 V RMS Canal gauche aiguille noire Canal droit aiguille rouge Le modulomètre vous permet d ajuster le volume de la meilleure façon en fonction de la source et l amplificateur que vous utilisez Sélecteur de gain Afin d élargir le plus possible les combinaisons entre amplificateurs et enceintes acoustiques le gain interne du CLASSIC PREAMP p...

Страница 21: ...ssant le levier vers le haut elle s atténue jusqu à l extinction en le basculant vers le bas Il y a sept niveaux d intensité au total Télécommande Le CLASSIC PREAMP est fourni avec une télécommande RCU III Vous pouvez également utiliser une télécommande Nagra RCU ou RCU II Comme elles ne répondent pas au même protocole de Balance gauche Augmentation du volume Balance droite Abaissement du volume M...

Страница 22: ...he 13 Mise en sourdine Réglage fin de la balance De nombreux constructeurs considèrent que le réglage de balance n est pas nécessaire Chez Nagra nous pensons qu il est utile pour ajuster les différences minimes de niveau entre les canaux gauche et droit typiques avec un disque vinyle par exemple Le réglage de balance du CLASSIC PREAMP est uniquement conçu pour des réglages fins entre les canaux éc...

Страница 23: ...comme du bois mort rompu Apparition de bruits pop courts dans les basses fréquences Apparition de bruit haute fréquence hiss et d une remontée du bruit de fond Dès que ces signes audibles apparaissent contactez votre revendeur Nagra pour commander un kit de tubes de remplacement pour CLASSIC PREAMP référence 7055764000 Nettoyage du boîtier Nettoyez le châssis en aluminium du CLASSIC PREAMP avec un...

Страница 24: ...nimum pour 0 dB modulomètre 0 25 V RMS Réglage gain à 12 dB Niveau d entrée maximum pour 0 dB modulomètre 25 V RMS Réglage gain à 0 dB Distorsion par harmoniques THD N 0 01 1 kHz 1 V out pas de charge en sortie Taux de diaphonie 85 dB Tubes 2 x 12AX7 ECC83 1 x 12AT7 ECC81 Sélectionnés par Nagra Consommation 12 V 1040 mA En veille 10 mW Alimentation 115 V or 230 V AC Alimentation ACPS II Dimensions...

Страница 25: ...ions conduites sur secteur EN 55022 Cl B Immunité aux champs électromagnétiques EN 61000 4 3 Immunité aux décharges électrostatiques EN 61000 4 2 Immunité aux transitoires électriques rapides en salves sur câble d alimentation EN 61000 4 4 level 2 1000V Immunité aux transitoires électriques rapides en salves sur câbles signaux d entrées sorties EN 61000 4 4 level 1 500V Immunité aux ondes de choc ...

Страница 26: ... collecte approprié pour le recyclage des équipements électriques et électroniques En s assurant que ce produit est bien mis au rebut de manière appropriée vous aiderez à prévenir de potentielles conséquences négatives pour l environnement et la santé humaine Le recyclage des matériaux aidera à conserver les ressources naturelles Pour toute information supplémentaire au sujet du recyclage de ce pr...

Страница 27: ...ure you have the right operating voltage before switching your amplifier on Warranty Audio Technology Switzerland SA certifies that this device has been inspected and tested before leaving the factory Every Nagra unit goes through our test laboratory The result of the measurements is recorded in the Protocol documentation that comes with your device We guarantee our products against all manufactur...

Страница 28: ...a for its technical innovation excellence in design and flawless construction including three Oscars and one Emmy The professional and Hi Fi ranges are both designed by our Research and Development department Nagra has launched a Hi Fi range to allow the wider public to benefit from technical advances that are often the privilege of the professionals This technology exists in the service of music ...

Страница 29: ...LASSIC PREAMP 29 One 1 remote control with 2 AAA dry cells Please contact your Nagra dealer if anything should be missing Depending on your country the power cord features either US European or Swiss male plug ...

Страница 30: ... the VFS L isolation base that offers a perfect match for your Nagra CLASSIC PREAMP Powering the CLASSIC PREAMP The CLASSIC PREAMP can be powered either with its own internal power supply and the provided AC power cord or with an external Nagra MPS power supply Connection to the mains Push the mains power switch at the back of the unit into the 0 OFF position Insert the power cord into the IEC con...

Страница 31: ...tor in the OFF position Insert the LEMO plug from the external power supply cable into the DC connector as shown You will hear a click indicating that the plug is securely locked in Please note that the LEMO plug features a red dot that must be facing upwards for correct insertion into the power input connector Then you should insert the BLACK tail cable at the back of the MPS unit To disconnect t...

Страница 32: ...ferent the input transformers are much more complex to build and thus are more expensive All our audio transformers are custom designed and hand wound by us in Romanel sur Lausanne Switzerland In order to obtain optimal performance from the Nagra CLASSIC PREAMP it is preferable to leave the device switched on for about 15 minutes before use so that the internal components can reach their optimum o...

Страница 33: ...ion 12 dB 6 Volume potentiometer 7 Line out selection XLR RCA or HEADPHONES positions 8 Nagra rotary main selector 9 jack Headphones output 10 IR window and remote LED When turned ON the CLASSIC PREAMP will enter a 2 5 minutes preheating time in order to optimize the tubes and critical components warm up This will allow your CLASSIC PREAMP to offer excellent performance for a longer period of time...

Страница 34: ...n the rear panel please see page 32 The typical Nagra rotary selector offers 4 positions OFF similar to STANDBY The unit is still powered but the consumption remains very low R is for Remote Control use MUTE the unit is turned on but the signal is muted No sound ON the unit is playing normally This table sums up the different positions vs actions Mains switch Nagra selector Action 0 Any The unit i...

Страница 35: ...s different functions If you press it and hold it more than 3 seconds you will access the menu You can get through the menu tree structure by rotating the controller knob Whenever you want to exit the menu press and hold the knob for 2 seconds at least How to use the CONTROLLER knob Controller knob Normal operation Inside menu Rotate Change input Scroll up or down Press and hold 3s Access menu Go ...

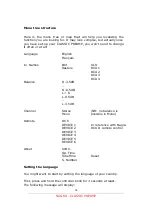
Страница 36: ...Names Edit XLR Restore RCA 1 RCA 2 RCA 3 RCA 4 Balance R 3 5dB R 0 5dB L R L 0 5dB L 3 5dB Channel Stereo Mono NB no balance is possible in Mono Remote RC 5 DEVICE 1 In reference with Nagra DEVICE 2 RCU II remote control DEVICE 3 DEVICE 4 DEVICE 5 DEVICE 6 About Soft V Op Time TubeTime Reset S Number Setting the language You might want to start by setting the language of your country First press a...

Страница 37: ...nside the menu rotate the knob until In Names is displayed Press the controller knob to get through this setting Edit displays Press the knob once to access input names modification You can now edit names XLR is the first displayed input It is its default factory name You could choose the new name to be displayed if you select this input Keep turning the knob if you wish to edit and modify another...

Страница 38: ...o record the new name and to get back to the In Names menu Resetting input name to default name If you are unhappy with the renaming of the inputs you can reset all the input names to factory settings Go in the In Names Menu Press the knob once Edit displays Rotate the knob until Restore displays Press the knob once again Confirm displays Press once again the factory names have been restored Adjus...

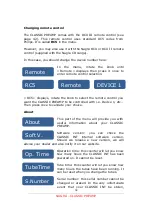
Страница 39: ...rolled with i e Device 1 etc Then press once to validate your choice About This part of the menu will provide you with useful information about your CLASSIC PREAMP Software version you can check the CLASSIC INT internal software version Should we release a new version we will advise your dealer and also notify it on our website Operation time this counter will let you know how many hours the CLASS...

Страница 40: ...he main amplifiers connected to your CLASSIC PREAMP Only the BYPASS input is active when the CLASSIC PREAMP is turned OFF whether it is actually connected to the DC power supply or not When the CLASSIC PREAMP is ON the line level inputs are active only The BYPASS input will directly connect to the XLR output so if the source is balanced the connection will be balanced all the way through Here is a...

Страница 41: ...ut level The 0 dB corresponds to a 1 V rms signal on the output Left channel black needle Right channel red needle The Modulometer allows you to make sure you adjust the volume in a consistent manner with the source and the amplifier you are using Gain selection In order to accommodate a wide range of amplifier speaker combinations the gain of the CLASSIC PREAMP can be adjusted by a toggle switch ...

Страница 42: ...e toggle up will increase the intensity pushing it down will lower the intensity all the way to complete extinction There are 7 different intensity levels Remote control The CLASSIC PREAMP comes with the RCU III remote control You may also use Nagra RCU or RCU II remote control As they use a different communication protocol please contact your Nagra Left balance Increase volume Right balance Decre...

Страница 43: ...27 Balance Left 13 Mute Balance fine adjustment A lot of manufacturers often regard balance control as not mandatory At Nagra we believe it is useful to adjust any minor left right level shift typical of LP cutting for example The CLASSIC PREAMP balance control is intended for fine adjustments only i e up to 3 dB that could affect the left right balance This is the reason why it is not possible to...

Страница 44: ...esence of clicks dry and short noise like breaking dead wood Presence of pops short noise in the low frequencies Presence of hiss higher background noise As soon as one of these signs appears please contact your Nagra dealer to order a CLASSIC PREAMP replacement tube kit reference 7055764000 Case cleaning Clean the CLASSIC PREAMP casing using a soft non fluffy slightly damp cloth Do not use any cl...

Страница 45: ...evel to reach 0 dB meter 0 25 V RMS Gain at 12 dB Maximum input level to reach 0 dB meter 25 V RMS Gain at 0 dB Total harmonic distortion THD N 0 01 1 kHz 1 V out no load Crosstalk 85 dB Vacuum tubes 2x 12AX7 ECC83 1x 12AT7 ECC81 Selected by Nagra Laboratory Consumption 12 V 1040 mA Standby 10 mW Power supply 115 V or 230 V AC input ACPS II power supply Dimensions 310 x 254 x 76 mm 12 2 x 10 x 3 i...

Страница 46: ...ORMS Radiated electromagnetic field EN 55022 Cl B Disturbance voltage on mains terminal EN 55022 Cl B Immunity to electromagnetic fields EN 61000 4 3 Immunity to electrostatic discharges EN 61000 4 2 Immunity to burst on mains line EN 61000 4 4 level 2 1000V Immunity to burst on input output signal line EN 61000 4 4 level 1 500V Immunity to surge EN 61000 4 5 level 2 1000V Romanel 2nd quarter 2016...

Страница 47: ...e recycling of electrical and electronic equipment By ensuring this product is disposed of correctly you will help prevent potential negative consequences for the environment and human health The recycling of materials will help to conserve natural resources For more detailed information about recycling of this product please contact your local authority your household waste disposal service or th...

Страница 48: ...tie AUDIO TECHNOLOGY SWITZERLAND SA Entwickler und Hersteller von Nagra Produkten versichert dass dieses Gerät vor dem Verlassen der Fabrik sorgfältig kontrolliert und getestet wurde und mit den Daten der beiliegenden Messprotokolle und Testblätter übereinstimmt Wir gewähren für Produkte unserer Herstellung bei Schäden durch Herstellungsfehler eine Garantiedauer von drei Jahren ab Lieferdatum zum ...

Страница 49: ...r technische Innovation Exzellenz im Design und einwandfreier Bauweise darunter 3 Oscars und 1 Emmy Die Nagra Philosophie ist seit Anbeginn dieselbe für kontinuierliche Innovation und qualitativ hochwertige Technologie zu sorgen um hochwertige Produkte zu erzeugen Wir möchten Ihnen danken dass Sie Nagra Kunde geworden sind und Ihnen mit Ihrem CLASSIC PRE viel Spaß und Genuss beim Musikhören wünsch...

Страница 50: ...NAGRA CLASSIC PREAMP 50 abhängig von Ihrem Land hat das AC Netzkabel entweder einen US Europäischen oder Schweizer Stecker ...

Страница 51: ...nahme des CLASSIC PREAMP Der CLASSIC PREAMP kann entweder von seiner eigenen internen Stromversorgung oder von einem externen 12V DC Netzteil dem Nagra MPS versorgt werden Ist ersteres der Fall benötigen Sie nur das beigelegte Netzkabel Stromanschluss Stellen Sie den Wahlregler auf der Vorderseite auf OFF Position bezeichnet mit 0 Stecken Sie das IEC Kabel in den dafür vorgesehenen Anschluss am Na...

Страница 52: ...ecken ins Gerät oben sichtbar sein muss Drehen Sie den Wahlschalter auf der Vorderseite auf OFF Position Stecken Sie nun den LEMO Stecker der externen Stromquelle in den Stecker auf der Rückseite des Gerätes siehe Abbildung Sie hören einen Klick der Ihnen signalisiert dass der Stecker sicher eingerastet ist Sie verbinden nun das schwarze Ende des Kabels mit dem MPS Um den LEMO Stecker auszustecken...

Страница 53: ...nd 1 Set für Ausgänge Die Transformatoren sind unterschiedlich die Eingangstrafos sind viel komplexer und schwieriger zu bauen dementsprechend auch teurer Alle Transformatoren sind Schweizer Qualitätsprodukte Um optimale Performance zu erreichen sollte das Gerät 15 Minuten vor Verwendung eingeschaltet werden damit die Komponenten ihre optimale Betriebstemperatur erlangen können Wie alle elektronis...

Страница 54: ...ehe Beschreibung unten 5 Gain Schalter Standardposition ist 0 dB obere Position 12 dB 6 Lautstärkeregler 7 Schalter für Ausgabeposition XLR RCA oder Kopfhörer 8 Nagra Hauptwahlschalter OFF ist Standby Position 9 Kopfhörerausgang 10 IR Sensor und Fernbedienungs LED Beachten Sie dass der CLASSIC PREAMP eine 2 5 minütige Aufwärmphase benötigt nachdem er eingeschaltet wurde Dies dient der Optimierung ...

Страница 55: ...NAGRA CLASSIC PREAMP 55 Beachten Sie Im Falle eines unbeabsichtigten oder zufälligen Zurückkehrens zur OFF Position das weniger als 2 Sekunden dauert wird sich der CLASSIC PREAMP nicht ausschalten ...

Страница 56: ... ON I Position gestellt werden Der typische Nagra Drehschalter bietet 4 Positionen OFF ist äquivalent mit STANDBY Das Gerät ist noch immer am Strom aber mit ganz geringem Stromverbrauch R steht für Fernbedienung Remote Control MUTE das Gerät ist eingeschaltet aber das Signal ist gemutet ON das Gerät arbeitet spielt Alle möglichen Positionen Stromschalter Drehschalter Front AKtion 0 egal welche Pos...

Страница 57: ... oder gedreht werden Controller drücken 3 Sekunden halten so steigt man ins Menu ein Innerhalb des Menu Stammes können Sie durch Drehen navigieren Wann immer Sie aus dem Menu aussteigen wollen drücken Sie den Controller und halten ihn für mind 2 Sekunden gedrückt Bedienung des Controler Drehknopfs Controler Normale Operation Innerhalb des Menüs Drehen Eingang wechsein Rauf und runter scrollen Drüc...

Страница 58: ...mehr zu ändern Language English Français In Names Edit XLR Restore RCA 1 RCA 2 RCA 3 RCA 4 Balance R 3 5dB R 0 5dB L R L 0 5dB L 3 5dB Channel Stereo Mono Remote RC 5 DEVICE 1 In Übereinstimmun g mit Nagra DEVICE 2 RCU II Fernbedienung DEVICE 3 DEVICE 4 DEVICE 5 DEVICE 6 Einstellen der Sprache Wahrscheinlich möchten Sie mit dem Einstellen der Sprache beginnen Als erstes drücken und halten Sie den ...

Страница 59: ...ungen einzusteigen Drücken Sie den Controler 1x jetzt können Sie editieren XLR ist der erste Eingang dies ist der technische Name Nun können Sie diesen Eingang benennen so dass der Name immer angezeigt wird sobald Sie auf Ihrem CLASSIC PREAMP den XLR Eingang anwählen Drehen Sie mit dem Controler weiter um weitere Eingänge neu zu benennen Wir ändern nun zu Anschauungszwecken gemeinsam den Namen RCA...

Страница 60: ... Löschen eines Eingangs Namens Wenn Sie mit der Neubenennung eines Eingangs nicht zufrieden sind können Sie alle Namen der Eingänge auf Factory Settings zurücksetzen Gehen Sie ins Menü INPUT NAMES wählen Sie RESTORE 1x drücken Drehen bis zur Anzeige RESTORE 1x drücken Noch 1x drücken die Fabrikseinstellungsnamen sind nun wieder aktiviert Einstellen der Balance xxxxx Stereo oder Mono Modus xxxxx DC...

Страница 61: ...n Über Dieser Teil des Menüs versorgt Sie mit interessanten und wertvollen Details und Informationen zu Ihrem CLASSIC PREAMP Software Version So prüfen Sie die interne CLASSIC PREAMP Software Version Wenn Nagra eine neue Software Version ausgibt wird Ihr Händler verständigt diese Information ist auch auf der Nagra Webseite zu finden Operation time Dieser Zähler informiert Sie über die Anzahl der S...

Страница 62: ...ald es einen Nagra Händler oder ein Service Center erreicht Bypass Eingang Der BYPASS Eingang ermöglicht einem zweiten System z B Heimkino eine Verbindung mit dem CLASSIC PREAMP Nur der Bypass Eingang ist aktiv während der Preamp ausgeschaltet ist Wenn der CLASSIC PREAMP eingeschaltet ist sind nur die Line Eingänge aktiv Der BYPASS Eingang ist direkt mit dem XLR Ausgang verbunden wenn die Quelle s...

Страница 63: ...wendige Information anzeigt um die bestmögliche Aufnahme zu erzielen Im Fall des CLASSIC PREAMP zeigt der Modulometer den digitalen Eingangs Level an Die 0 dB sind als Maßstab für maximalen digitalen Level zu betrachten Rechter Kanal rote Nadel Linker Kanal schwarze Nadel Der Modulometer ermöglicht es die Lautstärkeneinstellung so vorzunehmen dass die Quelle und der Verstärker optimal genutzt werd...

Страница 64: ...rgrundbeleuchtung des Modulumeter und der LEDs anzupassen Drücken Sie den Kippschalter hinauf UP wird die Helligkeit verstärkt drücken Sie den Kippschalter hinunter verringert sich die Helligkeit bis zur absoluten Dunkelheit Es gibt 7 verschiedene Helligkeitsstufen Fernbedienung Im Lieferumfang des CLASSIC PREAMP ist auch die neue RC III Left balance Lautstärke erhöhen Right balance Lautstärke ver...

Страница 65: ...C PREAMP nicht aktiv 32 33 Eingangs Wechsel rauf und runter 16 Lautstärke rauf 17 Lautstärke runter 26 Balance rechts 27 Balance links 13 Mute Feine Anpassung der Balance Viele Hersteller betrachten die Balance Kontrolle als nicht verpflichtend Nagra allerdings ist überzeugt dass es sinnvoll und wichtig ist jeden kleinsten recht links Unterschied auszugleichen wie er z B bei Plattenaufnahmen vorzu...

Страница 66: ...zu wird hörbar Knackgeräusche werden hörbar ähnlich totem brechenden Holz Knallgeräusche in niedrigen Frequenzen sind hörbar Zischen und höheres Hintergrundrauschen sind hörbar Sobald eines dieser Anzeichen hörbar wird kontaktieren Sie Ihren Nagra Händler für ein CLASSIC PREAMP Ersatzröhren kit Referenz 7055764000 Gehäusereinigung Reinigen Sie Ihren CLASSIC PREAMP mit einem weichen nicht fusselnde...

Страница 67: ...umfang 10 Hz 50 kHz 0 0 5 dB Dynamikumfang 125 dB Gain 12 dB Klirrfaktor 0 01 1 kHz 1 V Übersprechen 85 dB Röhren 2x 12AX7 ECC83 1x 12AT7 ECC81 Nagra selektiert Leistungsaufnahme 12 V 1040 mA Standby 10 mW Bereich Betriebsspannung 115 V oder 230 V AC ACPS II Netzteil Größe 310 x 254 x 76 mm 12 2 x 10 x 3 inches Gewicht 3 3 Kg 7 27 lbs CLASSIC PREAMP ohne Verpackung ...

Страница 68: ...gen im Netz EN 55022 Cl B Störfestigkeit gegen hochfrequente elektromagnetische Felder EN 61000 4 3 Störfestigkeit gegen Entladung statischer Elektrizität EN 61000 4 2 Störfestigkeit gegen schnelle transiente elektrische Störgrößen Netz EN 61000 4 4 level 2 1000V Störfestigkeit gegen schnelle transiente elektrische Störgrößen Eingangs Ausgangssignal EN 61000 4 4 level 1 500V Störfestigkeit gegen S...

Страница 69: ...NAGRA CLASSIC PREAMP 69 Nicht im Restmüll entsorgen ...

Страница 70: ...NAGRA CLASSIC PREAMP 70 ...

Отзывы: