manualshive.com logo in svg
background image

STATION ORDER

Use “Station Order” to sort the sequence of the listed stations. There are 
three orders – Alphanumeric, Ensemble and Active.

While listening to a DAB broadcast, press front panel’s [TUNER MODE] 
button and then [TUNE 

 ] to select “Station Order”. Press [ENTER].

Toggle [TUNE 

 ] to select through “Alphanumeric”, “Ensemble” and 

“Active”.

Press [ENTER] to select desired station order.

alphanumeric 

This is the default setting. Stations are arranged by numbers first and then 
alphabetically by letters.

enSemble

Digital radio is broadcast as groups of data called ensemble. Each ensemble 
contains a number of stations, transmitted at a set frequency. When 
“Ensemble” is selected as the mode of station order, the radio stations are 
arranged in the order of their ensemble names.

NOTE


Ensemble is also interchangeably termed as “multiplex” by other 
broadcast providers.

active

Active stations are listed at the top of the channel list.  Those channels 
that are in list but have no service in the area will be displayed last in the 
channel list.

DRC 

The level of compression of stations can be set to eliminate the differences 
in dynamic range or sound level between radio stations. Popular music 
would normally be more compressed than classical music, resulting in 
possible different audio levels when changing from one station to the 
other. Setting the DRC to “0” means no compression, “1/2” indicates medium 
compression and “1” shows maximum compression. No compression is 
recommended, especially for classical music.

While listening to a DAB broadcast, press front panel’s [TUNER MODE] 
button and then [TUNE 

 ] to select “DRC”. Press [ENTER].

Toggle [TUNE 

 ] to select through “DRC 0”, “DRC ½”and “DRC 1”.

Press [ENTER] to select desired DRC level.

MANUAL SCAN

This option allows you to directly tune to a desired channel and include it 
in the service list (if not yet available at the time). You can also use manual 
scan to assist you in positioning the DAB antenna for best reception of the 
desired channel.

While listening to a DAB broadcast, press front panel’s [TUNER MODE] 
button and then [TUNE 

 ] to select “Manual Scan”. Press [ENTER]. 

If you are doing manual scan the first time, the first order of channel 
and frequency will be shown in the upper line of the VFD. If you had 
previously done manual scanning, the last channel and frequency that 
you have manually scanned will be shown.  
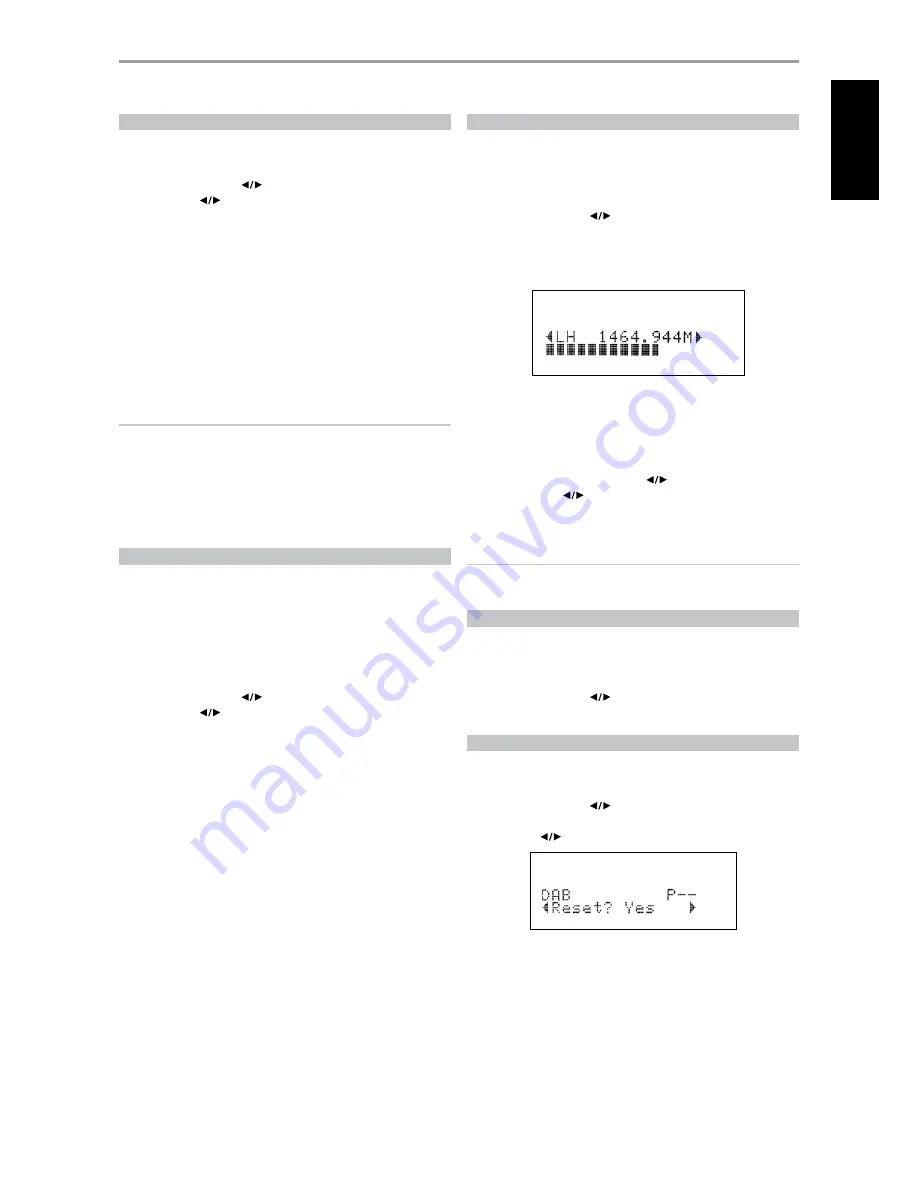
Channel and frequency are shown in the upper line of the VFD.  The “bars” 
at the lower line of the VFD indicate the signal strength level of the current 
channel.  To improve the reception of the selected channel, adjust or 
reposition the DAB antenna until the best reception is indicated.

To select other channels, toggle [TUNE 

 ] to step through the channel 

list. Release [TUNE 

 ] when you have arrived at your desired channel. 

Press [ENTER] to tune the selected channel.

NOTE


The number of ensembles and stations that could be scanned will vary 
depending on your location.

PRUNE LIST

There maybe situations wherein certain stations become inactive.  The 
“Prune List” option enables the deletion of these inactive stations in the 
service list.

While listening to a DAB broadcast, press front panel’s [TUNER MODE] 
button and then [TUNE 

 ] to select “Prune List”. 

Press [ENTER]. Any inactive stations are automatically deleted. 

RESET

The “Reset” option allows the connected (and separately sold) NAD DAB 
Adaptor DB1 to be reset to its factory default settings.  

While listening to a DAB broadcast, press front panel’s [TUNER MODE] 
button and then [TUNE 

 ] to select “Reset”. 

Press [ENTER]. “Reset?  No” will be shown in the lower line of the VFD. 
Press [TUNE 

 ] to switch to “Reset?  Yes” option. 

To select “Reset?  No” or “Reset?  Yes”, press [ENTER] while at the desired 
option. Selecting “Reset? Yes” will cause the DB1 to be reset to its factory 
default settings - the VFD will correspondingly show “No Service List”.

OPERATION

liStening to dab radio

17

EN

G

LI

SH

FR

ANÇ

AIS

ESP

AÑOL

IT

ALIANO

DEUT

SCH

NEDERL

ANDS

SVENSK

A

РУ

ССКИЙ

Содержание C 725BEE

Страница 1: ...ENGLISH FRANÇAIS ESPAÑOL ITALIANO DEUTSCH NEDERLANDS SVENSKA РУССКИЙ Owner s Manual C725BEE Stereo Receiver ...

Страница 2: ...nly one way This is a safety feature If you are unable to insert the plug fully into the outlet try reversing the plug If the plug should still fail to fit contact your electrician to replace your obsolete outlet Do not defeat the safety purpose of the polarized plug 13 Power Cord Protection Power supply cords should be routed so that they are not likely to be walked on or pinched by items placed ...

Страница 3: ...ources such as radiators heat registers stoves or other products including amplifiers that produce heat WARNING TO REDUCE THE RISK OF FIRE OR ELECTRIC SHOCK DO NOT EXPOSE THIS PRODUCT TO RAIN OR MOISTURE CAUTION TO PREVENT ELECTRIC SHOCK MATCH WIDE BLADE OF PLUG TO WIDE SLOT FULLY INSERT FCC WARNING Changes or modifications not expressly approved by the party responsible for compliance could void ...

Страница 4: ...tribution to the protection of our environment Your local administrative office can advise you of the responsible waste disposal point INFORMATION ABOUT COLLECTION AND DISPOSAL OF WASTE BATTERIES DIRECTIVE 2006 66 EC OF THE EUROPEAN PARLIAMENT AND THE COUNCIL OF EUROPEAN UNION for European customers only Batteries bearing any of these symbols indicate that they should be treated as separate collec...

Страница 5: ...hing We urge you to register your C 725BEE ownership on the NAD Worldwide Web site http NADelectronics com warranty For warranty information contact your local distributor IMPORTANT SAFETY INSTRUCTIONS 2 INTRODUCTION GETTING STARTED 6 UNPACKING AND SETUP 6 CHOOSING A LOCATION 6 NOTES ON INSTALLATION 6 ABOUT THE C 725BEE 6 IDENTIFICATION OF CONTROLS FRONT PANEL 7 REAR PANEL 9 REMOTE CONTROL 11 USIN...

Страница 6: ... you intend not to use the C 725BEE for long periods of time switch OFF the rear panel POWER switch Should water get into your C 725BEE shut off the power to the unit and disconnect the plug from the AC wall outlet Have the unit inspected by a qualified service technician before attempting to use it again DO NOT REMOVE THE COVER THERE ARE NO USER SERVICEABLE PARTS INSIDE Use a dry soft cloth to cl...

Страница 7: ...reset memory locations One can store a mix of any AM FM and DAB broadcasts to the 40 available presets In combination with INFO button MEMORY button is also used in deleting stored presets Press and hold INFO button and then press MEMORY current stored preset setting will be erased Refer also to the item about SETTING RADIO PRESETS at the LISTENING TO AM FM RADIO section of the OPERATION page 6 TU...

Страница 8: ...ar panel Press A to switch ON or OFF the speakers connected to the SPEAKERS A terminals Press B to switch ON or OFF the speakers connected to the SPEAKERS B terminals 15 MP SOCKET Using a 3 5mm stereo plug connect into this socket the audio output of a Media Player The LED on the MP input button will illuminate when an external Media Player is connected to this socket 16 Input selectors These butt...

Страница 9: ...l line level input signals such as CD Mini Disc player or the output signal from a step up amplifier for a turntable Use a twin RCA to RCA lead to connect the auxiliary unit s left and right Audio Outputs to this input 6 AUX INPUT Input for additional line level input signals such as another CD player Use a twin RCA to RCA lead to connect the auxiliary unit s left and right Audio Outputs to this i...

Страница 10: ... OFF position When the POWER switch is at OFF position the front panel power button SR 8 remote control or ZR 5 cannot activate the C 725BEE 15 SWITCHED AC OUTLET This convenience outlet can supply switched power to another component or accessory With the Power switch at the rear panel set to ON position this outlet is powered ON or OFF by the front panel STANDBY switch or by the SR 8 s ON OFF but...

Страница 11: ...er to gain access to these buttons The input selector buttons perform the same functions as the buttons labeled the same on the front panel 4 NUMERIC KEYS The numeric keys allow for direct input of tracks for CD players and direct channel preset access for tuners and receivers 5 SLEEP Switch off the NAD Receiver or Tuner after a preset number of minutes SLEEP MODE The Sleep Mode timer will switch ...

Страница 12: ... USB as the active source OPT Select optical input as the active source SRC Toggle to select desired SRC mode TUNER CONTROL for use with NAD AM FM DAB Tuner Set the DEVICE SELECTOR to TUN in order to gain access to these buttons Refer to the corresponding labels printed in the remote control faceplate and their respective assigned buttons to make use of these functions Some of the control buttons ...

Страница 13: ...utput port 3 MUTE Temporarily switch OFF or restore the Zone Volume level 4 VOLUME This function is not applicable for the C 725BEE 5 PRESET Step up or down between stored radio presets This control button is possible if the selected Zone is TUNER and the active tuner section has stored presets 6 The following CD Player Zone buttons can control a CD Player linked to the C 725BEE under the followin...

Страница 14: ...une directly to the station 1 Toggle ENTER button to switch between Preset and Tune mode see the lower line of the VFD Select Tune mode 2 Using the numeric keys of the remote control key in the frequency allocation of the station and then press ENTER For example to enter 104 50 MHz press 1 0 4 5 and 0 or press 1 0 4 5 and ENTER SETTING RADIO PRESETS AM FM DAB The C 725BEE can store a mix of your 4...

Страница 15: ...ive 5 seconds press the INFO button the readout shows a blinking box 3 Use the PRESET buttons to select the first character of the name N from the alphabetical list 4 Press TUNE button to select the character and correspondingly move forward to the next position Press TUNE to go back to the previous character Repeat this process for each character in sequence 5 Press the MEMORY key again to store ...

Страница 16: ...OCAL SCAN performs local scanning of available DAB services in your area Check with your dealer or visit www WorldDAB org to check the applicable digital transmission frequencies in your area 3 Upon selecting either Full Scan or Local Scan press SR 8 s ENTER button Automatic scanning will ensue This sequence cannot be interrupted During the sequence the following message will be visible in theVFD ...

Страница 17: ... can also use manual scan to assist you in positioning the DAB antenna for best reception of the desired channel 1 While listening to a DAB broadcast press front panel s TUNER MODE button and then TUNE to select Manual Scan Press ENTER If you are doing manual scan the first time the first order of channel and frequency will be shown in the upper line of the VFD If you had previously done manual sc...

Страница 18: ... and frequency of the currently tuned DAB broadcast are displayed Ensemble name The name of the ensemble that is broadcasting the program is displayed Program type This is a description of the type of broadcast supplied by the station such as Pop Rock Drama and the likes Time and date The current time and date as supplied by the DAB station are displayed Audio Signal Information Displays the bit r...

Страница 19: ...the lower line of the VFD NOTE When the iPod player is removed from NAD IPD 1 the iPod Connected display in the lower line of the VFD will be extinguished Dock your iPod player into the NAD IPD 1 iPod Connected will be displayed in the lower line of the VFD iPod MENU OPTIONS Refer to your docked iPod player s own display screen to view and make full use of its navigation and control features Use y...

Страница 20: ...er computers games consoles Check station tuning Switch off or move the source of electrical noise No RDS information Station signal too weak Check station tuning Adjust or replace antenna Station not transmitting RDS data Tune to an RDS station that supports station name PS mode and radio text RT mode C 725BEE does not respond to remote control Batteries are flat or incorrectly inserted Check bat...

Страница 21: ...OUT Output resistance 75 Ω Output current 150 mA Output voltage 12 1 V POWER AMPLIFER SECTION Continuous output power into 8 Ω 2 2x50 W 17 dBW Rated distortion THD 20 Hz 20 kHz 0 02 Clipping power 61 W maximum continuous power per channel 4 Ω and 8 Ω IHF Dynamic headroom 8 Ω 3 1 dB 4 Ω 4 7 dB IHF dynamic power 8 Ω 102 W 20 0 dBW maximum short term power per channel 4 Ω 148 W 21 7 dBW 2 Ω 205 W 23 ...

Страница 22: ...F 28 dB Selectivity 20 dB Frequency response 6 dB 100 2 3 kHz 5 mV Physical Specifications Unit Dimensions W x H x D 435 x 133 x 350 Net 435 x 149 x 396 Gross 7 Net Weight 9 4 Kg Shipping Weight 11 0 Kg LEGEND 1 From CD input to speakers output volume setting for 500 mV in 8 Ω 1 W out 2 Minimum power per channel 20 Hz 20 kHz both channels driven with no more than rated distortion 3 Total harmonic ...

Страница 23: ...23 ENGLISH FRANÇAIS ESPAÑOL ITALIANO DEUTSCH NEDERLANDS SVENSKA РУССКИЙ ...

Страница 24: ...ATIONAL A DIVISION OF LENBROOK INDUSTRIES LIMITED All rights reserved No part of this publication may be reproduced stored or transmitted in any form without the written permission of NAD Electronics International C 725BEE Owner s Manual Issue 1 10 08 ...

Отзывы: