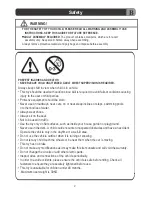
My Little Pony 6V Junior MotorBike Скачать руководство пользователя страница 3


Safety

                          B


              WARNING! 

FOR THE SAFETY OF YOUR CHILD, PLEASE READ ALL WARNING AND ASSEMBLY/ USE 

INSTRUCTIONS. KEEP THIS GUIDE FOR FUTURE REFERENCE. 

ADULT ASSEMBLY REQUIRED

. The product contains small parts, which are for adult 

assembly only. Keep small children away when assembling. 

Always remove protective material and poly bags and dispose before assembly. 


PREVENT INJURIES AND DEATHS:


• NEVER LEAVE CHILD UNATTENDED. ADULT DIRECT SUPERVISION IS REQUIRED. 

Always keep child in view when child is in vehicle. 
• This toy should be used with caution since skill is required to avoid falls or collisions causing 

injury to the user or third parties.


• Protective equipment should be worn.


• Never use on roadways, near cars, on or near steep inclines or steps, swimming pools 

or other bodies of water.


• Always wear shoes. 
• Always sit on the seat.


• Not to be used in traffic.


• Use the toy only on flat surfaces, such as inside your house, garden or playground. 
• Never use in the dark. A child could encounter unexpected obstacles and have an accident. 

Operate the vehicle only in the daytime or a well-lit area. 

• Do not use the vehicle outdoor when it is raining or snowing. 
• Do not let any child touch the wheels or be near them when the car is moving. 
• This toy has no brake.


• Do not make any modifications as it may make this item unsafe and will void the warranty. 
• Do not change the circuits or add other electric parts. 
• Inspect wires and connections of the vehicle periodically. 
• In order to avoid accidents, please ensure the vehicle is safe before riding. Check all 

fasteners to ensure they are securely tightened before use. 

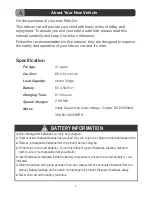
• This toy is unsuitable for children under 48 months. 
•  Maximum user weight is 30KG.


Содержание 6V Junior MotorBike

Страница 1: ...aximum user weight 30kg Adult assembly required OWNER S MANUAL Read and understand this entire manual before using Please keep this manual for future reference as it contains important information Before first time use charge the battery for at least 8 12hours ...

Страница 2: ...Depend on local voltage Output DC6V500mA 380 6V 14000MPH BATTERY INFORMATION Non rechargeable batteries are not to be recharged If removable rechargeable batteries are used they are only to be charged under adult supervision Remove rechargeable batteries from the product before charging Do not mix old and new batteries Do not mix different types of batteries alkaline standard carbon zinc or rechar...

Страница 3: ...teps swimming pools or other bodies of water Always wear shoes Always sit on the seat Not to be used in traffic Use the toy only on flat surfaces such as inside your house garden or playground Never use in the dark A child could encounter unexpected obstacles and have an accident Operate the vehicle only in the daytime or a well lit area Do not use the vehicle outdoor when it is raining or snowing...

Страница 4: ...der 1 7 Front fork 1 8 Front axle 1 9 Rear axle 1 10 Front wheel 1 11 Rear wheel 2 12 Φ8 washer 4 13 Locknut 4 14 Bushing 2 15 Φ5 nut 1 Placed on the handle bar 16 M5x35 machine screw 1 Placed on the handle bar 17 Spanner 2 18 Charger 1 WARNING CHOKING HAZARD Not suitable for children under 48 months ADULT ASSEMBLY REQUIRED ...

Страница 5: ...4 3 3 5 5 16 2 2 4 15 1 1 6 6 9 11 7 7 12 13 D Parts Diagram NOTE Somepartsshownareassembledonbothsidesofvehicle 13 12 14 8 17 13 14 Spanner ...

Страница 6: ...e Faceguard Front fender 1 Insert the tabs on the faceguard into the grooves on the front of the vehicle and push until you hear it click into place 2 Slide the front fender onto the front fork from the straight end ...

Страница 7: ...he front fork into the hole on the front of the vehicle 2 Fit the handle bar into the end of the front fork 3 Line up the holes on the handle bar with the hole on the front fork insert the M5x35 machine screw 4 Fasten a nut on the opposite end of the screw and tighten with a screw driver 7 16 2 15 ...

Страница 8: ... side of front fork 4 Slide a bushing onto the front axle 5 Slide a front wheel onto the front axle 6 Slide another bushing onto the front axle 7 Continue pushing the front axle until it passes through the hole on the other side of front fork 8 Slide a Φ8 washer onto the front axle 9 Tighten a lock nut to the end of the front axle with a spanner to secure the front wheel ...

Страница 9: ...2 Slide a rear wheel onto the rear axle 3 Slide a Φ8 washer onto the rear axle 4 Tighten a lock nut to the end of the rear axle with a spanner 11 12 13 5 On the other side of the rear axle slide a rear wheel onto the rear axle 6 Slide a Φ8 washer onto the rear axle 7 Tighten a lock nut to the end of the rear axle with a spanner ...

Страница 10: ... Remove the battery cover from the battery compartment 3 Insert two AAA batteries in their correct polarities 4 Place the battery cover over the battery compartment and fasten with the screw you removed in step one 5 Press the button on the dash to enable the light to turn on 6 Insert the tabs on the windshield into the grooves on the front vehicle ...

Страница 11: ...10 Remove The Seat J 1 Rotate the seat lock to the unlock position with a slotted screwdriver 2 Remove the seat ...

Страница 12: ...11 K Connect the Power Supply Battery connector 1 Vehicle connector 1 Plug the Black connector into the Black terminal on battery You should hear a click once the connectors are securely locked ...

Страница 13: ...ou should charge the battery for 8 12 hours Do not recharge the battery for more than 12 hours to avoid overheating the charger When the vehicle begins to run slowly recharge the battery 1 Plug the charger connector to battery connector Under the seat You should hear a click once the two connectors are locked together 2 Plug the charger plug into a wall outlet The battery will begin charging ...

Страница 14: ...t it from wet weather Keep the vehicle away from sources of heat such as stoves and heaters Plastic parts may melt Recharge the battery after each use Only an adult can handle the battery Recharge the battery at least once a month when the vehicle is not being used Do not wash the vehicle with a hose Do not wash the vehicle with soap and water Do not drive the vehicle in rainy or snowy weather Wat...

Страница 15: ...Maximum user weight is 30kgs Vehicle is being used in harsh conditions Avoid using vehicle in harsh conditions see Safety Vehicle needs a push to go forward Poor contact of wires or connectors Check that the battery connectors are firmly plugged into each other If wires are loose around the motor please contact customer service Dead Spot on motor A dead spot means the electric power is not being d...

Страница 16: ...ns lead acid electrolyte and must be disposed of properly and legally It is illegal in most areas to incinerate lead acid batteries or dispose of them in landfills Take it to a federal or state approved lead acid battery recycler such as local automotive battery retailer ...

Страница 17: ......

Отзывы: