


XLR
Connector
LED
Headphone
Volume
1/8” Headphone
Jack
Microphone
Gain
USB
Jack
USB
Cable
3
Mic Mate
™
Pro Features
8
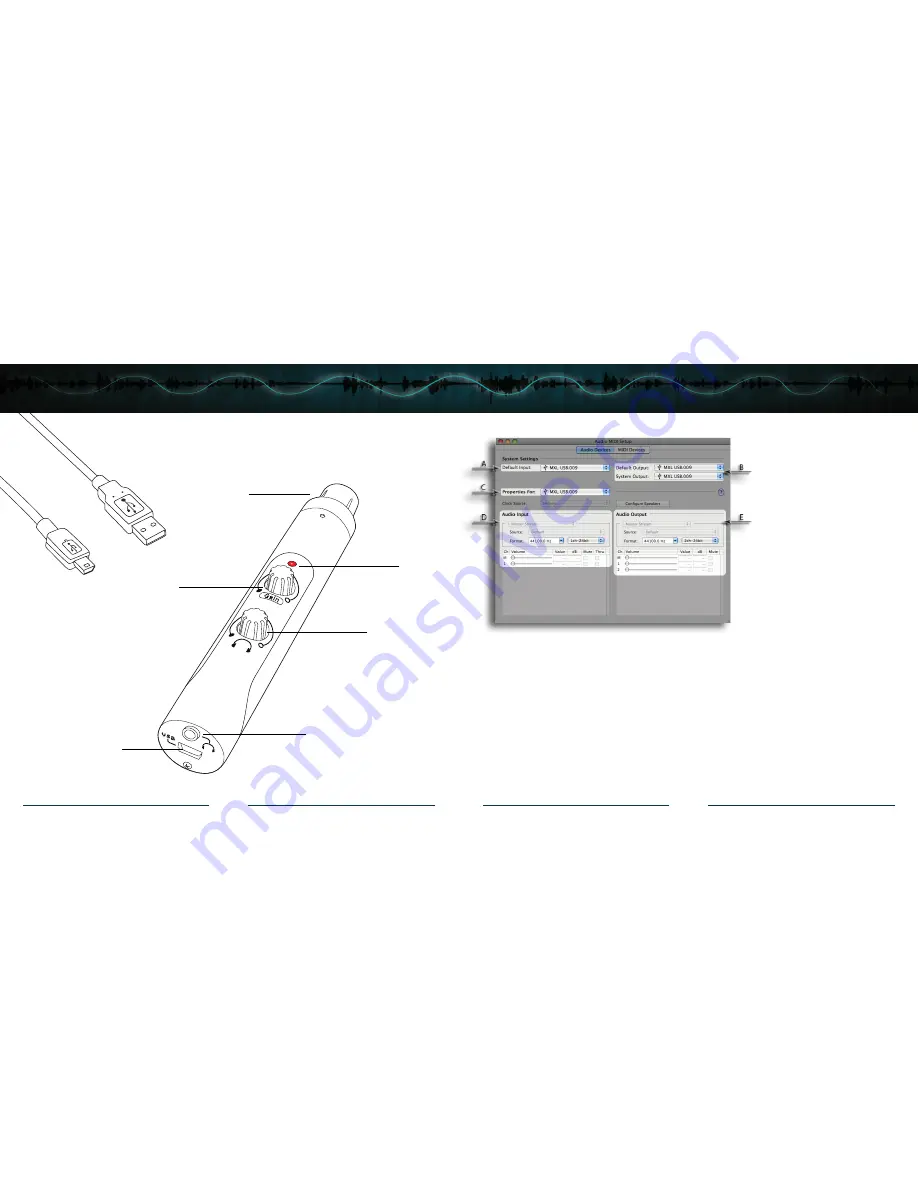
A.
By selecting the
USB
Audio Codec
as the “Default
Input” the Mic Mate
™
Pro will
automatically be selected as the
audio input device the next time
it is plugged in.
B.
By selecting the
USB
Audio Codec
as the “Default
Output” the Mic Mate
™
Pro will
automatically be selected as the
audio output device the next time
it is plugged in. By selecting the
USB Audio Codec as the “System
Output”, the microphone will be
used as the output device for any
system sounds.
C.
Select the
USB Audio Codec
to make adjustments to the sample rate and bit-depth. You will see the
sections D and E appear in the lower portion of the window.
D.
Here you can make adjustments to the sample rate and bit-depth for the input (the microphone signal).
E.
Here you can make adjustments to the sample rate and bit-depth for the output (the signal to the
headphones).
Your computer is now setup to use the Mic Mate
™
Pro USB interface. However, after changing these
settings you should still check the settings in your recording software. If the sample rate and/or bit-depth in
the recording software do not match your hardware, you will most likely hear clicks and pops, or the audio
will be the wrong pitch.


