background image


47 


6 hours 

Installazione e Impostazioni iniziali 

NOTA:

  Prima  dell’installazione,  accertarsi  che  nessun  componente  sia  danneggiato.    Per 

proteggere  le  proprie  apparecchiature  dalle  interruzioni  di  corrente,  accertarsi  che 
l’interruttore  d’accensione  sia  in  posizione  “ON”.  Per  installare  il  gruppo  UPS  seguire  le 
istruzioni.


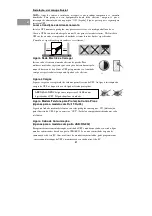
Posizionamento&conservazione 

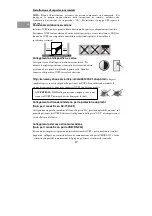
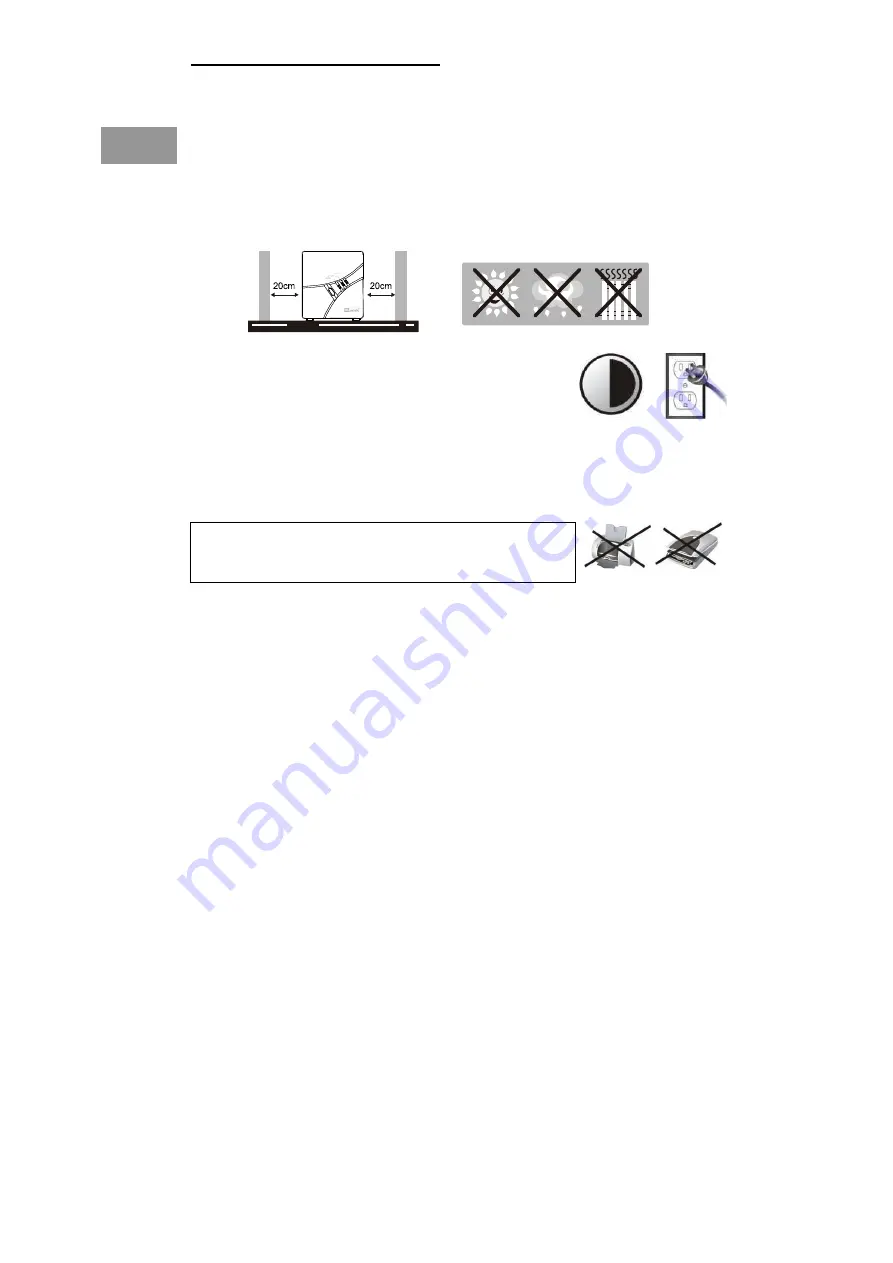
Installare l’UPS in un’area protetta, libera da accumuli di polvere e adeguatamente ventilata. 
Posizionare l’UPS lontano almeno 20 cm da altri dispositivi per evitare interferenze. NON far 
funzionare l’UPS con temperatura e umidità fuori dai limiti specifici. (Controllare le 
specifiche per i limiti)


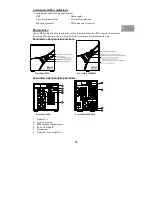
P owerMust 1060


Collegamento al dispositivo e carica 

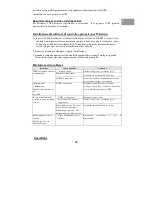
Collegare il cavo CA alla presa di alimentazione di rete. Per 
ottenere le migliori prestazioni, si consiglia di caricare la batteria 
per almeno 6 ore prima di utilizzarla la prima volta. Quando è 
connesso al dispositivo, l’UPS carica la sua batteria.


http://tw.news.yahoo.com/article/url/d/a/081203/2/1ahvp.html

Collegare i 

carichi alle prese in uscita sul pannello posteriore dell’UPS. Sarà sufficiente accendere il 
gruppo di continuità e i dispositivi connessi all’UPS risulteranno protetti.


Collegamento di modem/telefono per la protezione da picchi 
(Solo per i modelli con RJ-11/RJ45) 

Collegare una singola linea modem/telefono alla presa “IN”, protetta da picchi di tensione, sul 
pannello posteriore dell’UPS. Effettuare il collegamento dalla presa “OUT” al computer con il 
cavo della linea telefonica. 


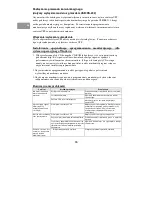
Collegamento del cavo di comunicazione 
(Solo per i modelli con porta USB/RS-232) 

Per consentire improvvisi spegnimenti/inizializzazioni dell’UPS e per controllare lo stato del 
dispositivo, collegare un’estremità del cavo di comunicazione alla porta USB/RS-232 e l’altra 

estremità alla porta di comunicazione del proprio pc. Grazie al software di controllo 

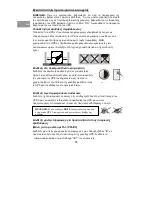
AVVERTENZA: NON

 collegare mai una stampante laser o uno 

scanner all’UPS. This may cause the damage of the unit. 


'

Содержание POWERMUST 1060

Страница 1: ...Line Interactive UPS Startup Manual...

Страница 2: ...Software Installation 6 Trouble Shooting 6 Specifications 7 Thank you for purchasing Mustek UPS To safely operate this uninterruptible power supply system please read and follow all instructions caref...

Страница 3: ...3 Important Safety Warning SAVE THESE INSTRUCTIONS 012 3 4 5 0 4 1 6...

Страница 4: ...att Mode green flashing AC Mode indicating load level Batt Mode indicating battery capacity Fault LED red lighting Power Switch Power Switch AC Mode green lighting Battery Mode yellow flashing Fault L...

Страница 5: ...be sure that power switch must be kept in the ON position Following below steps to install your UPS unit Placement Storage Conditions 1 P owerMust 1060 Connect to Utility and Charging 3 Connect the L...

Страница 6: ...ows OS 1 Insert the included installation CD into CD ROM or go to drive and then follow the on screen instructions If there no screen shows when inserting the CD after 1 minute please execute setup ex...

Страница 7: ...to 5th green LEDs gradually lighting indicating load level Battery Mode Yellow flashing The right green LED flashing the 2nd to 5th green gradually lighting indicating battery capacity Fault Red ligh...

Страница 8: ...8 PowerMust 1060 1590 2012 Interaktive Online USV Anleitung zur Inbetriebnahme...

Страница 9: ...lst ndig durch und befolgen Sie sie Lesen Sie sich dieses Handbuch vollst ndig durch bevor Sie Ihr Produkt auspacken aufstellen und in Betrieb nehmen Bewahren Sie dieses Handbuch f r sp tere Nachschla...

Страница 10: ...ung Stromschlaggefahr Auch nach Trennen des Ger tes vom Stromnetz ist durch die Batteriespeisung noch gef hrliche Spannung vorhanden Bei Wartungs und Reparaturarbeiten im Ger teinnern m ssen vorher di...

Страница 11: ...buchse 2 4 Steckdosenausg nge 3 Anschluss f r Modem Telefonleitung Netzwerk 4 USB Port Typ B 5 Sicherung 6 Netzeingang mit Sicherung PowerMust 1060 UPS status LED AC Mode green lighting Batt Mode gree...

Страница 12: ...das Netzkabel mit einer Netzsteckdose Laden Sie die eingebaute Batterie mindestens 6 Stunden lang auf bevor Sie das Ger t gebrauchen Die Batterie wird geladen w hrend das Ger t mit dem Stromnetz verb...

Страница 13: ...des Computers erscheint die berwachungssoftware als oranges Symbol in der Systemleiste neben der Uhr Probleml sungen Problem M gliche Ursache L sungen Batterie ersch pft Laden Sie die USV mindestens...

Страница 14: ...ge leuchtet und die zweite bis f nfte LED zeigen die Last an Batterie Betrieb Blinkt gelb Die rechte gr ne LED Anzeige blinkt und zweite bis f nfte LED zeigt die Batterieladung an Fehler Leuchtet rot...

Страница 15: ...15 Line Interactive UPS...

Страница 16: ...n asennus 20 Vianetsint 20 Tekniset tiedot 21 Kiitos kun valitsit Mustek UPS in Jotta voit k ytt turvallisesti t t katkotonta virransy tt j rjestelm lue kaikki ohjeet huolellisesti ja noudata niit Lue...

Страница 17: ...toon HUOMAA Vuotovirta asennetusta UPS laitteesta vastaanottavaan laitteeseen ei ole suurempi kuin 3 5 mA Huomio s hk isku mahdollinen Vaikka on irrotettu verkkovirrasta laitteen sis inen akku voi aih...

Страница 18: ...vikeilt virtakatkojen aikana T ss UPS laitteessa on kolme LED merkkivaloa jotka ilmaisevat UPS laitteen tilan Etupaneelin yleiskuva PowerMust 1060 PowerMust 1590 2012 Takapaneelin yleiskuva 1 2 3 4 5...

Страница 19: ...tt Laite lataa akkua ollessaan kytkettyn virransy tt n Kytke kuormitukset Kytke kuormitukset UPS laitteen takapaneelin l ht liit nt ihin Kytke UPS laitteen virta p lle ja UPS laitteisiin kytketyt lait...

Страница 20: ...kaisu Akun lataus v hiss Lataa laitetta v hint n kuusi tuntia Akku viallinen Vaihda akku samaa tyyppi olevaan akkuun Etupaneelissa ei merkkivaloa UPS laitetta ei ole k ynnistetty K ynnist UPS laite uu...

Страница 21: ...rkkivalot 2 ja 5 syttyv t asteittain osoittaen kuormitustasoa Akkuvarmistus Keltainen vilkkuva valo Oikealla olevat vihre t merkkivalot 2 ja 5 syttyv t asteittain osoittaen akun varaustilaa Vikatila P...

Страница 22: ...22 Onduleur ligne interactive...

Страница 23: ...R solution des probl mes 27 Sp cifications techniques 28 Nous vous remercions d avoir choisi cet onduleur de Mustek Veuillez lire et respecter toutes les instructions d utilisation indiqu es afin d u...

Страница 24: ...nduleur et des p riph riques connect s ne doit pas d passer 3 5 mA Attention risque d lectrocution Notez que m me lorsque l appareil est d branch du courant secteur sa batterie continue de fournir une...

Страница 25: ...r compact a t con u pour prot ger votre ordinateur d ventuelles pertes de donn es en cas de panne de courant Il incorpore trois voyants d tat Panneau avant PowerMust 1060 PowerMust 1590 2012 Panneau a...

Страница 26: ...sultats il est conseill de charger la batterie pendant au moins 6 heures avant de l utiliser pour la premi re fois L appareil charge automatiquement la batterie lorsqu il est branch sur le secteur Con...

Страница 27: ...heure R solution des probl mes Probl me Cause possible Solutions La batterie est faible Chargez l onduleur pendant au moins 6 heures La batterie est d fectueuse Remplacez la par une batterie de m me t...

Страница 28: ...vement en vert pour indiquer le niveau de charge Mode batterie Clignote en jaune Le voyant droite du bouton marche arr t clignote en vert puis les 4 voyants suivants s allument progressivement en vert...

Страница 29: ...29 Line Interactive UPS...

Страница 30: ...30 31 32 33 34 34 35 UPS Mustek...

Страница 31: ...31 UPS UPS UPS UPS UPS OFF UPS UPS UPS 3 5mA UPS 12Vdc 6 UPS 1 2 3 4 5...

Страница 32: ...32 UPS CD UPS UPS PowerMust 1060 PowerMust 1590 2012 1 2 3 4 5 4 2 3 6 PowerMust 1060 PowerMust 1590 2012 1 AC 2 x 4 3 4 USB B 5 6 AC...

Страница 33: ...33 6 hours UPS ON UPS UPS UPS 20 cm UPS P owerMust 1060 AC UPS 6 UPS UPS UPS RJ 11 RJ45 IN UPS OUT laser UPS...

Страница 34: ...34 USB RS 232 UPS USB RS 232 UPS UPS UPS Windows 4 CD CD ROM http www power software download com 1 CD setup exe 2 3 WinPower2004 UPS 6 UPS UPS UPS UPS UPS UPS 6...

Страница 35: ...1200 W 220 230 240 VAC 162 290 VAC 60 50 Hz 10 50 Hz 1 Hz 2 6 ms 10ms 12 V 7 AH x 2 12 V 9 AH x 2 12 V 9 AH x 2 120 W 30 40 50 4 6 90 2 5 2 5 10 0 5 Schuko IEC X X mm 350 x 146 x 160 397 x 146 x 205 8...

Страница 36: ...36 Linijski interaktivni UPS...

Страница 37: ...ornog softvera 41 Neispravnosti u radu 41 Tehni ke karakteristike 42 Hvala vam na kupnji Mustek UPS a Da biste sustav za neprekinuto napajanje UPS koristili sigurno pozorno pro itajte i pridr avajte s...

Страница 38: ...propu tanja izme u UPS a i priklju enog potro a a ne smije biti ve a od 3 5 mA Opasnost od elektri nog udara Nakon isklju ivanja ure aja iz strujne mre e postoji opasnost od visokog napona putem bate...

Страница 39: ...tu ra unalnih podataka u slu aju prekida napajanja elektri nom energijom Status UPS a ozna ava se putem tri kontrolne lampice Prednja strana ure aja PowerMust 1060 PowerMust 1590 2012 Stra nja strana...

Страница 40: ...barem 6 sata prije prve uporabe Ure aj puni bateriju dok je spojen na elektri nu mre u Priklju ivanje potro a a Potro a e priklju ite u izlazne uti nice na stra njoj plo i UPS a Uklju ite glavnu sklop...

Страница 41: ...enje Istro ena baterija Napunite UPS najmanje 6 sata Neispravna baterija Zamijenite bateriju novom baterijom iste vrste Ne svijetle lampice na prednjoj plo i UPS nije uklju en Pritisnite glavnu sklop...

Страница 42: ...na Svijetli desna zelena lampica a 2 do 5 zelena lampica postupno ozna avaju optere enje Baterijsko napajanje Treperi uta Treperi desna zelena lampica a 2 do 5 zelena lampica postupno ozna avaju kapac...

Страница 43: ...43 UPS interattivo alla linea Manuale base...

Страница 44: ...e 48 Risoluzione dei problemi 48 Specifiche 49 Grazie per aver acquistato un UPS Mustek Affinch questo sistema di alimentazione ininterrotta funzioni correttamente leggere e seguire attentamente tutte...

Страница 45: ...di dispersione del gruppo di continuit per il consumatore collegato sia superiore a 3 5 mA Attenzione rischio di scosse elettriche Anche dopo aver disconnesso l unit dall alimentazione a corrente lo...

Страница 46: ...evitare la perdita di dati del PC a causa di interruzioni di corrente Il dispositivo dotato di tre LED che consentono di controllarne lo stato Panoramica del pannello anteriore PowerMust 1060 PowerMu...

Страница 47: ...a volta Quando connesso al dispositivo l UPS carica la sua batteria http tw news yahoo com article url d a 081203 2 1ahvp htmlCollegare i carichi alle prese in uscita sul pannello posteriore dell UPS...

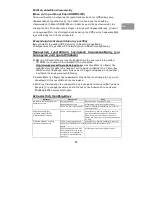
Страница 48: ...rollo Risoluzione dei problemi Problema Causa possibile Soluzioni Batteria scarica Caricare il dispositivo per almeno 6 ore Batteria non funzionante Sostituirla con un altra dello stesso tipo I LED su...

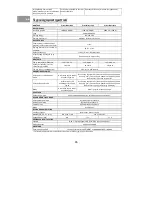
Страница 49: ...cendono gradualmente a indicare il livello di carico Modalit batteria Luce gialla lampeggiante Il LED verde a destra lampeggiante e dal 2 al 5 LED verdi che si accendono gradualmente a indicare la cap...

Страница 50: ...50 Interaktywny zasilacz UPS Instrukcja obs ugi...

Страница 51: ...m w 55 Dane techniczne 56 Dzi kujemy za zakup zasilacza UPS Mustek W celu bezpiecznego u ytkowania niniejszego zasilacza bezprzerwowego nale y dok adnie przeczyta wszystkie poni sze instrukcje i post...

Страница 52: ...u up ywowego zasilacza UPS do pod czonych urz dze nie przekracza 3 5 mA Uwaga niebezpiecze stwo pora enia pr dem Nawet po od czeniu urz dzenia od r d a zasilania jego akumulator mo e wytwarza wysokie...

Страница 53: ...uter przed utrat danych spowodowan przerw w dop ywie pr du zasilaj cego Zasilacz jest wyposa ony w trzy kontrolki LED informuj ce o jego stanie Widok panelu przedniego PowerMust 1060 PowerMust 1590 20...

Страница 54: ...ycz ce dopuszczalnych zakres w temperatury i wilgotno ci P owerMust 1060 Pod czanie do r d a zasilania i adowanie Pod czy zasilacz do gniazda zasilania Przed pierwszym u yciem akumulator nale y adowa...

Страница 55: ...eceniami wy wietlanymi na ekranie monitora 3 Gdy komputer uruchomi si ponownie oprogramowanie monitoruj ce b dzie widoczne jako pomara czowa ikona na pasku systemowym w pobli u zegara Rozwi zywanie pr...

Страница 56: ...do 5 wskazuj ce poziom na adowania Tryb akumulatorowy Migaj ca ta kontrolka Migaj ca z prawej strony zielona dioda LED i zapalaj ce si stopniowo zielone diody 2 i 5 wskazuj ce pojemno akumulatora Ust...

Страница 57: ...57 UPS Line Interactive Manual de Inicia o...

Страница 58: ...Monitoriza o 62 Resolu o de Problemas 62 Especifica es 63 Obrigado por ter adquirido uma UPS Mustek Para utilizar com seguran a esta fonte de alimenta o ininterrupta leia e siga cuidadosamente as ins...

Страница 59: ...dum choque el ctrico Mesmo depois de desligar esta unidade da rede el ctrica ainda poss vel que haja tens es perigosas provenientes da energia fornecida pela bateria A energia fornecida pela bateria...

Страница 60: ...os no seu PC devida a interrup es no fornecimento de energia Esta UPS possui tr s LEDs indicadores do estado da unidade Vista Geral do Painel Dianteiro PowerMust 1060 PowerMust 1590 2012 Vista Geral d...

Страница 61: ...ntes de utilizar a UPS pela primeira vez A unidade carrega a respectiva bateria enquanto ligada rede el ctrica Ligar as Cargas Ligue as cargas aos recept culos de sa da no painel traseiro da UPS Ao li...

Страница 62: ...UPS durante pelo menos 6 horas Bateria avariada Substitua a bateria por outra do mesmo tipo N o h nenhum LED aceso no painel dianteiro A UPS n o est ligada Prima novamente o interruptor de alimenta o...

Страница 63: ...2 a 5 LEDs verdes acendem se gradualmente para indicar o n vel de carga Modo de Bateria Luz amarela a piscar LED verde direita pisca e o 2 a 5 LEDs verdes acendem se gradualmente para indicar o n vel...

Страница 64: ...64 Surs ne ntreruptibil n linie interactiv Manual de ini iere...

Страница 65: ...l 69 Depanarea 69 Specifica ii 70 V mul umim pentru achizi ionarea sursei ne ntreruptibile Mustek Pentru utilizarea n siguran a acestui sistem de surs de alimentare ne ntreruptibil citi i i urma i cu...

Страница 66: ...tibile c tre dispozitivul conectat s nu dep easc 3 5 mA Aten ie pericol de ocuri electrice De asemenea trebuie avut n vedere c exist pericol de electrocutare i la deconectarea acestui aparat de la sur...

Страница 67: ...pe PC ul dvs la ntreruperea aliment rii Aceast surs ne ntreruptibil este dotat cu trei indicatoare LED pentru a prezenta starea sursei Prezentare general a panoului frontal PowerMust 1060 PowerMust 15...

Страница 68: ...limite P owerMust 1060 Conectarea la circuitul de alimentare i nc rcarea Conecta i cablul de alimentare cu c a la priz Pentru a ob ine cele mai bune rezultate nc rca i acumulatorul cel pu in 6 ore na...

Страница 69: ...puterului software ul de monitorizare apare ca o pictogram portocalie n bara de sistem l ng ceasul sistemului Depanarea Problem Cauz posibil Solu ii Acumulator desc rcat nc rca i sursa cel pu in 6 ore...

Страница 70: ...i LED urile verzi de la 2 la 5 aprinse gradual indic nd nivelul de nc rcare Mod acumulator LED galben intermitent LED ul verde dreapta intermitent i LED urile verzi de la 2 la 5 aprinse gradual indic...

Страница 71: ...71...

Страница 72: ...72 73 74 75 76 76 77 Mustek...

Страница 73: ...73 OFF 3 5 12 6 1 2 3 4 5...

Страница 74: ...74 PowerMust 1060 PowerMust 1590 2012 1 2 3 4 5 4 2 3 6 PowerMust 1060 PowerMust 1590 2012 1 2 4 3 4 USB 5 6...

Страница 75: ...75 ON 20 P owerMust 1060 6 RJ 11 RJ45 IN OUT USB RS 232...

Страница 76: ...76 USB RS 232 Windows 1 CD ROM http www power software download com setup exe 2 3 6 6...

Страница 77: ...00 1500 900 2000 1200 220 230 240 162 290 60 50 10 50 1 2 6 10 12 7 A x 2 12 9 A x 2 12 9 A x 2 120 30 40 50 4 6 90 2 5 2 5 10 0 5 Schuko IEC 350 x 146 x 160 397 x 146 x 205 8 0 11 1 11 5 0 40 C 0 90...

Страница 78: ...78 Line Interactive UPS Priru nik za instalaciju...

Страница 79: ...softvera 83 Re avanje problema 83 Specifikacije 84 Zahvaljujemo Vam na kupnji Mustek UPS a Pa ljivo pro itajte i sledite sva uputstva da biste obezbedili siguran rad ovog sistema za neprekidno napajan...

Страница 80: ...na struja izme u UPS a i spojenog potro a a ne prelazi preko 3 5 mA Opasnost od strujnog udara Nakon isklju ivanja ure aja iz elektri ne mre e postoji opasnost od visokog napona putem baterijskog napa...

Страница 81: ...unarskih podataka u slu aju prekida napajanja elektri nom energijom Status UPS a ozna ava se sa tri kontrolne lampice Prednja plo a PowerMust 1060 PowerMust 1590 2012 Zadnja plo a 1 2 3 4 5 4 2 3 6 Po...

Страница 82: ...prvog kori enja Ure aj puni bateriju dok je spojen na elektri nu mre u Spajanje potro a a Potro a e priklju ite u izlazne uti nice na zadnjoj plo i UPS a Uklju ite glavni prekida UPS a i svi ure aji...

Страница 83: ...a UPS punite barem 6 sati Kvar baterije Zamenite bateriju novom baterijom istog tipa Lampice na prednjoj plo i ne svetle UPS se ne uklju uje Ponovo pritisnite glavni prekida da biste uklju ili UPS Ala...

Страница 84: ...2 do 5 povremeno svetle ozna avaju i nivo napunjenosti Baterijsko napajanje uti titra Desni zeleni indikator titra a indikatori 2 do 5 povremeno svetle ozna avaju i kapacitet baterije Kvar Crveni svet...

Страница 85: ...85 PowerMust 1060 1590 2012 Line Interactive UPS...

Страница 86: ...ERROR ioerror OFFENDING COMMAND image STACK...

Отзывы: