background image


11

Scan Settings

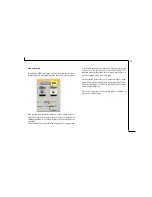
The Main Tab

The Main tab allows you to control the scanning
parameters, such as scan mode, scan source, resolution,
etc. These parameters determine how the original image
or document will be scanned.

Scan Mode
The Scan Mode determines how the scanner reads the original image
or document. When choosing a scan mode, it is recommended to
consider what purpose the resulting scanned image will be used for.

•LineArt
Use this mode to scan text documents for use
in OCR (Optical  Character  Recognition) or
when you wish to scan black-and-white
drawings.

Gray
Select Gray to capture images in shades of gray.

Color
Select Color to capture images in color.

Содержание 1200 UB PLUS - TWAIN DIALOG BOX

Страница 1: ...Scanner USER S GUIDE Appendices The TWAIN Dialog Box...

Страница 2: ...stallation This equipment generates uses and can radiate radio fre quency energy and if it is not installed and used according to the in struction manual it may cause harmful interference to radio com...

Страница 3: ...can Mode 7 5 Set the Resolution 7 6 Execute the Scan 7 The TWAIN Dialog Box Details 8 The Preview Window and Buttons 9 The Image Setting Buttons 10 Scan Settings 11 The Main Tab 11 The Enhance Tab 14...

Страница 4: ...allows scanning directly into any TWAIN compliant software It eliminates most compatibility problems associated with software and input devices supplied by different vendors You can access the TWAIN...

Страница 5: ...Launch Photo Express TWAIN compliant program 3 Under the File menu open the Acquire command and choose Scanner The Select Data Source dialog box appears 4 Choose your scanner model from the list 5 Cl...

Страница 6: ...5 Select the desired resolution 6 Click the Scan button 1 Place the Document Image To scan a document place your original face down on the scanner s glass plate and then please follow these steps a Li...

Страница 7: ...area select A4 Custom will automatically be selected when you use the Crop Frame to change the image area to be scanned 4 Set the Scan Mode The Scan Mode determines how the scanner will view the image...

Страница 8: ...regarding the features and functions of your scanner software please refer to the on line help system by clicking on the Help icon Cropping Tool Cropping Tool Allows you to selectively scan a portion...

Страница 9: ...Tool You can select an area if you don t want to scan the whole document This is optional Zoom Tools The Zoom In tool increases the magnification multiple levels of the image area In magnified view yo...

Страница 10: ...p Provides on line help for the scanner and software functions Language Icon Selects the language you would like to view the TWAIN interface in Exit Icon Exits the program The Image Setting Buttons Th...

Страница 11: ...Scan Mode determines how the scanner reads the original image or document When choosing a scan mode it is recommended to consider what purpose the resulting scanned image will be used for LineArt Use...

Страница 12: ...be selected when you use the Crop Frame to change the image area to be scanned Resolution The Resolution which is measured in dots per inch dpi determines the appearance of the image as it is displaye...

Страница 13: ...s the lightest and darkest areas of an image so that they are evenly distributed Output Scaling Output scaling allows you to enlarge shrink the size of the final output image Adjust the scaling by usi...

Страница 14: ...image A value of 127 will make the image appear very dark whereas a value of 127 will make the image appear very bright Brightness 50 Brightness 0 Brightness 50 The Enhance Tab The Enhance tab contai...

Страница 15: ...little white triangle to control the amount of hightlights and the black triangle to the shadows if you haven t set the two values using the eyedroppers The gray triangle in the middle controls the im...

Страница 16: ...the shadow at cost of the highlight and midtone If done properly you can energize a dull image using curves without sacrificing the overall image quality To write a curve simply place an anchor on th...

Страница 17: ...Slider is composed of two color bars The upper one is static and the lower one movable Slide the latter and you will see the image shift its overall coloring This function mostly affects loud colors...

Страница 18: ...fect in the sample thumbnail None No filter is applied if None default setting is selected Blur The Blur filter smoothes the image by lightening the pixels that are in sharp contrast to their neighbor...

Страница 19: ...ge horizontally Unsharp Mask The Unsharp Mask filter detects sharp edges and color boundaries and then emphasizes them Emboss The Emboss filter makes the elements in an image appear raised or sunken b...

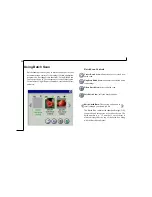
Страница 20: ...ore Batch Scan Controls Create Batch Scan allows the user to create a new batch scan Duplicate Batch Scan duplicates the selected batch scan settings Delete Batch Scan deletes a batch scan Exit Batch...

Страница 21: ...de and resolution for the current scan region 3 Repeat steps 2 if you wish to create additional scan regions 4 Click Scan The scanner will begin to scan the batch jobs one after the other NOTE You can...

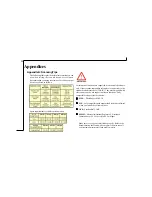
Страница 22: ...e supported via the standard software interface TWAIN They are compatible with this scanner but do not support our latest functions Fully compatible softwares are listed below SCAN PhotoExpress SE 3 0...

Страница 23: ...tion of your Windows control panel after first making sure that you have the proper driver disks to restore your system to the original settings You should be using a driver that provides 16 million c...

Отзывы: