8
Step 4 – Reconnecting the electrical assembly on the opposite side (Continued)
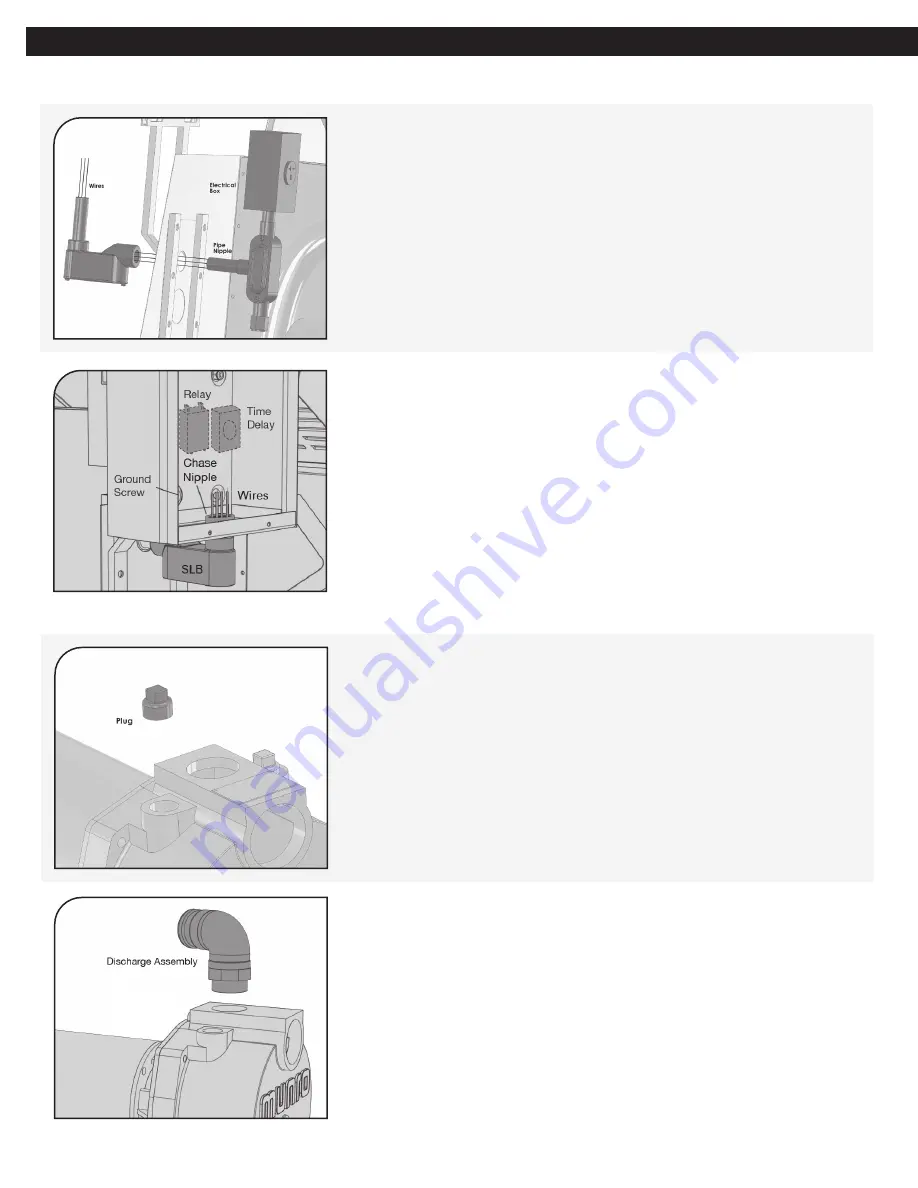
2. With the electrical outlet assembly on the inside, feed the
outlet assembly wires and pipe nipple through the round hole
on the electrical pass-through panel of the enclosure.
3. On the outside of the pump enclosure, thread the wiring
through the round opening on the end of the SLB. Screw
the SLB to the pipe nipple on the electrical outlet assembly.
Ensure that the other round opening is facing up, toward the
control box, and the uncovered access is facing down.
4. Screw the chase nipple through the knockout hole on the
bottom of the pump control box and into the SLB to secure
the SLB to the bottom of the pump control box. Use 1” box
wrench to tighten the chase nipple on the SLB.
5. Thread the wiring from the SLB into the pump control box,
passing through top SLB hole and chase nipple. Replace SLB
cover plate.
6. Rewire the control panel using the instructions found on the
inside of the box lid. Replace time delay device (if supplied).
Step 5 – Changing the pump direction
Remove Forward Plug
1. Remove front plug at the top of the pump.
2. Using a pipe wrench, remove top discharge assembly from top
of pump.
Munro Complete PRO ll
ASSEMBLY GUIDE


