Page 9
Page 10
STEP 11
VIDEO
link
BRK - 01 X 2
VTB - 01X 8
ATTENTION / HOW TO / READ ME / OWNER'S GUIDE
1.
Cabinets must be securely attached either to the wall and / or side of the
wall bed. Hardware is included
2.
When mounting to drywall, use appropriate fasteners, such as toggle bolts
or attach to wooden or metal studs. Please choose appropriate fasteners for
the type of wall and / or studs the cabinet will be mounted on. Drywall
mounting fasteners are not included.
3.
For safety and product longevity you must periodically inspect the integrity
and tightness of the mounting and mechanical connections. Confirm
hardware remains properly affixed and connections are snug.
4.
Do not lean or rest heavy objects on sides or top of furniture. This may cause
balance issues and compromise the integrity of your mounting connections.
5.
Please use cabinet shelves and clothes rails as intended. Do not place
extremely heavy items on shelves and / or drawers. Improper use may cause
personal injury and damage to property.
6.
With seasonal humidity change please inspect the interior and exterior of the
furniture for deformation and/or discoloration.
7.
Before any un-mounting or disassembly please contact Multimo Beds for
technical support and instructions. Failure to properly detach may result in
personal injury and damage to property.
Содержание A 502
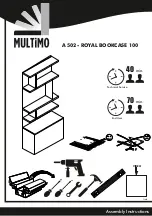
Страница 1: ...Assembly Instructions VIDEO link 40 min 70 min Technical Service End User A 502 ROYAL BOOKCASE 100...
Страница 3: ...Page 2 A B B C D G H L E M F R F L B B...
Страница 5: ...Page 4 STEP 2 VIDEO link H G STEP 3 H 210 MNG 01 x 8 F R F L G MNG 01 MNG 01 L 210 MNG 01 x 4...
Страница 6: ...Page 5 STEP 4 VIDEO link STEP 5 VD 03 X 4 M VD 03 X 4 M TS 01 x 2 VD 03 X 2 VD 03 X 3 AMR 01 120N...
Страница 7: ...Page 6 STEP 6 VIDEO link B E VDA 01 X 4 AL 01 A CT 02 X 2 AL 01 A B STEP 7...
Страница 8: ...Page 7 STEP 8 VIDEO link B D STEP 9 B B C B VDA 01 X 4 AL 01 VDA 01 X 4 AL 01...
Страница 9: ...Page 8 STEP 10 VIDEO link B VDA 01 X 4 AL 01...
Страница 10: ...Page 9 STEP 11 VIDEO link BRK 01 X 2 VTB 01X 8...
Страница 12: ...www mult mobeds com...


