background image

User Manual


Measurement Category   

The multimeter has a safety rating of 1000 V, CAT III and 600 V, CAT IV.   
 

Measurement category definition   

 
Measurement  CAT  I  applies  to  measurements  performed  on  circuits  not  directly 
connected to the AC mains. Examples are measurements on circuits not derived from the 
AC mains and specially protected (internal) mains- derived circuits. 
 
Measurement  CAT  II  applies  to  protect  against  transients  from  energy-consuming 
equipment  supplied  from  the  fixed  installation,  such  as  TVs,  PCs,  portable  tools,  and 
other household circuits. 
 
Measurement CAT III  applies  to  protect  against  transients  in  equipment  in  fixed 
equipment  installations,  such  as  distribution  panels,  feeders  and  short  branch  circuits, 
and lighting systems in large buildings.   
 
Measurement  CAT  IV  applies  to  measurements  performed  at  the  source  of  the  low- 
voltage installation. Examples are electricity meters and measurements on primary over 
current protection devices and ripple control units. 

Содержание MP730026

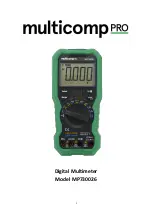
Страница 1: ...i Digital Multimeter Model MP730026...

Страница 2: ...Multimeter in Brief 7 Front panel 7 Rotary switch 8 Keypad 8 Display screen 9 Input terminals 10 3 Making Measurements 12 Measuring AC or DC Voltage 12 Measuring Resistance 12 Testing for Continuity...

Страница 3: ...e Error Bookmark not defined User Interface in iOS App Error Bookmark not defined Operations in iOS App Error Bookmark not defined Multimeter Offline Record iOS Error Bookmark not defined 6 To Connect...

Страница 4: ...lways use the specified battery type The power for the multimeter is supplied with a battery Observe the correct polarity markings before you insert the batteries to ensure proper insertion of the bat...

Страница 5: ...ears and flashes Disconnect circuit power and discharge all high voltage capacitors before testing resistance continuity diodes or capacitance Use the proper terminals function and range for your meas...

Страница 6: ...lies to protect against transients from energy consuming equipment supplied from the fixed installation such as TVs PCs portable tools and other household circuits Measurement CAT III applies to prote...

Страница 7: ...ions or practices that could result in damage to this product or other property Terms on the Product The following terms may appear on this product Danger It indicates an injury or hazard may immediat...

Страница 8: ...tly Install the Batteries The multimeter is powered by a 9V 6F22 battery Warning To avoid false readings which could lead to possible electric shock or personal injury replace the battery as soon as t...

Страница 9: ...ion mode from the sleep mode One minute before Auto Power off the buzzer will beep five times to warn Before shutoff the buzzer will emit a long beep and then the multimeter will shut off Note In slee...

Страница 10: ...onds to enter the auto ranging mode Note Manual range is not available when measuring capacitance Multimeter in Brief Front panel 1 2 3 4 5 6 7 8 Figure 2 1 Front panel overview MP730026 with hFE is s...

Страница 11: ...ts Resistance measurement Page 12 Continuity test Page 13 Diode test Page 13 Capacitance measurement Page 13 Frequency measurement Page 14 Temperature measurement Page 14 Non contact voltage detect Pa...

Страница 12: ...elative Measurements Page 16 Bluetooth only for MP730026 Page Error Bookmar k not defined Display screen Figure 2 2 Display screen Symbol Description Details Bluetooth enabled Page Error Bookmark not...

Страница 13: ...Description M Mega 1E 06 1000000 k kilo 1E 03 1000 m milli 1E 03 0 001 micro 1E 06 0 000001 n nano 1E 09 0 000000001 Sign Description Measurement type Degree Celsius Temperature Degree Fahrenheit V V...

Страница 14: ...e multimeter and then connect the test leads to the correct terminals Caution To avoid damaging the multimeter do not exceed the rated input limit Rotary switch position Input terminals Overload prote...

Страница 15: ...Press to switch into AC measurement mode will be displayed 2 Connect the black test lead to the terminal and the red test lead to the terminal 3 Probe the test points and read the display Press to en...

Страница 16: ...ltage capacitors before testing diodes 1 Rotate the rotary switch to Press twice to enter diode testing mode will be displayed 2 Connect the black test lead to the terminal and the red test lead to th...

Страница 17: ...K type thermocouple to the terminal and the black connection to the terminal 3 Probe the test points and read the display Non Contact Voltage Detect NCV To detect the presence of AC voltage place the...

Страница 18: ...Discharge all high voltage capacitors 2 Connect the black test lead to the terminal For currents below 600 mA connect the red test lead to the terminal for currents within 600 mA 10 A connect the red...

Страница 19: ...hould be carried out under a certain range that is this function is only available under the manual range mode Note This function is not available when measuring AC voltage current transistor only for...

Страница 20: ...ber of record that can be stored depends on the free storage space in your smart device Up to three multimeters can be connected simultaneously Note Bluetooth connectivity works over a range of about...

Страница 21: ...User Manual 18 3 Select I accept the agreement and then click Next...

Страница 22: ...User Manual 19 4 Select the destination folder and then click Next 5 Click Install...

Страница 23: ...desktop or in Start menu In the drop down menu click on Manage the Computer Management window opens Click on Device Manager on the left hand side On the right hand side double click on Ports COM LPT...

Страница 24: ...e If an unknown device is displayed try to install the driver manually following the steps below How to install the driver manually Right click the unknown device icon in the drop down menu click Upda...

Страница 25: ...wse my computer for driver software Select a directory path for the driver and click Next After installing successfully click Close In Device Manager check if TI CC2540 USB CDC Serial Port COM is disp...

Страница 26: ...luetooth USB adapter is plugged into the computer To find the Port COM you will need to look for it under Ports COM LPT in Device Manager window Select the port number and click OK 2 Turn on the multi...

Страница 27: ...n is finished select the desired multimeter in the device list Click the Connect button 4 The measurements will be shown if the connection is successful You can tap on the softkey on the right to add...

Страница 28: ...er device Single Device View Single Device View Range AUTO MANUAL Function Details follow Multi device View Move the cursor here to show click to delete the device Function Description Table Display F...

Страница 29: ...ng keys of the multimeter Unify the unit types In Graph Table view sometimes the unit type will be changed while recording for example V is changed to mV To unify the unite types click Function on the...

Страница 30: ...e recording data of one time When start to record the earlier offline record stored in the multimeter will be overwritten Note If you want to interrupt the recording process of the multimeter reconnec...

Страница 31: ...User Manual 28 7 Click Open Directory to open the directory where the CSV files are saved...

Страница 32: ...0 01mV 0 8 3dig V 600 0mV 0 1 mV 2 5dig V 6 000V 60 00V 600 0V 1mV 0 8 3dig V 750V 1V 1 3dig DC Current A A 600 0 A 6000 A 0 1 A 0 8 2dig mA 60 00mA 600 0mA 0 01mA 0 8 2dig A 20 00A 2 0 01A 1 2 3dig A...

Страница 33: ...ts the following conditions Frequency Amplitude rms 1 Hz 5 MHz 700 mV 5 When measuring duty cycle the typical waveform is Square Characteristics Instruction Display 5999 Frequency Response Hz 40 1000...

Страница 34: ...31 7 Appendix Appendix A Enclosure Standard Accessories Test lead K type thermocouple Quick guide 9V battery 6F22 Bolt driver Crocodile clip only for MP730026 Options Bluetooth USB adapter to PC only...

Страница 35: ...or moisture in the terminals can distort readings Follow the steps below to clean your multimeter 1 Turn the multimeter off and remove the test leads 2 Turn the multimeter over and shake out the dirt...

Отзывы: