28
IHL_UDARA_2016_11_04_BEGB
8 Troubleshooting
8.1.2
Er wordt wel ionisatiestroom gevormd
Indien u vaststelt dat er wel ionisatiestroom is
geweest, volgt u volgende tips om de oorzaak van het
probleem te vinden.
1. Kijk eerst na of er geen rookgas wordt aangezo-
gen. Dit gebeurt vaak indien de afdichting in de
schuifmof ontbreekt of indien de schuifmof niet
correct gemonteerd is.
2. Controleer de gasdruk in de toevoerleiding. Deze
moet conform de eisen zijn in de tabel technische
gegevens.
3. Controleer de bedrading, speci
fi
ek de aarde draad
en de hoogspanningskabel die de besturingseen-
heid en ontsteekpen verbindt en de kabel van de
ionisatiepen naar de branderautomaat.
4. Controleer het starttoerental van de ventilator.
5. Controleer de brander en de montageplaat op
vormen van lekkage.
6. Vervang de branderautomaat.
Info
Zelfs met geopend voordeksel kan aangezogen
rookgas ervoor zorgen dat de ontsteking faalt. De
ionisatiestroom fl uctueert dan en met een gewone
multimeter is dit niet meetbaar.
8.1.3
L’appareil toussote au démarrage
L’Udara est équipé d’une régulation adaptative. La
quantité de gaz injecté est variable et adaptée par le
régulateur. Si ce dernier ne détecte pas de
fl
amme, il
va injecter plus de gaz lors de la tentative suivante. Si
alors, après la quatrième tentative, il y en a une ultime
et que soudain la
fl
amme se forme, cela peut aller de
pair avec un bruit de toussotement. La cause est dans
tous les cas une « étincelle tardive ».
En d’autres termes, l’étincelle s’amorce au mauvais
endroit et a pour effet que l’amorçage du brûleur n’a
pas lieu ou est mauvais. Les causes peuvent être les
suivantes :
•
câble d’amorçage défectueux/électrode
d’amorçage éclatée
•
présence de morceaux de
fi
bres métalliques
•
canaux d’amorçage bouchés dans le brûleur ;
•
bouclier thermique défectueux.
Les morceaux de
fi
bres métalliques sont de petits
morceaux de
fi
l qui se détachent du brûleur en
fi
bres
métalliques et se trouvent très près de l’électrode
d’amorçage. De ce fait, l’étincelle s’amorce avec le
tapis du brûleur plutôt qu’avec l’électrode de masse de
l’électrode d’amorçage. Vous pouvez les enlever rapi-
dement en frottant doucement le brûleur avec le doigt.
8.1
Appliance does not start after 5
attempts
Measure the ionisation current by positioning a current
meter (
μ
A) in series at the ionisation electrode and the
burner management control system.
8.1.1
An ionisation current is not being formed
If you determine that an ionisation current is not being
formed during the ignition phase, this points to a lack
of a
fl
ame.
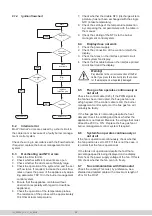
Check the following:
1. Check whether the gas valve is open.
2. Check the gas pressure in the supply pipe. This
must be in accordance with the technical data.
3. Open the appliance and allow the loose ignition
electrode to spark. If a spark is not formed, you
must replace the high-voltage cable, the ignition
electrode or the control unit.
4. Check whether the protection shut-off valve swit-
ches by measuring the voltage.
5. Check whether gas is
fl
owing in the protection
shut-off valve by measuring the drop in pressure
over the valve during switching.
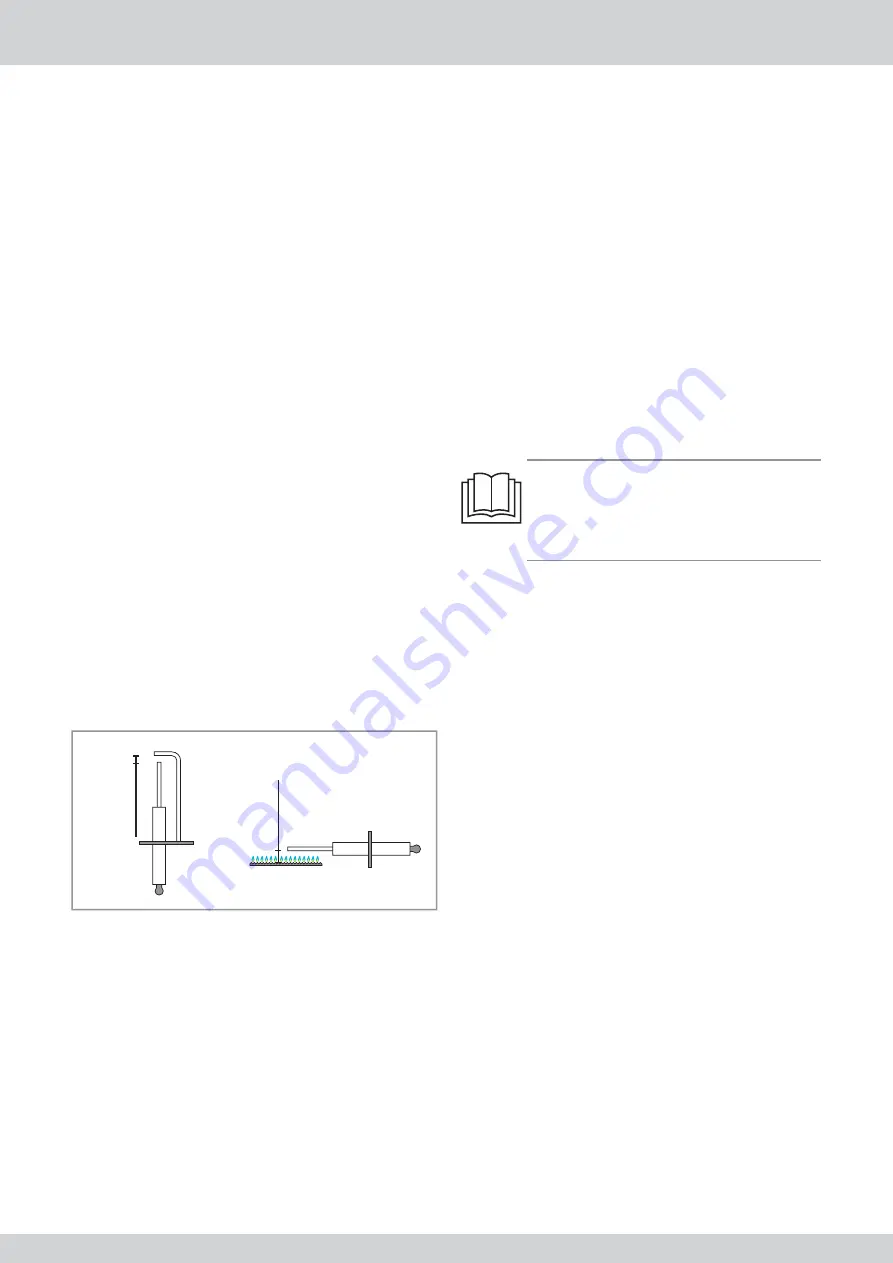
6. Remove the burner and check the distance
between the ignition electrode and the earth elec-
trode. That must amount to approximately 3.5 or
4.0 mm.
7. The bottom side of the ignition electrode must be
at a height of 7.2 mm above the metal burner mat.
8. The bottom side of the ionisation electrode must
be at a height of 7.2 mm above the metal burner
mat. If the ionisation electrode has been signi
fi
-
cantly deformed, it must be replaced.
3.5 - 4.0 mm
6.5 - 7.
5 mm
8.1.2
An ionisation current is being formed
If you determine that there has been an ionisation cur-
rent, follow the following tips to
fi
nd the cause of the
problem.
1. First check whether
fl
ue gas is not being sucti-
oned. This often happens if the seal in the sliding
joint is missing or if the sliding joint has not been
installed correctly.
2. Check the gas pressure in the supply pipe. This
must be in accordance with the requirements in
the technical data table.
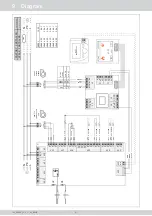
3. Check the wiring and speci
fi
cally the earthing wire
and the high-voltage cable that connects the con-
trol unit and the ignition electrode and the cable of
the ionisation electrode to the burner management
control system.
4. Check the starting speed of the fan. Check the
burner and the mounting plate for leaks.
5. Replace the burner management control system.
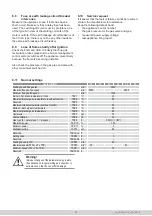
Information
Even with an opened front cover suctioned fl ue gas
can lead to the ignition failing. The ionisation current
will then fl uctuate and this cannot be measured with
a standard multimeter.
8.1.3
Appliance seems to make a backfi ring
noise when it is started
The Udara is equipped with a gas-adaptive control.
The quantity of gas that is injected is variable and
is adjusted by the controller. If the controller does
not detect a
fl
ame, the controller will inject more gas
during the next attempt. If a last ignition attempt is
made after the fourth try and suddenly a
fl
ame is
formed, this may be coupled to a sound like something
back
fi
ring. The cause for this, in all cases, is “late
spark”, in other words, there is a
fl
ame
fl
ashover at the
wrong place and this means that the burner does not
or only ignites poorly. The reason can be one of the
following causes:
•
faulty ignition cable/cracked ignition electrode;
• metal
fi
bres;
• obstructed
fl
ashover pipes in the burner;
•
faulty heat shield.
Metal
fi
bres are small pieces of
fi
bres that are released
from the metal
fi
bre burner and that can be found
very close to the ignition electrode. This means that
the spark
fl
ashes over to the burner mat instead of to
the earth electrode of the ignition electrode. You can
remove them quickly by simply softly rubbing over the
burner with your
fi
nger for a second.
Содержание 10
Страница 4: ...4 IHL_UDARA_2016_11_04_BEGB ...


