background image

O-Gauge Installation

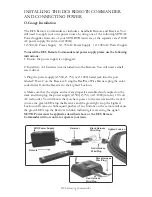
The DCS Remote Commander set includes a handheld Remote and Receiver. You 
will need to supply your own power source by using one of  the following MTH AC 
Power Supplies from one of  your MTH RTR train sets, or the separate sale Z-1000 
AC power supply (Item No. 40-1000A).  
• Z-500 AC Power Supply   • Z-750 AC Power Supply   • Z-1000 AC Power Supply

To install the DCS Remote Commander and power supply please use the following 
instructions:

1. Ensure the power supply is unplugged.

2. Install two AA batteries (not included) into the Remote. You will need a small 
screw driver.

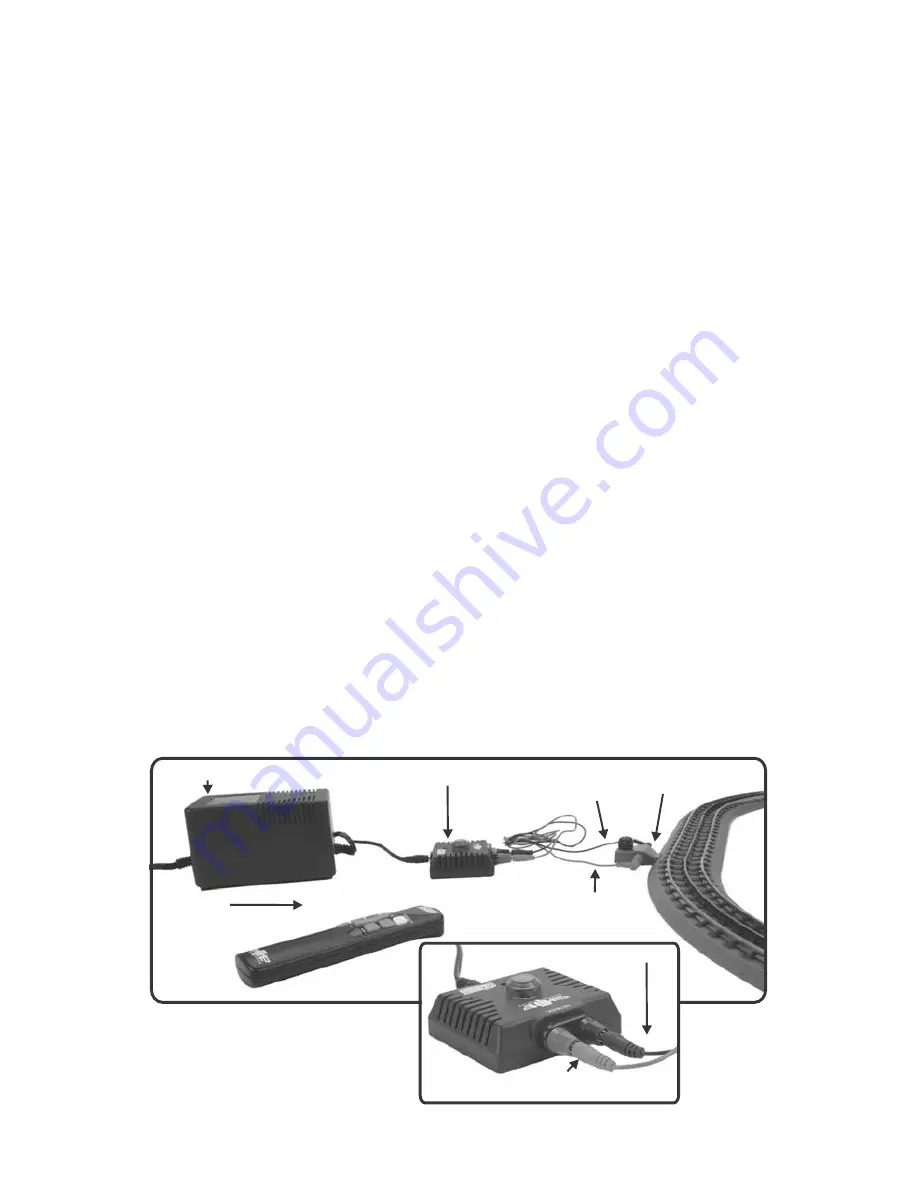
3. Plug the power supply (Z-500, Z-750, or Z-1000) barrel jack into the port 
labeled “Power” on the Receiver. Using the RealTrax Wire Harness plug the color-
coded wires from the Receiver to the Lighted Lock-on.

4. Make sure that the engine and cars are properly assembled and coupled on the 
track and then plug the power supply (Z-500, Z-750, or Z-1000) into any 110 volt 
AC wall outlet. You will know that you have power to the receiver and the track if  
you see the green LED atop the Receiver and the green light atop the Lighted 
Lock-on will come on. Subsequent pushes of  any buttons on the remote will cause 
the green LED atop the Receiver to blink, indicating it is receiving the signal.

NOTE: Power must be applied as described above or the DCS Remote 
Commander will not control or operate your train.

Red Harness 
Wire/Plug

Black Harness 
Wire/Plug

Lighted Lock-on

Receiver

MTH Power Supply

Remote

Red Harness 
Wire/Plug

Black Harness 
Wire/Plug

DCS Remote Commander

3

INSTALLING THE DCS REMOTE COMMANDER 
AND CONNECTING POWER

Содержание dcs remote commander

Страница 1: ...Instruction Manual PLEASE READ THE MANUAL BEFORE USE AND SAVE WWW MTHTRAINS COM ...

Страница 2: ...served includingthefollowing Read thismanualthoroughlybeforeusingthisdevice M T H recommends that all users and persons supervising use examine the hobby transformer and other electronic equipment periodically for conditions that may result in the risk of fire electric shock or injury to persons such as damage to the primary cord plug blades housing output jacks or other parts In the event such co...

Страница 3: ...rax Wire Harness plug the color coded wires from the Receiver to the Lighted Lock on 4 Make sure that the engine and cars are properly assembled and coupled on the track and then plug the power supply Z 500 Z 750 or Z 1000 into any 110 volt AC wall outlet You will know that you have power to the receiver and the track if you see the green LED atop the Receiver and the green light atop the Lighted ...

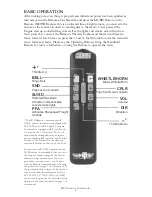
Страница 4: ... sound smoke lights BELL Rings Bell WHISTLE HORN Blows Whistle Horn CPLR Fires front rear couplers VOL Volume DIR Direction R Throttle Down F Throttle Up DCS Remote Commander 4 The DCS Remote Commander will ONLY operate locomotives equipped with M T H Proto Sound 2 0 and 3 0 systems Locomotives equipped with Proto Sound 2 0 must be the 3 volt model The 3 volt model can be distinguished by its squa...

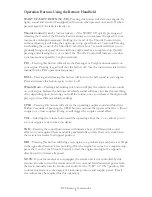
Страница 5: ...sound on your engine Release the button and whistle sound will decay just like the real thing Also depending upon how long you hold the button once you release it the engine will play up to three different whistle endings CPLR Pressing this button will activate the operating coupler sound and functions Within 2 seconds of pressing the CPLR button you must then press either the front coupler or rea...

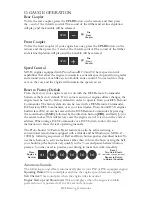
Страница 6: ...thin a few seconds the engine will start and move out on its own at the current throttle setting in the same direction it was traveling when you began the sequence Once the bell turns off the operator regains control of the transformer s Bell and Horn Whistle buttons and can ring the bell or blow the horn whistle as usual Tips on Using FYS PSA You can terminate FYS PSA at any time by pressing the ...

Страница 7: ...ur local dealer Proto Sound 3 0 engines built in late 2014 on can be reset with the DCS Remote Commander by pressing the sound button SND followed by the direction button DIR and lastly on the center rocker This will factory reset the engine even if it is not on the correct address When using a DCS Commander or a DCS System follow the reset instructions in those device s operating manuals The Prot...

Страница 8: ...button then press on the throttle control to raise the volume 1 Ensure the model has coil wound proto couplers 2 Press the CPLR button then press or on the throttle control within 2 seconds to fire the front or rear coupler Press the VOL button then press or on the throttle control within 2 seconds to raise or lower engine volume Press the DIR button to cycle through all four PFA sequences Engine ...

Страница 9: ...rvice Centers If you need assistance at any time email MTH Service at service mth railking com or call 410 381 2580 Limited One Year Warranty All M T H products purchased from an M T H Authorized Retailer are covered by this warranty provided the product was manufactured within five years of the date of purchase This warranty is for the original purchaser and is non transferable See our website ww...

Отзывы: