background image

16

Gebruiksaanwijzing

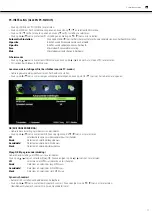
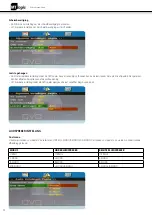
sYsteem Blokkeren

•  Druk op de MENU-toets om het hoofdmenu te openen. 
•  Druk op de    /    toets en selecteer SYSTEEM BLOKKEREN in het hoofdmenu. De eerste optie wordt gemarkeerd.

•  Druk op de   /   toets en selecteer de optie die u wilt instellen in het SYSTEEM BLOKKEREN-menu.
•  Druk op de    /    toets om in te stellen.
•  Na het maken van de instelling drukt u op de MENU-toets om terug te keren naar het vorige menu. 

voer wachtwoord in

•  Druk op de    /   toets en selecteer Voer wachtwoord in en druk op OK. U krijgt 4 opties. 
•  (Standaard wachtwoord is ‘0000'.)

Inschakelen

Druk op de   /   toets en selecteer Ingeschakelen. Druk vervolgens op de    /    toets en selecteer Aan of Uit. 
•  Kanaalslot Kinderslot en Toetsenbordslot zijn beschikbaar als Inschakelen op Aan staat.

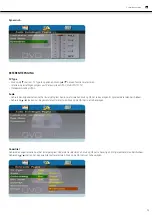
kanaal vergrendelen

•  Druk op de   /   toets en selecteer Kanaal vergrendelen. Druk vervolgens op de OK/   toets om het sub-menu te openen.

kinderslot classificatie

•  Druk op de   /   toets en selecteer Kinderslot classificatie en druk op de    /    toets om te selecteren. 

keypad vastzetten

•  Inschakelen om te voorkomen dat jonge kinderen het gebruiken of tegen ander onbedoeld gebruik. 
•  Druk op de   /   toets en selecteer Keypad vaststellen. Druk vervolgens op de    /    toets en selecteer Aan of Uit.

nieuw wachtwoord

Druk op de   /   knoppen om Nieuw wachtwoord te selecteren, geef de 4-cijferig code in die u als wachtwoord wilt gebruiken, geef de code 
nogmaals in om deze te verifiëren.

Blokkeren opheffen

•  Druk op de   /   toets en selecteer Clear Lock (Slot ontgrendelen). Druk vervolgens op de    /    toets om te selecteren.

Содержание LE-247845MT

Страница 1: ...NL Gebruiksaanwijzing en Instruction manual LE 247845MT ...

Страница 2: ...meegeleverd met uw TV Aansluitingen op de achterkant van uw TV Basis installatie Instructies voor afstandsbediening Kies invoerbron Gebruik van het menu USB multimedia weergaveformaat DVD menu Oplossen van problemen De specificaties van uw TV Aanwijzingen voor wandmontage 3 4 5 6 7 8 9 9 19 21 26 28 28 ...

Страница 3: ...eld Voorzichtigheid is geboden wanneer het netsnoer op een stopcontact wordt aangesloten Het stopcontact niet overbelasten Dit kan uw TV beschadigen en een elektrische schok of brand veroorzaken Controleer het netsnoer van uw TV regelmatig en verwijder de stekker van uw TV als het netsnoer slijtageverschijnselen vertoond Het toestel niet gebruiken totdat het netsnoer is vervangen door een gekwalif...

Страница 4: ...336 EEG 93 68 EEG en de laagspanningsrichtlijn 73 23 EEG van de Europese Gemeenschap Dit apparaat voldoet aan de Europese richtlijn 2006 95 EG Elektromagnetische compatibiliteit en Laagspanningsrichtlijnen Wanneer uw TV aan het einde is van zijn levenduur Wanneer uw TV aan het einde is van zijn levenduur 1 Uw TV niet meegeven met het normale huishoudelijk afval 2 U kunt ook contact opnemen met uw ...

Страница 5: ...g ervoor dat de en symbolen op de batterijen corresponderen met het diagram Verwijder de batterijen als u de afstandsbediening langere tijd niet gebruikt Wees voorzichtig met uw afstandsbediening Niet laten vallen Houd de afstandsbediening uit de buurt van water direct zonlicht en hete oppervlakken Wanneer de afstandbediening slecht reageert dient u de batterijen te vervangen nL Gebruiksaanwijzing...

Страница 6: ...De voedingsadapter hier aansluiten 2 Hoofdtelefoonuitgang 3 Audio ingang voor VGA modus voor aansluiting op de audio uitgang van uw PC 4 DB15 VGA interface 5 YPBPR Component ingang voor aansluiting van uw AV systeem 6 Scart inganginterface voor aansluiting van uw AV systeem met Scart uitgang 7 CVBS Component video ingang voor aansluiting van uw AV systeem 8 Rechts Links audiokanaalingang voor Comp...

Страница 7: ...en DVD speler inschakelen Selecteer AV met de SOURCE toets op de voorkant van de LED TV of rechtstreeks door op de SOURCE toets op de afstandsbediening te drukken YPBPR en Audio aansluiting De voeding naar de LED TV en DVD speler uitschakelen Gebruik de connectoren in het groene gebied om de y aansluiting groene kleur op de achterzijde van uw DVD speler aan te sluiten op de corresponderende y aans...

Страница 8: ...e TV programma s kijkt 6 10 Voer een programmanummer voor hogere kanaalnummers b v 2 1 enz Terugkeren naar het vorige kanaal 7 ASPECT Druk op deze toets om de aspectverhouding van uw TV veranderen 8 AUDIO Druk op deze toets om verschillende audiosystemen te selecteren 9 VOL VOL Verhogen en verlagen van het geluidsniveau 10 CH CH Door de kanalen schakelen 11 THUMBSTICK OK Hiermee navigeert u door d...

Страница 9: ...ng Druk op de SOURCE toets op de afstandsbediening om de ingangsbronnenlijst weer te geven Druk op toets om de gewenste ingangsbron te selecteren Druk op de OK toets om de ingangsbron te openen Druk op de EXIT toets om af te sluiten Sluit een RF kabel aan op de TV ingang gemarkeerd met RF ln en op uw TV antenne aansluiting OSD taal Druk op de toets om de gewenste taal voor de menu s en berichten t...

Страница 10: ... kunt de waarde van contrast helderheid kleur en scherpte veranderen als het beeld in de Persoonlijke modus staat TIPS U kunt ook op de PMODE toets op de afstandsbediening drukken om de Beeldmodus te veranderen Helderheid Druk op de toets en selecteer Helderheid en druk op OK om het sub menu te openen Druk op de toets om in te stellen Contrast Druk op de toets en selecteer Contrast en druk op OK o...

Страница 11: ...beeld in te stellen Druk op de toets en selecteer geavanceerde instellingen en druk op de OK toets om het sub menu te openen NR RUISONDERDRUKKING Gebruik deze instelling om videoruis te verminderen Druk op de toets en selecteer NR Druk vervolgens op de toets om te selecteren Uit Selecteerdezeoptieomvideoruisdetectieuitteschakelen Zwak Detecteerenverminderlaagvideoruis Gemiddeld Detecteerenverminde...

Страница 12: ... U kunt de waarde van de hoge en lage tonen veranderen wanneer het geluid in de Persoonlijke modus staat TIPS U kunt ook op de SMODE toets op de afstandsbediening drukken om de Geluidsmodus in te stellen Hoge tonen Druk op de toets en selecteer Treble en druk op OK om het sub menu te openen Druk op de toets om in te stellen Lage tonen Druk op de toets en selecteer lage tonen en druk op OK om het s...

Страница 13: ...bmenu te openen Geluidstype Druk op de toets en selecteer Geluidstype Druk vervolgens op de toets om te selecteren Kanaalmenu Druk op de MENU toets om het hoofdmenu weer te geven Druk op de toets en selecteer KANAAL in het hoofdmenu De eerste instelling wordt gemarkeerd Druk op de toets en selecteer de optie die u wilt instellen in het KANAAL menu Druk op de toets om in te stellen Na het maken van...

Страница 14: ...K toets om het sub menu te openen Het standaard wachtwoord is 0000 Handmatig scannen Druk op de toets en selecteer Handmatig scannen en druk op de OK toets om het sub menu te openen Digitaal handmatige scan Druk op de toets en selecteer Digitaal handmatige scan en druk op de OK toets om het submenu te openen ...

Страница 15: ...Groene toets om het geselecteerde kanaal over te slaan Uw TV toestel slaat het kanaal automatisch over wanneer u CH gebruikt om de kanalen te bekijken Druk op de Blauwe toets om het kanaal te markeren en druk dan op om het kanaal naar de gewenste positie te plaatsen Common interface Druk op de toets en selecteer Common interface en druk dan op OK om het sub menu te openen Alleen beschikbaar bij ge...

Страница 16: ...anaalslot Kinderslot en Toetsenbordslot zijn beschikbaar als Inschakelen op Aan staat Kanaal vergrendelen Druk op de toets en selecteer Kanaal vergrendelen Druk vervolgens op de OK toets om het sub menu te openen Kinderslot classificatie Druk op de toets en selecteer Kinderslot classificatie en druk op de toets om te selecteren Keypad vastzetten Inschakelen om te voorkomen dat jonge kinderen het g...

Страница 17: ...p de OK toets om het sub menu te openen Druk op de toets en selecteer Audio primaire taal en Audio tweede taal Ondertiteling Druk op de toets en selecteer Ondertiteling en druk op de OK toets om het sub menu te openen Teletekst De Teletekst instellingen wijzingen Alleen beschikbaar onder DTV en ATV modus Druk op de toets en selecteer Teletekst en druk op OK toets om het sub menu te openen Druk ond...

Страница 18: ...selecteer Eerste instelling Druk vervolgens op de OK toets Resetten Druk op de toets en selecteer Resetten en druk op de OK toets Als u zeker weet dat u wilt resetten op Ja drukken Media Menu Opmerking Voordat u het USB menu gebruikt eerst het USB apparaat aansluiten Vervolgens op de SOURCE toets drukken en de invoerbron op USB zetten Druk op de toets en selecteer USB in het menu en druk vervolgen...

Страница 19: ...toets Druk op de toets en selecteer het disk station dat u wilt afspelen en druk op de OK toets Druk op de button toets en selecteer de optie om terug te keren naar het vorige menu Wanneer u een een optie selecteert wordt de bestandsinformatie aan de rechterkant getoond Film Druk op de toets en selecteer MOVIE FILM in het hoofdmenu en druk vervolgens op de OK toets Druk op de toets en selecteer he...

Страница 20: ... Max resolutie 720x576 Max data snelheid 20Mbps rm rmvb RV8 RV9 RV10 COOK Max resolutie en beeldsnelheid 1280x720 30fps Max data snelheid 10Mbps Muziek mp3 MP3 Sample snelheid 32K 48Khz Bit rate 32K 320Kbps Channel Mono Stereo wma WMA Sample snelheid 8K 48Khz Bit rate 128K 320Kbps Kanaal Mono Stereo m4a aac AAC Sample snelheid 8K 48Khz Bit rate 128K 442Kbps Kanaal Mono Stereo Foto jpg jpeg Progres...

Страница 21: ... bij het afspelen van wide screen films het scherm wordt links en rechts bijgesneden 4 3 LB Normaal Geschikt voor normale TV bij het afspelen van wide screen films de boven en onderkant hebben een zwarte balk 16 9 Breedte Geschikt voor het aansluiten van een wide screen TV Monitor Selecteer de gewenste aspectverhouding OPMERKING Schermafmetingen kunnen variëren afhankelijk van de inhoud van de sch...

Страница 22: ...e disc afspeelde De speler kan dan het afspelen hervatten vanaf de onthouden tijd UIT Kies deze instelling zodat de DVD speler weergave hervat vanaf het begin van de disk Luidspreker instelling Dual mono U kunt vier standen voor dual mono selecteren STEREO L MONO R MONO MIX MONO De standen voor dual mono worden in onderstaande afbeelding getoond MODUS LINKER LUIDSPREKER RECHTER LUIDSPREKER STEREO ...

Страница 23: ...t instelpictogram Audio te selecteren en druk op OK om te bevestigen Er zijn meerdere talen beschikbaar Gebruik de toetsen om de gewenste taal te selecteren Druk op de OK toets om te bevestigen Ondertitel Gebruik de navigatietoetsen om het instelpictogram Ondertitel te selecteren en druk op OK om te bevestigen Er zijn meerdere talen beschikbaar Gebruik de toetsen om de gewenste taal te selecteren ...

Страница 24: ...deld Wachtwoord De instelling is standaard vergrendeld Het is niet mogelijk de instellingen of het wachtwoord te veranderen Als u de rating wilt aanpassen eerst het standaardwachtwoord 0000 invoeren met de cijfertoetsen vervolgens op OK drukken om te bevestigen Terwijl het slot ontgrendeld is een nieuw wachtwoord van 4 cijfers invoeren Wanneer u de nieuwe 4 cijferige code hebt ingevoerd is dat uw ...

Страница 25: ...r op uw TV niet kan worden bereikt Hebt u de batterijen in de afstandsbediening op de juiste manier geplaatst De moet op de en de op de Controleer of de juiste functie op de afstandsbediening is geselecteerd b v TV of videorecorder De TV mag niet in direct zonlicht worden geplaatst Probeer nieuwe batterijen te plaatsen als bovenstaande niet werkt De TV wordt plotseling uitgeschakeld Controleer of ...

Страница 26: ...naar uw TV goed is aangesloten Er is een verticale balk of streep op mijn TV scherm Schakel automatisch configureren in of verander de horizontale of verticale frequentiepositie Schermkleuren worden niet weergegeven zoals het moet of er is maar één kleur Controleer of de videokabel op de juiste manier is aangesloten De videokaart van uw PC opnieuw installeren als het signaal afkomstig is van uw co...

Страница 27: ...age van het toestel Als u het apparaat aan de wand monteert raadpleeg dan een gekwalificeerde installateur voor instructies over met monteren van de draagbeugel en wandmontageplaat Specificatie montageplaat 100mm x 100mm met schroefmaat M4 niet meegeleverd De lengte van de schroef mag niet meer zijn dan 8mm Opgelet De 8mm lengte van schroef verwijst naar de maximale diepte van de montagegaten Wann...

Страница 28: ... Sockets on the back of your TV Basic installation Remote Control lnstruction Select lnput Source Basic menu operation USB Multimedia playback format DVD menu If you re having problems Your Tv s specification Wall mounting assembly instruction Instruction Manual 29 30 31 32 33 34 35 35 38 47 52 54 54 ...

Страница 29: ...to be serviced Be careful when you plug the power cord into a socket Do not overload wall sockets They could damage your TV and could give you an electric shock or cause a fire Check your TV s power cord from time to time and unplug your TV if the power cord looks worn Stop using it until you have had the power cord replaced by a qualified technician Do not twist kink or pinch the power cord Note ...

Страница 30: ...ll work in Your TV will only work when the temperature is in the range of 0 C 40 C Safety notice Your TV has a CE marking This means your TV meets both the EMC directive 89 336 EEC 93 68 EEC and the Low Voltage Directive 73 23 EEC that the European Community have issued This unit complies with European Council Directive 2006 95 CE Electromagnetic Compatibility Low Voltage Directives When you need ...

Страница 31: ...into the remote control Make sure the and symbols on your batteries match the diagram Replace the batteries So they are facing the right way If you won t be using the remote control for a long time take the batteries out Use your remote control carefully Do not drop Keep the remote control away from water direct sunlight and hot surfaces en Instruction Manual ...

Страница 32: ...er supply adaptor here 2 Headphone output 3 Audio input for VGA mode connects to your PC audio output 4 DB15 VGA interface 5 YPBPR Component input connects your AV system 6 Scart input interface connects your AV system with Scart output 7 CVBS Composite video inputs connects your AV system 8 Right Left Audio Channel input for Composite video component mode 9 Coaxial Output connecting to Coaxial in...

Страница 33: ...n the power to the LED TV and DVD player Select AV using the SOURCE button on the front of the LED TV or directly by pressing the SOURCE button on the remote Control YPBPR and audio Connection Turn off the power to the LED TV and DVD player Using the connectors in the green color area connect the y green color connector on the rear of your DVD player to the corresponding y green color connector in...

Страница 34: ...channel menu on your TV screen when you watch digital TV programmes 6 10 Enter a program number for multiple program channel such as 2 1 etc Returns to the previous channel 7 ASPECT Press this button to change the aspect of your TV 8 AUDIO Press this button you can choose different audio system 9 VOL VOL Increase or dicrease the sound level 10 CH CH Go through the channel list 11 THUMBSTICK OK All...

Страница 35: ...nput Source Basic Operation Press SOURCE button on the remote control to display the input source list Press button to select the input source you want to watch Press OK button to enter the input source Press EXIT button to quit Connect an antenna from the TV s input called RF ln and to your TV Aerial socket OSD Language Press button to select the language to be used for menus and message Country ...

Страница 36: ... you want to adjust in the PICTURE menu Press button to adjust After finishing your adjustment Press MENU button to return back to the previous menu Picture Mode Press button to select Picture Mode then press OK button to enter sub menu Press button to select Available Picture mode Dynamic Standard Mild Personal You can change the value of contrast brightness color and sharpness when the picture i...

Страница 37: ... PC Setting PC Mode only Press SOURCE to select PC source Press MENU to enter the main menu then press button to select PICTURE menu Press OK to enter and press to select PC Setting Press button to select PC Settings then press button to adjust Auto Adjust Press MENU button to adjust to the screen automatically to the optimal position of the picture H Position Adjust the horizontal position of the...

Страница 38: ... to select Sound in the main menu it will highlight the first option Press button to select the option that you want to adjust in the SOUND menu Press button to adjust After finishing your adjustment Press MENU button to return back to the previous menu Sound Mode Press button to select Sound Mode then press OK button to enter sub menu Press button to select Available Sound mode Standard Music Mov...

Страница 39: ... SPDIF then press Press button to select Off Auto PCM Audio Description Press button to select Audio Description then press OK button to enter submenu Sound Type Press button to select Sound Type then press Press button to select Channel Menu Press MENU button to display the main menu Press button to select CHANNEL in the main menu it will highlight the first option en Instruction Manual ...

Страница 40: ...on to return back to the previous menu Auto Scan Press button to select Auto Scan then press OK button to enter submenu The default password is 0000 Manual Scan Press button to select Manual Scan then press OK button to enter submenu Digital Manual Scan Press button to select Digital Manual Scan then press OK button to enter submenu Instruction Manual ...

Страница 41: ... the Green button to skip the select channel Your TV set will skip the channel automatically when using CH to view the channels Press the Blue button to to set the channel to moving state then press to move it to the position you want to put Common interface Press button to select Common interface then press OK button to enter sub menu Only available when there is CI card under DTV Signal Informat...

Страница 42: ...ment Press MENU button to return back to the previous menu Enter Password Press button to select Enter Password then press OK button to make the following 4 options valid Default password is 0000 Enable Press button to select Enable then press Press button to select On or Off Channel Locks Parental Rating and Lock Keypad are available when Enable is On Channel Locks Press button to select Channel ...

Страница 43: ...confirm your new password by enter it again Clear Lock Press button to select Clear Lock then press button to select Setup Menu Press MENU button to display the main menu Press button to select SETUP in the main menu it will highlight the first option OSD Language Press button to select OSD Language then press OK button to enter sub menu Press button to select OSD Language Audio Language Press but...

Страница 44: ... under DTV and ATV source Press button to select Teletext then press OK button to enter submenu Under DTV source press button to select Digital Teletext Language Under ATV source press button to select Decoding Page Language Time Settings Press button to select Time Settings then press OK button to enter submenu Instruction Manual ...

Страница 45: ...tton to select Reset then press OK button to enter If you are sure to reset press Yes to reset Media Menu Note Before operating USB menu Plug in USB device then press SOURCE button to set the Input Source to USB Press button to select USB in the Source menu then press OK button to enter Press button to select the option you want to adjust in the main USB menu then press OK button to enter en Instr...

Страница 46: ... button to enter Press button to select drive disk you want to watch then press OK button to enter Press button to select return option to back to the previous menu When highlighting the option you select the file information will appear on the right Movie Press button to select MOVIE in the main menu then press OK button to enter Press button to select drive disk you want to watch then press OK b...

Страница 47: ...Mbps rm rmvb RV8 RV9 RV10 COOK Max resolution and frame rate 1280x720 30fps Max data rate 10Mbps Music mp3 MP3 Sample rate 32K 48Khz Bit rate 32K 320Kbps Channel Mono Stereo wma WMA Sample rate 8K 48Khz Bit rate 128K 320Kbps Channel Mono Stereo m4a aac AAC Sample rate 8K 48Khz Bit rate 128K 442Kbps Channel Mono Stereo Photo jpg jpeg Progressive JPEG Max resolution 1024x768 Baseline JPEG Max resolu...

Страница 48: ...isplay Select the most appropriate aspect ratio NOTE Playback screen size may vary according to the disc contents For media with 4 3 contents using any mode would only display a 4 3 screen Screen ratio selection should be according to the connected TV display aspect ratio OSD language Use navigation buttons to select the OSD LANGUAGE Setup Icon press OK button to confirm There are multi language F...

Страница 49: ...etting so the DVD player will restart the disc from the beginning Audio setup page Dual mono You can select four different audio output STEREO MONO L MONO R MIX MONO The audio out descriptions of these selections is shown in table below MODUS LINKER LUIDSPREKER RECHTER LUIDSPREKER STEREO STEREO L STEREO R L MONO L MONO L MONO R MONO R MONO R MONO MIX MONO L MONO R MONO L MONO R MONO Dynamic en Ins...

Страница 50: ...s to select the AUDIO LANGUAGE Setup Icon press OK button to confirm There are multi language For your selection press buttons to toggle between different languages Press OK button to confirm Subtitle Use navigation buttons to select the SUBTITLE LANGUAGE Setup Icon press OK button to confirm There are multi language For your selection press buttons to toggle between different languages Press OK b...

Страница 51: ...ocked No rating selection or change password could be done To edit the rating setting please enter default password 0000 using the numeric buttons then press OK button to confirm To change password input any 4 digit number when the lock is unlocked Once the 4 digit number is entered that will be your new password Default Press OK button to restore factory default en Instruction Manual ...

Страница 52: ...ars slowly after I have switched it on This is normal The image takes a few seconds to appear after you have switched the TV on Please contact your service centre if picture has not appeared after five minutes There is no or poor quality colour ora poor picture on my TV Change the colour setting on the PICTURE MENU Keep a distance between your TV and any VCR you may be using Try watching another c...

Страница 53: ...parately from your household waste There are separate collection systems for recycling in the European Union EU For more information please contact your local authority or your retailer where you bought your TV Specifications and design are subject to possible modifications without notice due to improvements INSTALLING THE STAND To attach the stand lay the TV down on a non abrasive suface then pla...

Страница 54: ...LE 247845MT ...

Отзывы: