background image

Preface

vii

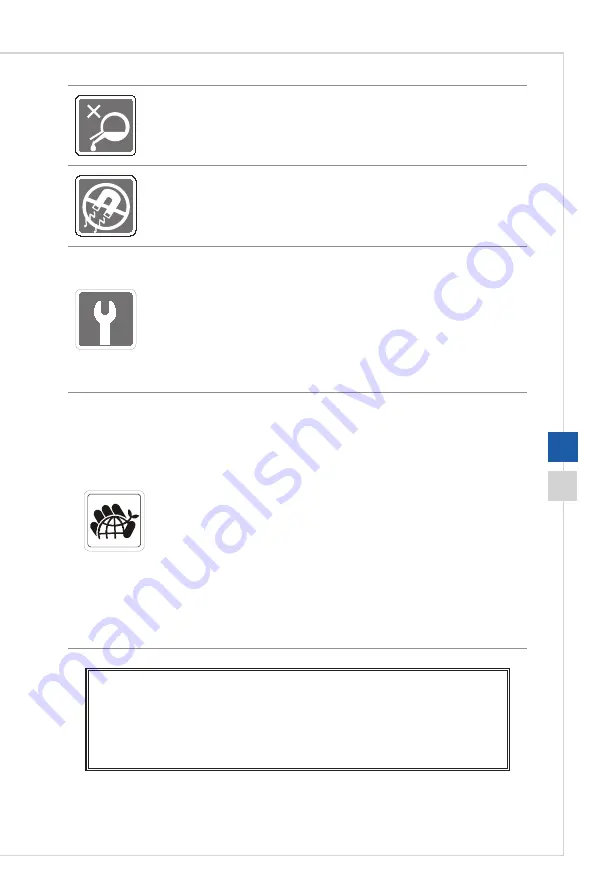
Never pour any liquid into the opening that could damage or cause electrical 

shock�

Always keep the strong magnetic or electrical objects away from the computer�

If any of the following situations arises, get the computer checked by service 

personnel:


The power cord or plug is damaged�


Liquid has penetrated into the computer�


The computer has been exposed to moisture�


The computer does not work well or you can not get it work according to 

user’s manual�


The computer has dropped and damaged�


The computer has obvious sign of breakage�

Green Product Features


Reduced energy consumption during use and stand-by


Limited use of substances harmful to the environment and health


Easily dismantled and recycled


Reduced use of natural resources by encouraging recycling


Extended product lifetime through easy upgrades


Reduced solid waste production through take-back policy

Environmental Policy


The product has been designed to enable proper reuse of parts and 

recycling and should not be thrown away at its end of life�


Users should contact the local authorized point of collection for recycling 

and disposing of their end-of-life products�


Visit the MSI website and locate a nearby distributor for further recycling 

information� 


Users may also reach us at gpcontdev@msi�com for information regarding 

proper disposal, take-back, recycling, and disassembly of MSI products�

★ Warning! Overuse of screens is likely to affect eyesight.
★ Recommendations: 

1� 

Take a 10-minute break for every 30 minutes of screen time� 

2� 

Children under 2 years of age should have no screen time� For children aged 

2 years and over, screen time should be limited to less than one hour per day�

Содержание PRO 22X

Страница 1: ...PRO 22X Series All in One AIO PC MS ACD3 System...

Страница 2: ...requency Interference Statement viii WEEE Statement ix RoHS Statement ix Overview 1 1 Packing Contents 1 2 System Overview 1 3 Component Replacement Upgrade 1 8 Getting Started 2 1 Safety Comfort Tips...

Страница 3: ...is a registered trademark of Micro Star Int l Co Ltd All other marks and names mentioned may be trademarks of their respective owners No warranty as to accuracy or completeness is expressed or implie...

Страница 4: ...er within 5 years at most since the product has been discontinued depending on the official regulations declared at the time Please contact the manufacturer via https www msi com support for the detai...

Страница 5: ...cle or treat them in compliance with the local regulations Taiwan For better environmental protection waste batteries should be collected separately for recycling or special disposal California USA Th...

Страница 6: ...19 5V 6 15A Please take special precautions if this computer comes with a battery Danger of explosion if battery is incorrectly replaced Replace only with the same or equivalent type recommended by t...

Страница 7: ...atural resources by encouraging recycling Extended product lifetime through easy upgrades Reduced solid waste production through take back policy Environmental Policy The product has been designed to...

Страница 8: ...ich can be determined by turning the equipment off and on the user is encouraged to try to correct the interference by one or more of the measures listed below Reorient or relocate the receiving anten...

Страница 9: ...product complies with the India E waste Management and Handling Rule 2011 and prohibits use of lead mercury hexavalent chromium polybrominated biphenyls or polybrominated diphenyl ethers in concentra...

Страница 10: ......

Страница 11: ...irror screen which displays the simplicity of modern individualism and the comfort of home With a touchscreen display flawless audio video capabilities and intuitive user interface it blends technolog...

Страница 12: ...ual Optional Quick Guide Warranty Card Book Mouse Optional Keyboard Optional Please contact us immediately if any of the items is damaged or missing The illustrations are for reference only and your p...

Страница 13: ...tem Overview h h Front View 1 2 1 Display The 21 5 inch LED backlit display provides 1920 x 1080 FHD resolution in a 16 9 widescreen format 2 Stand Use this stand to position your system on a flat and...

Страница 14: ...s such as storage devices hard drives video cameras etc 3 USB 3 2 Gen 1 Port Type C USB 3 2 Gen 1 the SuperSpeed USB delivers up to 5Gbps high speed data transfer for various devices such as storage d...

Страница 15: ...Overview h h Rear View 3 1 2 8 7 12 5 6 4 11 10 9 Important We suggest that you connect the AC DC adapter to your AIO PC first and then connect the AC power cord to the socket outlet for safety conce...

Страница 16: ...lus multi channel digital audio on a single cable 5 HDMI In Port with MSI Instant Display Technology The High Definition Multimedia Interface HDMI is an all digital audio video interface capable of tr...

Страница 17: ...ted 9 USB 2 0 Port The USB Universal Serial Bus port is for attaching USB devices such as keyboard mouse or other USB compatible devices It supports up to 480Mbit s Hi Speed data transfer rate 10 Head...

Страница 18: ...purchased For any further information on the product users purchased please contact the local dealer Do not attempt to upgrade or replace any component of the product if you are not an authorized dea...

Страница 19: ...tarted This chapter provides you with the information on hardware setup procedures While connecting peripheral devices be careful in holding the devices and use a grounded wrist strap to avoid static...

Страница 20: ...on the chair sit straight and keep a good posture Adjust the chair s back if available to support your back comfortably 4 Place you feet flat and naturally on the floor so that your knees and elbows h...

Страница 21: ...ase make sure the system has been grounded to earth through the AC power cord and the electrical outlet before powering on the system Do not use any sharp objects on the display 1 Adjust the stand to...

Страница 22: ...2 4 3 Press the power button to power on the system...

Страница 23: ...3 System Operations This chapter provides you with essential information on system operations Important All information is subject to change without prior notice...

Страница 24: ...also fine tune the settings by clicking Change plan settings The Shut Down Computer menu presents the options of Sleep S3 S4 Shut Down S5 for rapid and easy management of your system power h h Waking...

Страница 25: ...s 3 3 Network Connection Windows 10 h h Wired Network 1 Right click Start and select Network Connections from the list 2 Select Ethernet and then Network and Sharing Center 3 Select Set up a new conne...

Страница 26: ...ternet and click Next 5 Select Broadband PPPoE to connect using DSL or cable that requires a user name and password 6 Type the information from your Internet Service Provider ISP and click Connect to...

Страница 27: ...ose a connection from the list 3 To establish a new connection select Network and Sharing Center 4 Select Set up a new connection or network 5 Followingly choose Manually connect to a wireless network...

Страница 28: ...ng system in use When the operating system is affected by virus and is not able to work normally When you want to install the OS with other built in languages Before using the System Recovery Function...

Страница 29: ...r Reset this PC to start the system recovery 3 The Choose an option screen pops up Choose between Keep my files and Remove everything Reset this PC Keep my files Remove everything Only the drive where...

Страница 30: ...our apps will be removed screen shows a list of apps that will need to be reinstalled from the web or installation discs Click Next to continue 3 The next screen will show the changes to be made durin...

Страница 31: ...rives a screen will pop up asking you to choose between Only the drive where Windows is installed and All drives 3 Then select between Just remove my files and Remove files and clean the drive 4 The n...

Страница 32: ...data saved on your system drive to other storage devices h h Recovering the system with the F3 Hotkey Follow the instructions below to continue 1 Restart the PC 2 Press the F3 hotkey on the keyboard p...

Страница 33: ...4 OSD Setup This chapter provides you with essential information on OSD Setup IMPORTANT All information is subject to change without prior notice...

Страница 34: ...4 2 Navi Key The AIO comes with a Navi Key a multi directional control that helps navigate the On Screen Display OSD menu Navi Key...

Страница 35: ...ow main menu Sub menus Press Menu to show sub menus Only Input Source and Mode are available in PC Mode Mode Press Menu to show sub menus Press the Down button to enter Mode function and Left and Righ...

Страница 36: ...nitor Mode only Brightness Press the Right button to enter Brightness function and Left and Right buttons to adjust the value Press Menu to save and exit Monitor Mode only Mode Press the Down button t...

Страница 37: ...panel off Press Menu again to wake it up h h Image 1st Level Menu 2nd 3rd Level Menu Description Mode User Default is User While sRGB mode is selected the color space will changed to standard sRGB fr...

Страница 38: ...PC User can use Navi Key and OSD Menu to adjust the Input Source in any Mode HDMI h h Setting 1st Level Menu 2nd Level Menu Description Language English Default is English Language is an independent s...

Страница 39: ...A Troubleshooting...

Страница 40: ...e of the following steps 1 Press Ctrl Alt Del keys then choose Shut Down 2 Press and hold the power button till the system is off 3 Unplug the power cable from the system My microphone does not work 1...

Страница 41: ...l check if the volume is muted 3 If you have connected an audio cable to the Headphone jack disconnect it 4 If the system has OSD function please adjust the volume of OSD System monitor does not displ...

Отзывы: