background image

110W

MS-N0E1

Disassembly Guide 


1

COVER ASSY


1.1

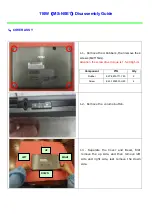
Remove the 4 Rubbers, then 

remove the 4 

screws (M2.5*5mm).


Attention: the screw driver torque is 1.5-2.0Kgf-cm


Component P/N Qty 

Rubber E2Y-0E10711-Y40 

Screw E43-1255001-H29 


1.2

Remove the volume button.


1.3

Separate the Cover and Bezel, first 

remove the up side, and then remove left 
side and right side, last remove the down 
side. 


UP


LEFT


RIGHT


DOWN


Содержание MS-N0E1

Страница 1: ...110W MS N0E1 Disassembly Guide 1 COVER ASSY 2 MB ASSY 3 LCD MODULE ASSY ...

Страница 2: ... 5 5mm Attention the screw driver torque is 1 5 2 0Kgf cm Component P N Qty Rubber E2Y 0E10711 Y40 4 Screw E43 1255001 H29 4 1 2 Remove the volume button 1 3 Separate the Cover and Bezel first remove the up side and then remove left side and right side last remove the down side UP LEFT RIGHT DOWN ...

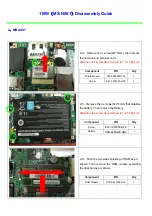
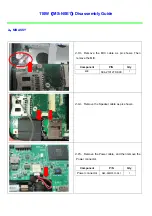
Страница 3: ...move the battery cable 2 2 Remove the GPS Mylar as pic shows 2 3 Remove the 2 screws M2 3mm then remove the antenna and GPS card Attention the screw driver torque is 1 2 1 5Kgf cm Component P N Qty GPS card S5D 0400010 T46 1 Screw E43 1203003 H29 2 ...

Страница 4: ...0800590 T46 1 Screw E43 1203003 H29 1 2 5 Remove the 3 screws M2 3mm that stabilize the battery Then remove the Battery Attention the screw driver torque is 1 2 1 5Kgf cm Component P N Qty Screw E43 1203003 H29 3 Battery S9N 422A200 SB3 1 2 6 Push the two sides shielding of RAM as pic shows Then remove the RAM module according the direction as pic shows Component P N Qty RAM Module S7C S459106 AJ9...

Страница 5: ...7 Remove the 2 screws M2 3mm that stabilize the USB Board Attention the screw driver torque is 1 2 1 5Kgf cm Component P N Qty Screw E43 1203003 H29 2 USB Board 607 N0E1A 01S 1 2 8 Remove the USB FFC 2 9 Remove the GPS and Wlan antenna Wlan GPS ...

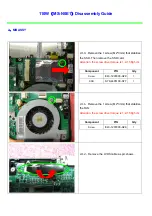
Страница 6: ... SSD card Attention the screw driver torque is 1 2 1 5Kgf cm Component P N Qty Screw E43 1203003 H29 1 SSD S78 4405100 S77 1 2 11 Remove the 1 screw M2 3mm that stabilize the FAN Attention the screw driver torque is 1 2 1 5Kgf cm Component P N Qty Screw E43 1203003 H29 1 2 12 Remove the LVDS cable as pic shows ...

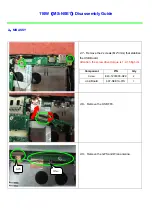
Страница 7: ...move the MIC cable as pic shows Then remove the MIC Component P N Qty MIC S34 2101270 K03 1 2 14 Remove the Speaker cable as pic shows 2 15 Remove the Power cable and then remove the Power connector Component P N Qty Power connector N93 02M0031 A81 1 ...

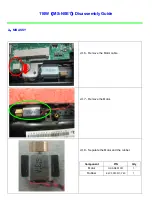
Страница 8: ...110W MS N0E1 Disassembly Guide 2 MB ASSY 2 16 Remove the Motor cable 2 17 Remove the Motor 2 18 Separate the Motor and the rubber Component P N Qty Motor OS9 N0D1001 1 Rubber E2Y 0D10511 Y40 1 ...

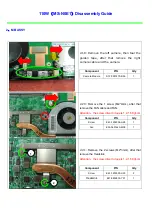
Страница 9: ... 0001870 B36 1 2 20 Remove the 1 screw M2 4mm after that remove the FAN cable and FAN Attention the screw driver torque is 1 2 1 5Kgf cm Component P N Qty Screw E43 1204004 H29 1 Fan E33 0601440 MC2 1 2 21 Remove the 2 screws M2 3mm after that remove the Heatsink Attention the screw driver torque is 1 2 1 5Kgf cm Component P N Qty Screw E43 1203003 H29 2 Heatsink E31 0802830 Y31 1 2 1 ...

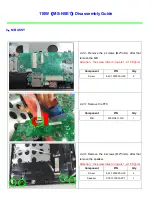
Страница 10: ...crew driver torque is 1 2 1 5Kgf cm Component P N Qty Screw E43 1203003 H29 2 2 23 Remove the FFC Component P N Qty MB 607 N0E11 01S 1 2 24 Remove the 4 screws M2 3mm after that remove the speaker Attention the screw driver torque is 1 2 1 5Kgf cm Component P N Qty Screw E43 1203003 H29 4 Speaker S78 1310030 SY7 1 ...

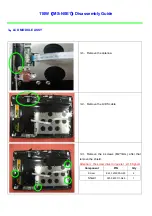
Страница 11: ...MODULE ASSY 3 1 Remove the antenna 3 2 Remove the LVDS cable 3 3 Remove the 4 screws M2 3mm after that remove the shield Attention the screw driver torque is 1 2 1 5Kgf cm Component P N Qty Screw E43 1203003 H29 4 Shield 307 0E10111 A89 1 ...

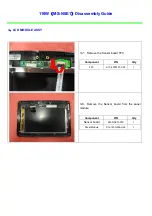
Страница 12: ...ent P N Qty Camera S1F 0001870 B36 1 3 5 Remove the 1 screw M2 2 5mm Then remove the OFN shield Attention the screw driver torque is 0 5 1 0Kgf cm Component P N Qty Screw E43 1203003 H29 1 3 6 Remove the FFC and then remove the OFN board Component P N Qty OFN Board OS1 N0D1001 1 ...

Страница 13: ...y Guide 3 LCD MODULE ASSY 3 7 Remove the Sensor board FFC Component P N Qty FFC K10 3005157 V03 1 3 8 Remove the Sensor board from the panel module Component P N Qty Sensor board 607 N0E13 01S 1 Panel Module S1J 140G002 H34 1 ...

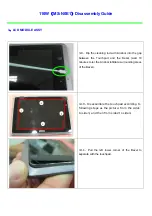
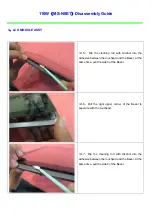
Страница 14: ...n the Touchpad and the Bezel wait 10 minutes to let the Alcohol infiltrate surrounding areas of the Bezel 3 10 Disassemble the touchpad according to following steps as the picture from the side1 to side3 and then from side2 to side4 3 11 Pull the left lower corner of the Bezel to separate with the touchpad ...

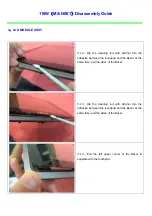
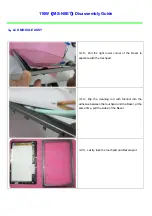
Страница 15: ...dhesive between the touchpad and the Bezel at the same time pull the side1 of the Bezel 3 13 Dip the cleaning rod with Alcohol into the adhesive between the touchpad and the Bezel at the same time pull the side2 of the Bezel 3 14 Pull the left upper corner of the Bezel to separate with the touchpad ...

Страница 16: ...dhesive between the touchpad and the Bezel at the same time pull the side3 of the Bezel 3 16 Pull the right upper corner of the Bezel to separate with the touchpad 3 17 Dip the cleaning rod with Alcohol into the adhesive between the touchpad and the Bezel at the same time pull the side4 of the Bezel ...

Страница 17: ... Pull the right lower corner of the Bezel to separate with the touchpad 3 19 Dip the cleaning rod with Alcohol into the adhesive between the touchpad and the Bezel at the same time pull the side2 of the Bezel 3 20 Lastly take the touchpad and Bezel apart ...

Страница 18: ...110W MS N0E1 Screws specification Photo Screw specification Label M2 5 L5MM black M2 L4MM black M2 L3MM white ...

Страница 19: ...110W MS N0E1 screws specification 1 COVER 4pcs screws specification Photo Screw specification label M2 5 L5MM black ...

Страница 20: ...110W MS N0E1 screws specification 2 WIRELESS and GPS 3pcs screws specification Photo Screw specification label M2 L3MM white ...

Страница 21: ...110W MS N0E1 screws specification 3 BATTERY ASSY total 3pcs screws specification Photo Screw specification label M2 L3MM white ...

Страница 22: ...110W MS N0E1 screws specification 4 SSD MODULE 1pcs screw specification Photo Screw specification label M2 L3MM white ...

Страница 23: ...110W MS N0E1 screws specification 5 THERMAL KIT total 4pcs screws specification Photo Screw specification label M2 L3MM white M2 L4MM black ...

Страница 24: ...110W MS N0E1 screws specification 6 Main Board ASSY total 4pcs screws specification Photo Screw specification label M2 L3MM white ...

Отзывы: