background image

3-6

BIOS Setup  

MS-98I0   

Advanced


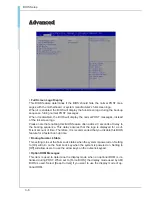
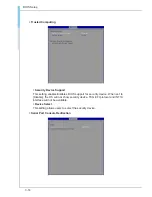
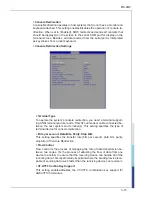
Full Screen Logo Display

This BIOS feature determines if the BIOS should hide the normal POST mes-

sages with the motherboard or system manufacturer’s full-screen logo.
When it is enabled, the BIOS will display the full-screen logo during the boot-up 

sequence, hiding normal POST messages.
When it is disabled, the BIOS will display the normal POST messages, instead 

of the full-screen logo.
Please note that enabling this BIOS feature often adds 2-3 seconds of delay to 

the booting sequence. This delay ensures that the logo is displayed for a suf-

ficient amount of time. Therefore, it is recommended that you disable this BIOS 

feature for a faster boot-up time.


Bootup NumLock State

This setting is to set the Num Lock status when the system is powered on. Setting 

to [On] will turn on the Num Lock key when the system is powered on. Setting to 

[Off] will allow users to use the arrow keys on the numeric keypad.


Option ROM Messages

This item is used to determine the display mode when an optional ROM is ini-

tialized during POST. When set to [Force BIOS], the display mode used by AMI 

BIOS is used. Select [Keep Current] if you want to use the display mode of op-

tional ROM.

Содержание MS-98I0

Страница 1: ...i MS 98I0 v1 x Industrial Computer Board ...

Страница 2: ...thout notice Trademarks All trademarks are the properties of their respective owners Revision History Revision Date V1 0 2015 09 Technical Support If a problem arises with your system and no solution can be obtained from the user s manual please contact your place of purchase or local distributor Alterna tively please try the following help resources for further guidance Visit the MSI website for ...

Страница 3: ... Always Unplug the Power Cord before inserting any add on card or mod ule All cautions and warnings on the equipment should be noted Never pour any liquid into the opening that could damage or cause electrical shock If any of the following situations arises get the equipment checked by ser vice personnel The power cord or plug is damaged Liquid has penetrated into the equipment The equipment has b...

Страница 4: ...ed household waste Please use the public collection system to return recycle or treat them in compliance with the local regulations 廢電池請回收 Taiwan For better environmental protection waste batteries should be collected separately for recycling or special disposal California USA The button cell battery may contain perchlorate material and requires special handling when recycled or disposed of in Cal...

Страница 5: ...odifications not expressly approved by the party responsible for compliance could void the user s authority to operate the equipment Notice 2 Shielded interface cables and AC power cord if any must be used in order to comply with the emission limits VOIR LA NOTICE D INSTALLATION AVANT DE RACCORDER AU RESEAU This device complies with Part 15 of the FCC Rules Operation is subject to the following tw...

Страница 6: ... biphenyls or polybrominated diphenyl ethers in concentrations exceeding 0 1 weight and 0 01 weight for cadmium except for the exemptions set in Schedule 2 of the Rule Turkey EEE Regulation Conforms to the EEE Regulations of the Republic Of Turkey Türkiye EEE yönetmeliği Türkiye Cumhuriyeti EEE Yönetmeliğine Uygundur Ukraine Restriction of Hazardous Substances The equipment complies with requireme...

Страница 7: ...regulating the permitted limits for a number of hazardous substances in electronic and electric products Việt Nam RoHS Kể từ ngày 01 12 2012 tất cả các sản phẩm do công ty MSI sản xuất tuân thủ Thông tư số 30 2011 TT BCT quy định tạm thời về giới hạn hàm lượng cho phép của một số hóa chất độc hại có trong các sản phẩm điện điện tử ...

Страница 8: ...claration vi India RoHS vi Turkey EEE Regulation vi Ukraine Restriction of Hazardous Substances vi Vietnam RoHS vii 1 Overview 1 1 Motherboard Specifications 1 2 Motherboard Layout 1 4 2 Hardware Setup 2 1 Memory 2 3 Power Supply 2 4 Rear Panel I O 2 5 Connector 2 8 Jumper 2 14 Slot 2 16 3 BIOS Setup 3 1 Entering Setup 3 2 The Menu Bar 3 4 Main 3 5 Advanced 3 6 Boot 3 12 Security 3 13 Chipset 3 17...

Страница 9: ...N3050 SoC for optimal system efficiency the MS 98I0 supports up to 2 DDR3L 1333 1600 MHz SO DIMM slots to provide the maximum of 8 GB memory capacity In the advanced level and mid range market segment MS 98I0 provides a high performance solution for today s front end and general purpose workstation as well as in the future 1 Overview ...

Страница 10: ...111G Gigabit Fast Ethernet controller SKU2 LAN1 Realtek RTL8111G Gigabit Fast Ethernet controller SATA 1 x SATA 6Gb s port 1 x mSATA slot shared with Mini PCIe slot Audio Realtek ALC887VD audio codec 1 x front audio connector 1 x amplifier connector Graphics Graphics integrated in Intel processor Rear Panel I O SKU1 1 x RS232 422 485 serial port 1 x DisplayPort 1 x DVI D port 2 x USB 3 0 ports 2 x...

Страница 11: ...ctor 1 x LVDS connector 1 x LVDS inverter connector 1 x front audio connector 1 x amplifier header 1 x S PDIF Out header 1 x chassis intrusion header 1 x clear CMOS jumper 1 x LVDS power jumper 1 x LVDS inverter power jumper 1 x serial port power jumper 1 x AT ATX select jumper Slot 1 x PCIe x1 slot 1 x Mini PCIe slot shared with mSATA Form Factor Mini ITX 170 mm x 170 mm Environmental Operating T...

Страница 12: ...A Port GPIO Header Keyboard Mouose Connector COM Port Jumper LPC Header Power Connector SATA Power Connector PCIe Slot Back Panel Amplifier Connector LVDS Power Jumper SO DIMM Slots Front Panel Header Inverter Connector Inverter Power Jumper S PDIF Out header LVDS Connector RJ45 GbE LAN Port DVD D Port Serial Port DisplayPort USB 3 0 Port RJ45 GbE LAN Port ...

Страница 13: ... Port GPIO Header Keyboard Mouose Connector COM Port Jumper LPC Header Power Connector SATA Power Connector PCIe Slot Back Panel Amplifier Connector LVDS Power Jumper SO DIMM Slot Front Panel Header Inverter Connector Inverter Power Jumper S PDIF Out header LVDS Connector DVD D Port Serial Port DisplayPort USB 3 0 Port RJ45 GbE LAN Port ...

Страница 14: ......

Страница 15: ...llation be careful in holding the com ponents and follow the installation procedures For some components if you install in the wrong orientation the components will not work prop erly Use a grounded wrist strap before handling computer components Static electricity may damage the components 2 Hardware Setup ...

Страница 16: ...is Intrusion Header JCASE1 2 11 RS232 Serial Port Connector COM2 COM3 COM4 COM5 COM6 2 11 USB 2 0 Header JUSB1 JUSB2 JUSB3 2 11 LVDS Inverter Connector JINV1 2 12 LVDS Connector JLVDS1 2 12 Keyboard Mouse Connector JKB MS1 2 13 LPC Debug Port Connector JLPC1 With TPM Support 2 13 Jumper 2 14 Clear CMOS Jumper JCMOS1 2 14 AT ATX Select Jumper JATX1 2 14 Serial Port Power Jumper JCOMP1 2 15 LVDS Pow...

Страница 17: ... key on the slot and insert the DIMM into the slot 2 Push the DIMM gently down wards until the slot levers click and lock the DIMM in place 3 To uninstall the DIMM flip the slot levers outwards and the DIMM will be released instantly Important You can barely see the golden finger if the DIMM is properly inserted in the DIMM slot ...

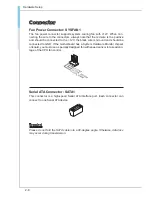
Страница 18: ...sed to provide power to the motherboard SATA Power Connector JPW1 This connector is used to provide power to SATA devices 2 G N D 3 G N D 1 V C C 5 4 1 2 V Important Make sure that all power connectors are connected to the power supply to ensure stable operation of the motherboard ...

Страница 19: ...he serial port is a 16550A high speed communications port that sends receives 16 bytes FIFOs You can attach a serial mouse or other serial devices directly to the connector PIN SIGNAL DESCRIPTION 1 2 3 4 5 6 7 8 9 DCD RXD TXD DTR GND DSR RTS CTS VCC_COM1 Data Carrier Detect Receive Data Transmit Data Data Terminal Ready Signal Ground Data Set Ready Request To Send Clear To Send Voltage select sett...

Страница 20: ...on RS485 h h DisplayPort DisplayPort is a digital display interface standard This connector is used to con nect a monitor with DisplayPort inputs h h DVI D Port The DVI D Digital Visual Interface Digital connector allows you to connect an LCD monitor It provides a high speed digital interconnection between the com puter and its display device To connect an LCD monitor simply plug your monitor cabl...

Страница 21: ...ded for connection to the Local Area Network LAN You can connect a network cable to it Active LED Speed LED LED LED Status Description Active LED Off No link Yellow Linked Blinking Data activity Speed LED Off 10 Mbps connection Green 100 Mbps connection Orange 1 Gbps connection ...

Страница 22: ...e is Ground and should be connected to GND If the motherboard has a System Hardware Monitor chipset onboard you must use a specially designed fan with speed sensor to take advan tage of the CPU fan control Serial ATA Connector SATA1 This connector is a high speed Serial ATA interface port Each connector can connect to one Serial ATA device Important Please do not fold the SATA cable into a 90 degr...

Страница 23: ...odule Front Panel Header JFP1 This front panel connector is provided for electrical connection to the front panel switches LEDs and is compliant with Intel Front Panel I O Connectivity Design Guide 1 3 1 0 N o P i n 5 R e s e t S w i t c h H D D L E D P o w e r S w i t c h P o w e r L E D 7 9 R e s e r v e d 8 6 4 2 ...

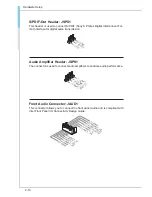
Страница 24: ...transmission 2 S P D I F 3 G N D 1 V C C Audio Amplifier Header JSPK1 The connector is used to connect audio amplifiers to enhance audio performance 2 A M P _ L 1 A M P _ L 4 A M P _ R 3 A M P _ R Front Audio Connector JAUD1 This connector allows you to connect the front panel audio and is compliant with Intel Front Panel I O Connectivity Design Guide ...

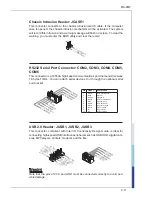
Страница 25: ...erial devices to it through the optional serial port bracket PIN SIGNAL DESCRIPTION 1 2 3 4 5 6 7 8 9 10 NDCD NSIN NSOUT NDTR GND NDSR NRTS NCTS RI NC Data Carrier Detect Signal In Signal Out Data Terminal Ready Signal Ground Data Set Ready Request To Send Clear To Send Ring Indicate No Connection USB 2 0 Header JUSB1 JUSB2 JUSB3 This connector compliant with Intel I O Connectivity Design Guide is...

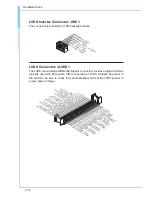
Страница 26: ...ight options LVDS Connector JLVDS1 The LVDS Low Voltage Differential Signal connector provides a digital interface typically used with flat panels After connecting an LVDS interface flat panel to the JLVDS1 be sure to check the panel datasheet and set the LVDS jumper to proper power voltage ...

Страница 27: ...nector works as LPC debug port and supports TPM modules through an adapter 1 0 N o P i n 1 4 G r o u n d 8 5 V P o w e r 1 2 G r o u n d 6 S e r i a l I R Q 4 3 3 V P o w e r 2 3 V S t a n d b y p o w e r 1 L P C C l o c k 3 L P C R e s e t 5 L P C a d d r e s s d a t a p i n 0 7 L P C a d d r e s s d a t a p i n 1 9 L P C a d d r e s s d a t a p i n 2 1 1 L P C a d d r e s s d a t a p i n 3 1 3 L...

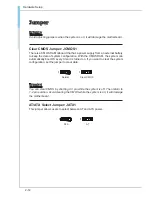
Страница 28: ...With the CMOS RAM the system can automatically boot OS every time it is turned on If you want to clear the system configuration set the jumper to clear data 1 1 Normal Clear CMOS Important You can clear CMOS by shorting 2 3 pin while the system is off Then return to 1 2 pin position Avoid clearing the CMOS while the system is on it will damage the motherboard AT ATX Select Jumper JATX1 This jumper...

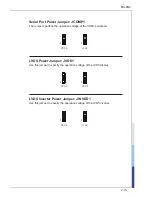
Страница 29: ...ation voltage of the COM1 serial port 1 1 VCC5 12V LVDS Power Jumper JVDD1 Use this jumper to specify the operation voltage of the LVDS display 1 1 VCC3 VCC5 LVDS Inverter Power Jumper JINVDD1 Use this jumper to specify the operation voltage of the LVDS inverter 1 1 VCC5 12V ...

Страница 30: ...ot The Mini PCIe slot is provided for mSATA devices WiFi modules Bluetooth mod ules TV tuner cards and other Mini PCIe cards Important When adding or removing expansion cards make sure that you unplug the power supply first Meanwhile read the documentation for the expansion card to config ure any necessary hardware or software settings for the expansion card such as jumpers switches or BIOS config...

Страница 31: ...message appears on the screen at system startup and re quests users to run SETUP Users want to change the default settings for customized features Important Please note that BIOS update assumes technician level experience As the system BIOS is under continuous update for better system performance the illustrations in this chapter should be held for reference only 3 BIOS Setup ...

Страница 32: ...efore you respond and you still wish to enter Setup restart the system by turning it OFF and On or pressing the RESET button You may also restart the system by simultaneously pressing Ctrl Alt and De lete keys Important The items under each BIOS category described in this chapter are under continuous update for better system performance Therefore the description may be slightly different from the ...

Страница 33: ... right pointer symbol appears to the left of certain fields that means a sub menu can be launched from this field A sub menu contains additional op tions for a field parameter You can use arrow keys to highlight the field and press Enter to call up the sub menu Then you can use the control keys to enter values and move from field to field within a sub menu If you want to return to the main menu ju...

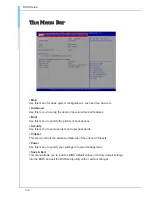
Страница 34: ...specify the priority of boot devices Security Use this menu to set supervisor and user passwords Chipset This menu controls the advanced features of the onboard chipsets Power Use this menu to specify your settings for power management Save Exit This menu allows you to load the BIOS default values or factory default settings into the BIOS and exit the BIOS setup utility with or without changes ...

Страница 35: ...ng allows you to set the system date The date format is Day Month Date Year System Time This setting allows you to set the system time The time format is Hour Min ute Second SATA Mode Selection This setting specifies the SATA controller mode ...

Страница 36: ... the booting sequence This delay ensures that the logo is displayed for a suf ficient amount of time Therefore it is recommended that you disable this BIOS feature for a faster boot up time Bootup NumLock State This setting is to set the Num Lock status when the system is powered on Setting to On will turn on the Num Lock key when the system is powered on Setting to Off will allow users to use the...

Страница 37: ...mode for the serial port 1 Device Mode Select an operation mode for the serial port 6 FIFO Mode This setting controls the FIFO data transfer mode Shared IRQ Mode This setting provides the system with the ability to share interrupts among its serial ports Watch Dog Timer You can enable the system watch dog timer a hardware timer that generates a reset when the software that it monitors does not res...

Страница 38: ...tages temperatures and all fans speeds Smart Fan Configuration Smart SYSFAN Target These setting enables disables the Smart Fan function Smart Fan is an ex cellent feature which will adjust the CPU system fan speed automatically de pending on the current CPU system temperature avoiding the overheating to damage your system ...

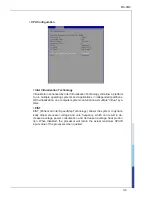
Страница 39: ...itions With virtualization one computer system can function as multiple Virtual sys tems EIST EIST Enhanced Intel SpeedStep Technology allows the system to dynam ically adjust processor voltage and core frequency which can result in de creased average power consumption and decreased average heat produc tion When disabled the processor will return the actual maximum CPUID input value of the process...

Страница 40: ...ystem that does not support or have any USB 1 1 2 0 driver installed such as DOS and SCO Unix Audio Controller This setting enables disables the onboard audio controller Launch OnBoard LAN OpROM These settings enable disable the initialization of the onboard onchip LAN Boot ROM during bootup Selecting Disabled will speed up the boot process ...

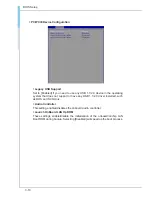
Страница 41: ...3 11 MS 98I0 GPIO Group Configuration GPO0 GPO3 These settings control the operation mode of the specified GPIO ...

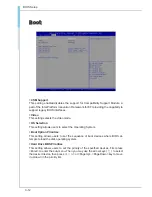
Страница 42: ...ection This setting allows users to select the Operating System Boot Option Priorities This setting allows users to set the sequence of boot devices where BIOS at tempts to load the disk operating system Hard Drive BBS Priorities This setting allows users to set the priority of the specified devices First press Enter to enter the sub menu Then you may use the arrow keys to select the desired devic...

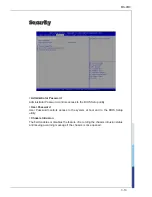
Страница 43: ... to the BIOS Setup utility User Password User Password controls access to the system at boot and to the BIOS Setup utility Chassis Intrusion The field enables or disables the feature of recording the chassis intrusion status and issuing a warning message if the chassis is once opened ...

Страница 44: ...ng enables disables BIOS support for security device When set to Disable the OS will not show security device TCG EFI protocol and INT1A interface will not be available Device Select This setting allows users to select the security device Serial Port Console Redirection ...

Страница 45: ...S 232 null modem cable connected be tween the host system and terminal s This setting specifies the type of terminal device for console redirection Bits per second Data Bits Parity Stop Bits This setting specifies the transfer rate bits per second data bits parity stop bits of Console Redirection Flow Control Flow control is the process of managing the rate of data transmission be tween two nodes ...

Страница 46: ...tion After BIOS POST This setting determines whether or not to keep terminals console redirection running after the BIOS POST has booted Security Configuration TXE FW Version The setting shows the firmware information of the Intel Trusted Execution En gine TXE TXE HMRFPO The setting enables disables TXE HMRFPO Host ME Region Flash Protec tion Override TXE Firmware Update This setting enables disab...

Страница 47: ...l Gfx Mem This setting specifies the memory size for DVMT LCD Panel Type This setting specifies the LCD panel type LVDS Backlight Control This setting controls the intensity of the LVDS backlight PlayReady 3 for Windows 10 only This setting enables disables Microsoft s PlayReady 3 technology PlayReady is a content protection technology from Microsoft that includes encryption out put protection and...

Страница 48: ...p Sleep Mode The setting enables disables the Deep S5 power saving mode S5 is almost the same as G3 Mechanical Off except that the PSU still supplies power at a minimum to the power button to allow return to S0 A full reboot is required No previous content is retained Other components may remain powered so the computer can wake on input from the keyboard clock modem LAN or USB device Advanced Resu...

Страница 49: ... S3 S4 The item allows the activity of the USB device to wake up the system from S3 S4 sleep state RTC When Enabled your can set the date and time at which the RTC real time clock alarm awakens the system from suspend mode ...

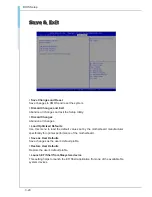
Страница 50: ...mized Defaults Use this menu to load the default values set by the motherboard manufacturer specifically for optimal performance of the motherboard Save as User Defaults Save changes as the user s default profile Restore User Defaults Restore the user s default profile Launch EFI Shell from filesystem device This setting helps to launch the EFI Shell application from one of the available file syst...

Страница 51: ...2 A 1 This appendix provides the sample codes of WDT Watch Dog Timer and GPIO General Purpose Input Output Appendix WDT GPIO ...

Страница 52: ...ange to WDT mov dx SIO_INDEX_Port mov al 07h out dx al mov dx SIO_DATA_Port mov al WatchDog_LDN out dx al Acive WDT mov dx SIO_INDEX_Port mov al 30h out dx al mov dx SIO_DATA_Port in al dx or al 01h out dx al set timer mov dx SIO_INDEX_Port mov al 0F6h out dx al mov dx SIO_DATA_Port mov al WDT_Timer out dx al set UINT mov dx SIO_INDEX_Port mov al 0F5h out dx al mov dx SIO_DATA_Port mov al WDT_UNIT...

Страница 53: ...h 0FED8C408h SIO PIO Register Bit 1 1 1 1 Sample code 2 GPI0_Addr equ 0FED8C428h GPO0_Addr equ 0FED8C400h Sample Code 1 Get GPI 0 status Push es Push 0 Pop es Push esi Get GPI 0 Pin Status Register mov esi GPI0_Addr mov al byte ptr es esi al bit0 GPI 0 status Pop esi Pop es 2 Set GPO 0 value to high Push es Push 0 Pop es Push esi Get GPO 0 Pin Status Register mov esi GPO0_Addr mov al byte ptr es e...

Страница 54: ......

Отзывы: