


2-10
Intro
d
u
cti
ons
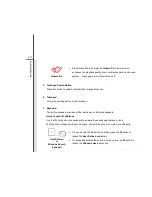
S-Bar application.
ODD Eject
Press this button to eject the disc tray of the optical device drive.
Press this button again to retrieve the disc tray.
Please Note
: The ODD Eject button is functional under pure DOS
system. However, in an Operating System without the S-Bar
application installed, the Eject button will not be functional.
In such a case, users can right-click the ODD in "My Computer"
and select "Eject" to eject the ODD tray.
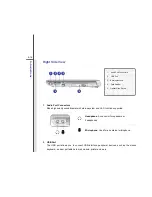
Display Off
Press this button to switch the display off instantly to economize the
power consumption.
Press this button again to switch on the display.
Turbo
Press this button to enable the
Turbo
function to
maximize the battery running time.
Press this button again to disable the Turbo function.
Refer to chapter 3 of this manual for the further information.
Device Key
Press this button to activate the S-Bar application.
Refer to chapter 3 of this manual for the further information.
Содержание FX420
Страница 1: ...CHAPTER 1 Preface...
Страница 23: ...CHAPTER 2 Introductions...
Страница 45: ...CHAPTER 3 Getting Started...
Страница 60: ...3 16 Getting Started 4 1 2 3...
Страница 91: ...CHAPTER 4 BIOS Setup...


