


T: +1-613-545-0466
www.mrel.com
5
Press the
Menu Button
. The on screen menus will
appear with the
Menu Bar
at the top and the
System Menu
arranged to the left .
1.5 Battery
The
Blaster’s Ranger II™ Camera
battery does not
charge while the
Blaster’s Ranger II™ Camera
is in
use. To begin charging the battery, attach the DC
power adapter to the
Blaster’s Ranger II™ Camera
and press the
Power Button
. While the
Blaster’s
Ranger II™ Camera
is charging the
Battery LED
will
blink. When the battery is completely charged the
Blaster’s Ranger II™ Camera
will fully power down, turning off all LEDs. Charging may
take up to 5 hours.
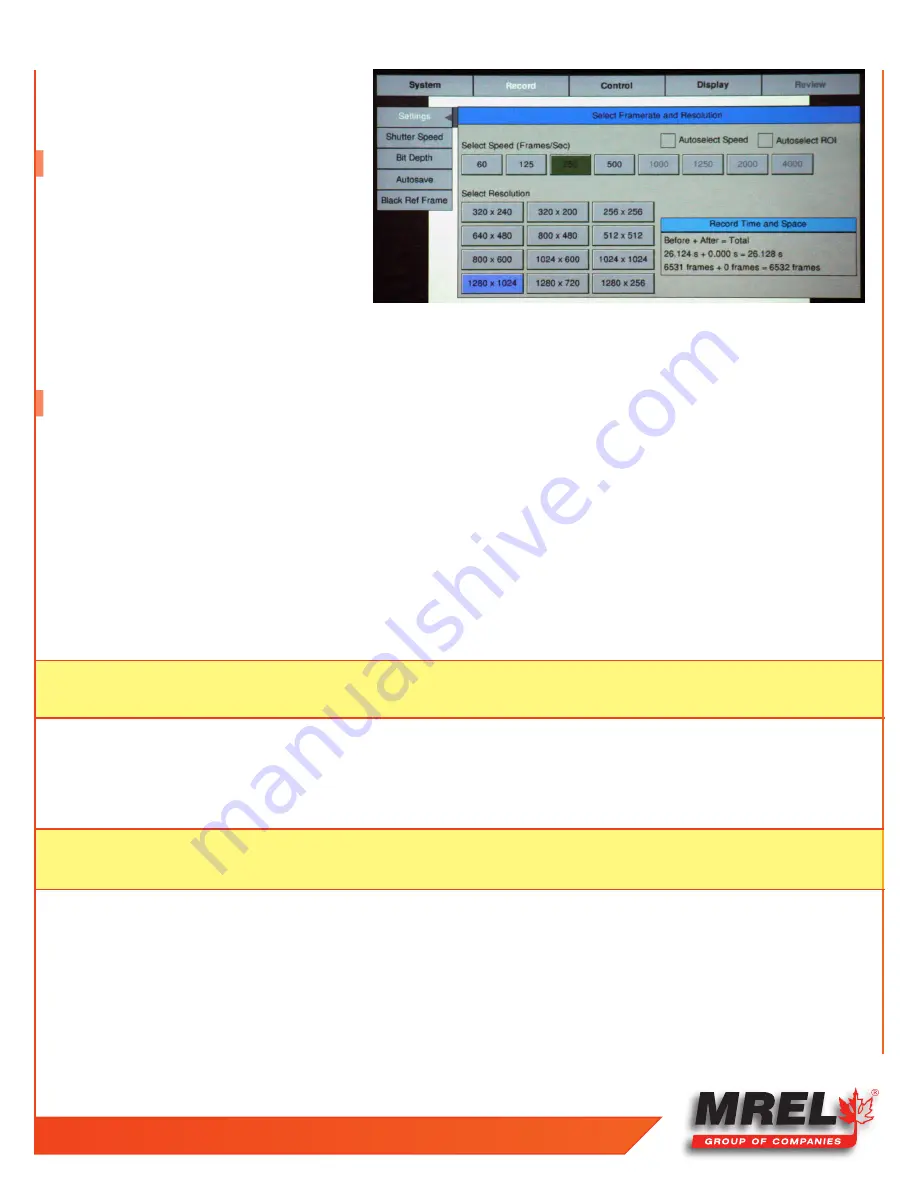
1.6 Record
1. Navigate to the
Record Settings
Sub-Menu and set the resolution and speed desired.
2. Navigate to the
Record > Shutter Speed
Sub-Menu
and set the desired exposure.
3. Navigate to the
Control Menu > Trigger Position
Sub-Menu
and set the desired
Trigger
point. Setting the
Trigger
point divides the
internal memory into two sections:
•
A circular buffer reserved for pre-trigger frames (the
Blaster’s Ranger II™ Camera
fills this buffer until it gets a trigger. If
the
Blaster’s Ranger II™ Camera’s
memory gets full, it continues recording, discarding the oldest frame for each new frame
captured);
•
A second buffer for post-trigger frames. The images recorded before the trigger are given negative frame numbers (oldest is
most negative, the newest is -1), the image taken at the time of the trigger is “
frame 0
,” and all frames taken after the
Trigger
are
given positive numbers.
4. Navigate to the
Control Menu
>
Ext. Trigger
, set to be
Enabled
.
5. Frame and focus the scene.
6. Press the
Arm Button
to begin recording pre-trigger frames. The
Blaster’s Ranger II™ Camera
settings will be locked in. If you wish to
abort the recording to change settings, press the
Arm Button
again.
7. Trigger the
Blaster’s Ranger II™ Camera
via the
Trigger Button
or a
Trigger Switch
cable button attached to the
I/O cable
to complete
the recording. The
Blaster’s Ranger II™ Camera
will now enter
Review Mode
, unless it is set to
AutoSave
, in which case the
Blaster’s
Ranger II™ Camera
will download the recording, then revert to
Armed Mode
.
NOTE:
With an “
End
” trigger, all frames will have negative numbers except for frame 0, which will be the last frame. With a
“
Start
” trigger the recording will begin at frame “
0
” and all subsequent frames will have positive numbers.
NOTE:
The
Blaster’s Ranger II™ Camera
may remain
Armed
for an indefinate period of time because it is overwriting its
Circular
Buffer
, it never runs out of space, but only retains the newest images.


