background image

9

7) Connect all the components together (electrically) and verify proper operation of                              

all the system functions.

a. The  headrest  DIN  cables  and  the  Interface  Harness  DIN  cables  are  color 

coded. Connect each headrest cable to the correct color cable on the Audio 
interface harness. In some vehicles it will be necessary to use the supplied DIN 
extension  cables  to  reach  from  under  one  seat  to  the  other  seat.  The  DIN 
extension  cables  can  be  used  for  either  the  MMD7HRM  or  MMD7HRS 
monitors. The extension cables are labeled with color coded Green/Red and 
Blue/Yellow. When connecting the extension cables, ensure that the


Green/Red  extension  cable  is  used  with  the  Master  monitor  cable  and  the 
Blue/Yellow extension cable is used with the Satellite monitor cable.

b. Connect the DC power jack.

8)   Verify proper operation of the system.

9) Make  sure  that  no  wiring  is  pinched,  or  connected  improperly  during  the  final 

installation.

Содержание MMD7HRB

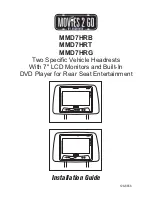
Страница 1: ...Monitors and Built In DVD Player for Rear Seat Entertainment Two Specific Vehicle Headrests Installation Guide 128 8658 SCREEN MODE PLAY STOP SOURCE AUX POWER SCREEN MODE SOURCE AUX POWER MMD7HRB MMD7...

Страница 2: ...7HRB MMD7HRT MMD7HRG System Monitor MMD7HRM Master Monitor with DVD Player 1pc MMD7HRS Satellite Monitor 1pc MMD7HRS MMD7HRM IMPORTANT SCREEN MODE PLAY STOP SOURCE AUX POWER SCREEN MODE SOURCE AUX POW...

Страница 3: ...112B3227 2pc 4 2 Pin DC Power Cable P N 112 3667 1pc 5 Post Tube 12MM P N 100 2508 2pcs 6 Post Tube 14MM P N 100 2509 2pcs 7 Wired Headphone P N 136 3758 2pcs OPTIONAL ACCESSORIES 8 Infrared Channel W...

Страница 4: ...ay from the DVD source in M1 AV1 orAUX source The SM monitor has a built in infrared audio transmitter CH B for use with the optional two channel wireless headphones CH B 4 The monitors will show all...

Страница 5: ...a maximum adjustment of 30 degrees from closed position the headrest itself can be tilted forward to help achieve a comfortable viewing position Inner Ring Closed Position Internal Lock 30 degrees MMD...

Страница 6: ...Satellite Monitor MMD7HRM Monitor Master Monitor M1 MMD7HRS Monitor Satellite Monitor SM SCREEN MODE SOURCE AUX POWER SCREEN MODE PLAY STOP SOURCE AUX POWER SCREEN MODE SOURCE AUX POWER SCREEN MODE P...

Страница 7: ...7 5 6 Adjust match your vehicle seatback dimension SCREEN MODE SOURCE AUX POWER 4 Use a screwdriver to tighten the screw after headrest support have been adjusted 3...

Страница 8: ...Ensure that the switched power is fused at the source Failure to do so may result in vehicle wiring damage 4 Run the wiring harnesses throughout the vehicle as necessary Refer to the Wiring Diagrams...

Страница 9: ...reach from under one seat to the other seat The DIN extension cables can be used for either the MMD7HRM or MMD7HRS monitors The extension cables are labeled with color coded Green Red and Blue Yellow...

Страница 10: ...M DIN Extension Cables GREEN RED YELLOW BLUE DIN Extension Cables Optional MMD7HRS Monitor Satellite Monitor MMD7HRM Monitor Master Monitor SCREEN MODE SOURCE AUX POWER SCREEN MODE PLAY STOP SOURCE AU...

Страница 11: ......

Страница 12: ...128 8658 2008 Audiovox Electronics Corp Hauppauge NY 11788 www mobile audiovox com...

Отзывы: