background image

15

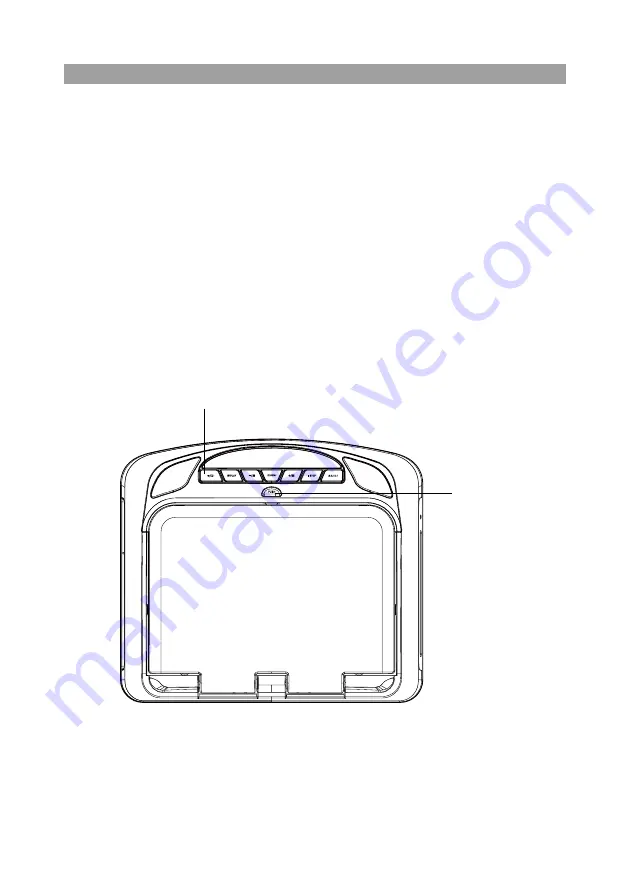
1.   Push in the Screen Release button to unlock the LCD screen. The screen will drop down 

slightly. 

2.   Pivot the screen downward until a comfortable viewing angle is reached. The hinge friction 

will hold the screen in position while the system is in use. 

3.   Press the power button on the unit or the remote control to turn the syst

em on and off

When in use, the internal backlighting will illuminate the controls. 

4.   After the unit has been turned on and is displaying a picture, adjust the viewing angle by 

pivoting the screen to optimize the picture quality. 

5.   Remember to tur

n the unit off and piv

ot the LCD screen to the locked position when not in 

use.

Power ON/OFF 

Button

Screen Release

   Turning the unit on or off

Содержание AMVXMTG10/VXMTG10

Страница 1: ...AMVXMTG10 VXMTG10 10 1 OverheadLCDMonitor With Built In DVD Player HDMI USB Inputs Owner s Manual...

Страница 2: ......

Страница 3: ...ully closed position when not in use Before putting on headphones always adjust the volume setting to the lowest position Remember to leave the dome light switch in the off or auto positions when the...

Страница 4: ...Note Installation options vary see the individual owner s manuals for each component in your system to obtain a full understanding of each component s operation For safety reasons when changing video...

Страница 5: ...iew 9 Remote Control Operation 10 Remote Control Functions 11 Turning the unit on or off 15 Source menu 16 System Menu Setting and Adjustments 18 Playing DVDs and Audio Discs 25 Playing USB Devices 25...

Страница 6: ...DMI USB 2 0 Port User Accessible with Media Playback and Charging support On Screen Display OSD for control of picture quality and functions Full function remote control Plays DVD CD and MP3 discs 100...

Страница 7: ...a disc or pause a disc 3 DOWN Previous Button Short press to select the source mode and system menu pages Long press to select previous chapter or track during play the DVD 4 MENU Select Button This...

Страница 8: ...T Button This button is used for ejecting a disc from the disc compartment 8 Dome Lights Provide additional interior illumination 9 Infrared Transmitter Remote Sensor IR Transmitter is used to broadca...

Страница 9: ...ng Mobile Devices up to 500mA It is recommended to connect the device to a vehicle power outlet for full charging capabilities 3 HDMI For connection of devices with HDMI outputs Note Requires an HDMI...

Страница 10: ...ion Battery Replacement 1 Remove the battery cover 2 Insert two AAA batteries into the battery holder Be sure to observe the correct polarity 3 Reinstall the battery cover back into the Remote Control...

Страница 11: ...11 Remote Control Functions...

Страница 12: ...he user to access the system menu Press the por q cursor buttons to select PICTURE AUDIO SYSTEM PLAYER and FMM Settings 7 CURSOR pqt u Use the cursor buttons to access menu selections on the screen 8...

Страница 13: ...TITLE Press to display and select the subtitle language in DVD mode Each time this button is pressed the subtitle language changes Pressing the button will also turn the subtitles off Note The type an...

Страница 14: ...of the disc Note For MP3 or photo mode press twice to return to Audio Photo Video option menu 28 SETUP No function on this model User can use the system to select the function may need 29 MUTE Press...

Страница 15: ...ress the power button on the unit or the remote control to turn the system on and off When in use the internal backlighting will illuminate the controls 4 After the unit has been turned on and is disp...

Страница 16: ...or the OK button on the remote control to select the desired source DVD The DVD source input is used to play DVDs Audio CDs and MP3 discs USB The USB source input is used to play MP3 files JPEG files...

Страница 17: ...mobile phone Connect your HDMI device with an optional HDMI cable Smartphones and Tablet require the appropriate adapter for your smart device You can also use this input to connect a Smart Stick suc...

Страница 18: ...e system menu cursor button to the icon side of the setup page Then repeat steps 2 through 5 PICTURE AUDIO Setup SYSTEM Setup PLAYER Setup FMM Setup PICTURE PICTURE PICTURE AUDIO AUDIO AUDIO SYSTEM SY...

Страница 19: ...OLOR TINT MOVE 16 16 0 MENU 16 PICTURE AUDIO SYSTEM PLAYER FMM ADJUST EXIT BRIGHTNESS CONTRAST COLOR TINT MOVE 16 0 MENU 16 16 PICTURE AUDIO SYSTEM PLAYER FMM ADJUST EXIT BRIGHTNESS CONTRAST COLOR TIN...

Страница 20: ...CREEN SAVER MONITOR MODE ASPECT RATIO PASSWORD SETUP RESET RATING LAST MEMORY AUDIO LANGUAGE MOVE MOVE MOVE MENU MENU MENU PICTURE AUDIO SYSTEM PLAYER FMM ADJUST EXIT IRT MOVE MENU L R ON ENGLISH NTSC...

Страница 21: ...P TINT RESET RATING LAST MEMORY AUDIO LANGUAGE MOVE MOVE MOVE 16 16 16 0 MENU MENU MENU PICTURE AUDIO SYSTEM PLAYER FMM ADJUST EXIT IRT MOVE MENU L R ON ENGLISH NTSC ADULT ON ON ON M1 16 9 ENGLISH PIC...

Страница 22: ...lay After the password is entered press the OK button on the remote control PICTURE PICTURE PICTURE PICTURE PICTURE PICTURE PICTURE PICTURE AUDIO AUDIO AUDIO AUDIO AUDIO AUDIO AUDIO AUDIO SYSTEM SYSTE...

Страница 23: ...O AUDIO AUDIO AUDIO AUDIO AUDIO SYSTEM SYSTEM SYSTEM SYSTEM SYSTEM SYSTEM SYSTEM SYSTEM PLAYER PLAYER PLAYER PLAYER PLAYER PLAYER PLAYER PLAYER FMM FMM FMM FMM FMM FMM FMM FMM ADJUST ADJUST ADJUST ADJ...

Страница 24: ...STEM PLAYER FMM SELECT EXIT MOVE MENU 91 1MHz 91 3MHz 91 5MHz 91 7MHz 91 9MHz 92 1MHz 92 3MHz 92 5MHz 92 7MHz 92 9MHz 93 1MHz 93 3MHz 93 5MHz 93 7MHz 93 9MHz 94 1MHz 94 3MHz 94 5MHz 94 7MHz 94 9MHz 95...

Страница 25: ...by using the numbers keys Press the number key corresponding to the desired track and the player will implement the selection Press the previous button 9 to return to the previous chapter or track Pr...

Страница 26: ...CD quality song can be compressed into MP3 format with very little loss of quality while taking up much less space CD R discs that have MP3 format files can be played on the DVD player The DVD player...

Страница 27: ...er is sold A DVD from a different region cannot be played in this unit and the unit will display WRONG REGION Region 1 USA Canada Region 2 Japan Europe South Africa Middle East Greenland Region 3 S Ko...

Страница 28: ...media source Smartphones and Tablets For Apple products go to the Apple Store or enter the following link into your web browser to find the adapter required for your device Different models require di...

Страница 29: ...and search for FireTV Stick Chromecast media streaming device www google com and search for Chromecast Roku HDMI streaming device http www roku com products compare Note does not require external pow...

Страница 30: ...roid Mobile It will charge at up to 1 Amps of charging current For Samsung Mobile It will charge at up to 500mA of charging current USB2 Port Hidden Input for when remote HDMI USB Harness HDH12 is Ins...

Страница 31: ...nto the appropriate jacks If you are using the 2 channel IR headphones make sure you turn on the IR headphone power make sure the correct channel A or B is selected If the FM Modulator is ON make sure...

Страница 32: ...ideo Display System Video Output Power Source Dimension L x W x H TFT Active Matrix LCD 1024 RGB X3 x 600 1 843 200 32 113 F 0 45 C 4 149 F 10 65 C 20 000 Hours NTSC PAL AUTO 1 0Vp p 75 ohms 12VDC 312...

Страница 33: ...or part thereof which in the opinion of the Company has suffered or been damaged through alteration improper installation mishandling misuse neglect accident or by removal or defacement of the factory...

Страница 34: ......

Страница 35: ......

Страница 36: ...2020 Voxx Electronics Corp 2351 J Lawson BLVD Orlando FL 32824 700090 www voxxelectronics com...

Отзывы: