3
Add your Satellite manually
If you are not using the MotoManage app, you will need to
configure the Satellite manually. Follow the steps below to add
a Satellite to your existing whole home network.
1
Place the Satellite near your Router and plug the included
Ethernet cable into the Router’s LAN port and the LAN
port of the Satellite. Your Router should already be
powered on and connected to the Internet.
2
Now, connect the supplied power adapter between the
Satellite’s power jack and an electrical outlet. The Motorola
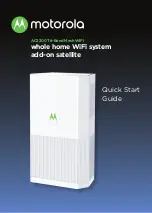
logo on the front of the unit should start blinking green
while the device powers up. If the logo is not blinking
green, check that the On/Off button on the back panel is
pushed in. The logo will switch to blinking blue while it is
pairing with the Router.
3
Once the Satellite has paired with the Router, the Motorola
logo will turn solid green. This process can take up to 5
minutes. Then you can unplug the Ethernet cable and
move the Satellite to where you plan to locate it. Continue
below to Positioning the Satellites around your home for
help on doing this.
If the Motorola logo does not turn solid green see the
Troubleshooting section at the end of this guide.


