background image

32

Optional Features

The Travel Clock, Travel Alarm and QuickNotes are optional features that may 
be available on your pager. If these features are not currently available and you 
would like to take advantage of them, contact your paging service provider.

Setting the Travel Clock

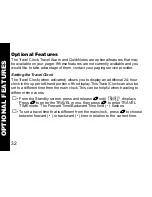
The Travel Clock (when activated) allows you to display an additional 24-hour 
clock in the upper left-hand portion of the display. This Travel Clock can also be 
set to a different time from the main clock. This can be helpful when traveling to 
different time zones.


 • From the Standby screen, press and release 

*

until  

TRAVEL?

  displays. 

Press 

+

 to enter the TRAVEL menu, then press 

+

 to enter TRAVEL 

TIME mode. The Forward Time/Backward Time field (

 -

 ) flashes.

 • To set a travel time that is different from the main clock,  press 

*

 to choose 

between forward (

 +

 ) or backward (

 - 

) time in relation to the current time. 

BATTER

Y

OPTIONAL FEATUR

ES

Содержание Jazz

Страница 1: ...A USER S GUIDE TM ...

Страница 2: ...ng Alarms 12 Message Features Storing Messages 20 Deleting Messages 21 Locking Unlocking Messages 22 Information Services Reading a Message 24 Turning the Alert On Off 26 Deleting a Message 26 Phone Directory Entering an Entry 27 Adding a Received Message 30 Deleting an Entry 31 Optional Features Travel Clock and Travel Alarm 32 QuickNotes 36 Other Features Special Pager Displays 38 Use and Care I...

Страница 3: ...guide This user s guide includes a detachable Quick Reference Card on the back cover Effective Use of Your Pager Your pager can help you keep in contact with everyone important to you By giving your pager number to your business associates family and friends you can be contacted when necessary If you have a cellular phone give your pager number instead of your cellular number Then you can decide w...

Страница 4: ...nd held to scroll through available choices or to increment a value The Select button is used to select and confirm a value The Read Power On button is used to read a message to save a setting to turn on the pager or to turn on the backlighting ON OFF INTRODUCTION ...

Страница 5: ...dibly or vibrates Note The Startup alert can be skipped by pressing The Standby screen displays the time date and the AUDIBLE alert iconH or VIBRATE alert icon G From the Standby screen press and release until CONTROLS displays Press to enter the CONTROLS menu 12 00 A 1 01 H H H H MOTOROLA H H H H 12 00 A 1 01 BACKLIGHT TIME DATE GETTING STARTED ...

Страница 6: ... When you have finished reading your messages and the Standby screen is displayed the backlight remains on for four seconds before automatically turning off Press to set the pager to OFF mode The OFF screen displays without any alert icon H H H H OFF d 12 00 A 1 01 ALERTS GETTING STARTED ...

Страница 7: ...NTROLS menu Then press to enter TIME DATE mode Press to set the hour to the desired value Move to the Minute A M P M Date and Month fields by pressing then press to set the value for each field Note To display a 24 hour clock set the AM PM field to _ Press from any field to set and exit 12 00 A 1 01 GETTING STARTED ...

Страница 8: ...choose the speed at which your messages scroll or read them line by line Message Type Unselected Selected Personal Phone Directory Information services when received º when selecting when chirp is on j From the Standby screen press and release until CONTROLS displays Press to enter the CONTROLS menu then press to enter the SCROLL SPEED menu MESSAGES ...

Страница 9: ...l message flashes The slot number of the latest message displays on top Press to choose the SCROLL SPEED you desire Press to set and exit Note There are four scroll speeds LINE BY LINE SLOW MEDIUM and FAST Press to display the message status screen Press to read the latest message Note The flashing unread message indicator changes to when it is selected To read a different message press to select ...

Страница 10: ...peed If the scroll speed is set to LINE BY LINE the remaining screens will automatically display one line at a time every few seconds Note To pause the message in any scroll mode press Press again to continue In LINE BY LINE mode continue pressing until the last screen is displayed The last screen displays the time and date the message was received After an interval the pager returns to the standb...

Страница 11: ...ad and audible alerts are chosen the pager gives a periodic alert until all unread messages are read This alert will continue for up to 30 minutes A message is considered read if any part of the message is displayed If a duplicate personal message is received the Duplicate icon displays on top Press to view the duplicate message The word DUPLICATE displays before the duplicate message is displayed...

Страница 12: ... until the desired alert mode displays e g VIBRATE The pager gives off a sample of each displayed alert Press to set and exit The Standby screen displays with either H H H H the audible alert icon or G G G G the vibrate alert icon depending on which alert mode was chosen H H H H AUDIBLE w w w w G G G G VIBRATE x x x x G G G G 9 05 P 9 28 ALERTS ...

Страница 13: ...s received To stop an alert press any button From the Standby screen press and release until ALERTS displays Press to enter the ALERTS menu Press to enter the PLEASING alert menu Press until the desired alert mode displays e g ARPEGGIO The pager gives off a sample of each displayed alert Press to set and exit The Standby screen displays with the Audible alert icon H H H H H STANDARD h h h h H H H ...

Страница 14: ...MINDER alarm can be set to expire within 60 minutes or less From the Standby screen press and release until ALARMS displays Press to enter the ALARMS menu Press again to enter the REMINDER menu Press to set the alert time In this example the pager is set to alert 45 minutes from the time the alarm is set Note When setting the alert time the value starts with OFF then 1 through 60 then OFF again Pr...

Страница 15: ...ress any button once to stop the alarm and again to clear the message If the alarm is not stopped during activation the Alarm icon flashes Press any button once to read the message and press again to clear From the Standby screen press and release until ALARMS displays Press to enter the ALARMS menu Press to enter GENERAL alarms mode H H H H J J J J 9 00 P 9 28 H H H H J J J J REMINDER s H H H H J...

Страница 16: ...field Press to set the minutes to the desired value Move to the A M P M Day and Month fields by pressing then press to set the value for each field Press in any field to set and exit Note To alert on a daily basis set the Day and Month to The Standby screen displays with J the enable alert icon H H H H I I I I 9 05 P 9 28 0 0 0 01 1 1 1 H H H H I I I I 9 05 P 9 28 H H H H J J J J 10 00 A 9 30 H H ...

Страница 17: ...xit The alarm remains set and enabled but the alert won t occur until it is re enabled To re enable the alert follow these steps 1 From the Standby screen press and release until ALARMS displays When a GENERAL alarm expires this screen displays and the pager alerts Press any button once to stop the alarm and again to clear the message If the GENERAL alarm is not stopped during activation the ALARM...

Страница 18: ...ess to enter the ALARMS menu Press to enter GENERAL alarms mode 2 Press then press until the disable alarm icon displays Press to set and exit EVENT Alarms You can set up to three EVENT alarms Each EVENT alarm allows you to keep a special reminder message that displays when the alarm is activated and the pager alerts These can be set to alert either on a daily basis or one time only From the Stand...

Страница 19: ... the next Note You can enter up to 14 characters letters numbers or spaces If the message is less than 14 characters long advance to the rubout character and press to fill the remaining character fields with blanks At the last character field press to move to the alarm Time Date screen 0 0 0 01 1 1 1 H H H H I I I I AAAAAAAAAAAAAA 0 0 0 03 3 3 3 H H H H I I I I AAAAAAAAAAAAAA 0 0 0 03 3 3 3 H H H ...

Страница 20: ...ust press to save each event alarm prior to setting the next alarm Note To alert on a daily basis set the Day and Month to The Standby screen displays with J the enable alert icon When an EVENT alarm expires the message displays and the pager alerts Press any button once to stop the alarm and again to clear the message 0 0 0 03 3 3 3 H H H H J J J J 9 00 A 9 29 H H H H J J J J 9 05 P 9 28 H H H H ...

Страница 21: ...ess to move to the alert enable disable field 3 Press until I I I I the disable alert icon displays 4 Press to set and exit The alarm remains set and enabled but the alert won t occur until it is re enabled To re enable the alert follow these steps 1 From the Standby screen press and release until ALARMS displays If the EVENT alarm is not stopped during activation the ALARM icon flashes Press any ...

Страница 22: ...hese steps 1 From the Standby screen press and release until ALARMS displays Press to enter the ALARMS menu Press to enter EVENT alarms mode 2 Press until the EVENT alarm you want to disable displays Press then press until the disable alarm icon displays Press to set and exit Storing Messages Your pager can store up to 16 personal messages Each stored message is assigned a number which displays wh...

Страница 23: ...ed Automatic Message Deletion If all message slots are full and a new message is received the oldest unlocked read message is automatically deleted While reading a message press until DELETE displays Press to delete From the Standby screen press until DELETE ALL displays then press to delete all 1 1 1 1 H H H H Q Q Q Q PICK ME UP AT 10PM H H H H DELETE H H H H DELETE ALL g MESSAGE FEATURES ...

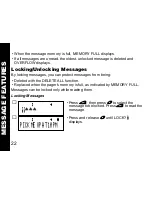
Страница 24: ...u can protect messages from being Deleted with the DELETE ALL function Replaced when the pager s memory is full as indicated by MEMORY FULL Messages can be locked only while reading them Locking Messages Press then press to select the message to be locked Press to read the message Press and release until LOCK displays 1 1 1 1 H H H H 1 1 1 1 H H H H Q Q Q Q PICK ME UP AT 10PM MESSAGE FEATURES ...

Страница 25: ...ges LOCK FULL displays when you try to lock the next message To lock the next message you must first unlock one message Press then press to select the message to be unlocked Press to read the message Press until UNLOCK _ displays H H H H LOCK 1 1 1 1 H H H H L L L L 1 1 1 1 H H H H L L L L 1 1 1 1 H H H H L L L L Q Q Q Q PICK ME UP AT 10PM MESSAGE FEATURES ...

Страница 26: ... few hours This pager can store up to five information service messages Press to unlock the message The lock icon disappears When an information service message is received flashes and the number of unread information service messages displays on the message status screen If no key is pressed for 12 seconds the standby screen displays Press to return to the message status screen H H H H UNLOCK _ 1...

Страница 27: ...he pager is set to scroll the message automatically SLOW MEDIUM or FAST scroll speeds the remainder of the message is displayed at that speed If the scroll speed is set to LINE BY LINE the remaining screens will automatically display one line at a time every few seconds Note To pause the message in any scroll mode press Press again to continue In LINE BY LINE mode continue pressing until the last ...

Страница 28: ...isplays the time and date the message was received After an interval the pager returns to the standby screen While reading an information service message press until CHIRP ON or CHIRP OFF displays Press to turn CHIRP ON or OFF While reading an information service message press until DELETE displays 4 4 4 4 H H H H 3 51P 9 29 2 2 2 2 H H H H Q Q Q Q INDEX ROSE 87 PTS 2 2 2 2 H H H H CHIRP ON y 6 6 ...

Страница 29: ...No spaces or hyphens may be entered You can also set the pager to block out pages from specific numbers in the PHONE DIR When a new numeric message is received it may be added to the phone directory while reading the message Entering a Phone Directory Entry Press to delete From the Standby screen press and release until DIRECTORY displays Press to enter the DIRECTORY menu Press to enter PHONE DIR ...

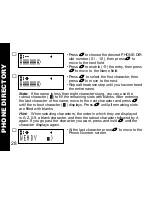
Страница 30: ...s with blanks After entering the last character of the name move to the next character and press until the rubout character displays Press until all remaining slots are filled with blanks Hint When selecting characters the order in which they are displayed is A Z 0 9 a blank character and then the rubout character followed by A again If you go past the character you want press and hold until the c...

Страница 31: ...s to fill the remaining slots with blanks Spaces cannot be entered in phone numbers At the last digit press to move to the Alert field Press to select the desired Alert 0 9 or for page blocking Note The pager gives off a sample alert each time is pressed The page blocking feature prohibits pages from the entered numbers Press to set and exit 0 0 0 0 H H H H 0000000000000 0 0 0 0 H H H H 6530828 OT...

Страница 32: ... associated PHONE DIR name WENDY displays before it While reading a message press until PHONE DIR displays and press to enter it The phone number of the message being read is automatically assigned the next available PHONE DIR slot The Name field is then displayed Press to select the first character of the Name field then press to move to the next field Repeat the above step until you have entered...

Страница 33: ...for page blocking Press to set and exit From the Standby screen press and release until DIRECTORY displays Press to enter the DIRECTORY menu Press to enter PHONE DIR mode Press to select the PHONE DIR entry you want to delete e g 02 JOHN then press to move to the Enable Disable field Press to disable this entry then press to delete it and exit 0 0 0 02 2 2 2 H H H H JOHN 0 0 0 02 2 2 2 H H H H JOH...

Страница 34: ...ional 24 hour clock in the upper left hand portion of the display This Travel Clock can also be set to a different time from the main clock This can be helpful when traveling to different time zones From the Standby screen press and release until TRAVEL displays Press to enter the TRAVEL menu then press to enter TRAVEL TIME mode The Forward Time Backward Time field flashes To set a travel time tha...

Страница 35: ... fields to zero Move to the ON OFF field by pressing then press to choose ON or OFF Press to set and exit The Standby screen displays with the Travel Clock time in the top left corner This example shows a 1 hour forward time This example shows a 24 hour clock with the same time as the main clock 1 1 1 1 0 0 0 0 3 3 3 3 0 0 0 0 H H H H 0 00 OFF 1 1 1 11 1 1 1 3 3 3 3 0 0 0 0 H H H H 1 00 ON 1 1 1 1...

Страница 36: ...ime Press until J the enable alert icon displays Press to move to the next field Press to set the Hour field to the desired value Press to move to the Minute field and press to set the minute to the desired value Press from any field to set and exit The Standby screen displays with the J icon 1 1 1 11 1 1 1 3 3 3 3 1 1 1 1 H H H HI I I I 11 31 2 2 2 2 3 3 3 3 3 3 3 3 1 1 1 1 H H H HJ J J J 10 31 P...

Страница 37: ...ress to set and exit The alarm remains set and enabled but the alert won t occur until it is re enabled When a Travel alarm expires this screen displays and the pager alerts Press any button once to stop the alarm and again to clear the message Note If the pager is off when an alarm expires it turns on alerts and remains on If the Travel alarm is not stopped during activation the ALARM icon flashe...

Страница 38: ...set and exit QuickNotes QuickNotes are short messages that can be displayed when you are paged There are 10 QuickNotes permanently stored in the memory of the pager The person paging you activates these messages by entering a code number instead of their phone number To send QuickNotes the person paging you enters then the message code number and then Example Entering code 01 displays Running Late...

Страница 39: ...ging service provider to verify the QuickNotes list When the person paging you enters this code this displays on the message screen 01 Running late 02 I m on my way 03 Pick me up 04 I m home 05 Come home 06 Call home 07 Call office 08 Call school 09 I love you 10 I miss you OPTIONAL FEATURES ...

Страница 40: ... the pager off before changing the battery to save messages Out of Range If your pager is equipped with this optional feature R displays if you are outside your paging coverage area and the pager cannot receive messages The out of range indicator R no longer displays when you return to your paging coverage area Special message icons If displays at the end of the message there is an error in the me...

Страница 41: ...te at www motorola com pagers or in the U S call 1 800 548 9954 or 1 800 793 7834 TDD For questions pertaining to your paging service contact your paging service provider Care and Maintenance Jazz pagers are durable reliable and can provide years of dependable service however they are precision electronic products Water and moisture excessive heat and extreme shock may damage the pager Do not expo...

Страница 42: ...er your paging service provider retailer or Motorola Inc at 1 800 548 9954 For repairs call Motorola Inc at 1 800 548 9954 in the U S or 1 800 323 9685 in Canada In the U S to contact Motorola Inc on your TDD call 1 800 793 7834 Battery Information Your Jazz pager operates with one AAA size alkaline battery carbon zinc batteries are not recommended BATTERY ...

Страница 43: ...ocking tabs release and the Battery Door Alignment Dots align Lift the door until it is free of the housing Remove the battery Align the new battery matching the illustration on the inside of the battery chamber Insert the battery Replace the battery door by aligning the grooves on the door with the grooves on the housing Slide the battery door until it is fully closed Lock the battery door by sli...

Страница 44: ...r Other U S patents covering this product are pending t Motorola FLEX f Jazz and QuickNotes are trademarks or registered trademarks of Motorola Inc 1997 by Motorola Inc All Rights Reserved Paging Products Group 1500 Gateway Boulevard Boynton Beach Florida 38426 Printed in U S A 8 97 6881029B95 6881029B95 O LISTED 830H I ABCD DIV2 II FG 1 5 AAA ALK T3C RAD DEV FOR HAZ LOC INT SAFE R ...

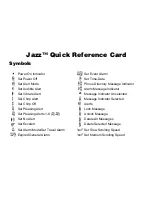
Страница 45: ...Indicator x Set Vibrate Alert Message Indicator Unselected y Set Chirp Alert Message Indicator Selected Set Chirp Off Alerts j Set Pleasing Alert Lock Message T Set Pleasing Alerts 1 8 T _ Unlock Message Set No Alert g Delete All Messages z Set Escalert Delete Selected Message k Set Alarm Mode Set Travel Alarm b Set Slow Scrolling Speed t Expired General Alarm a Set Medium Scrolling Speed ...

Страница 46: ... Disabled G Silent Alert Mode Indicator Information Service Indicator Unselected H Audible Alert Mode Indicator Information Service Indicator Selected I No Alarm Indicator Low Cell J Alarm Indicator R Out of Range Indicator K Duplicate Lock Indicator Mailbox Unselected L Lock Indicator º Mailbox Selected O Low Cell Indicator Disable Entry Q Message Continued Indicator Duplicate Message Enable Entr...

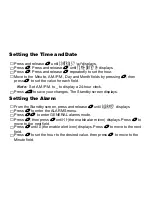
Страница 47: ...h field Note Set A M P M to _ to display a 24 hour clock Press to save your changes The Standby screen displays From the Standby screen press and release until ALARMS displays Press to enter the ALARMS menu Press to enter GENERAL alarms mode Press then press until the enable alarm icon displays Press to move to the next field Press until J the enable alert icon displays Press to move to the next f...

Страница 48: ...to set the value for each field Press to set and exit When the person paging you enters this code this displays on the message screen 01 Running late 02 I m on my way 03 Pick me up 04 I m home 05 Come home 06 Call home 07 Call office 08 Call school 09 I love you 10 I miss you ...

Отзывы: