background image


SD7581 User Guide 

12


Using Your New System 

Use the chart below to learn how to use the functions and features of your new 
phone system. 


ON/FLASH 

Press to answer a call. Press again to switch to a waiting call. 

OFF/CANCEL 

Press to end a call or cancel an action. 

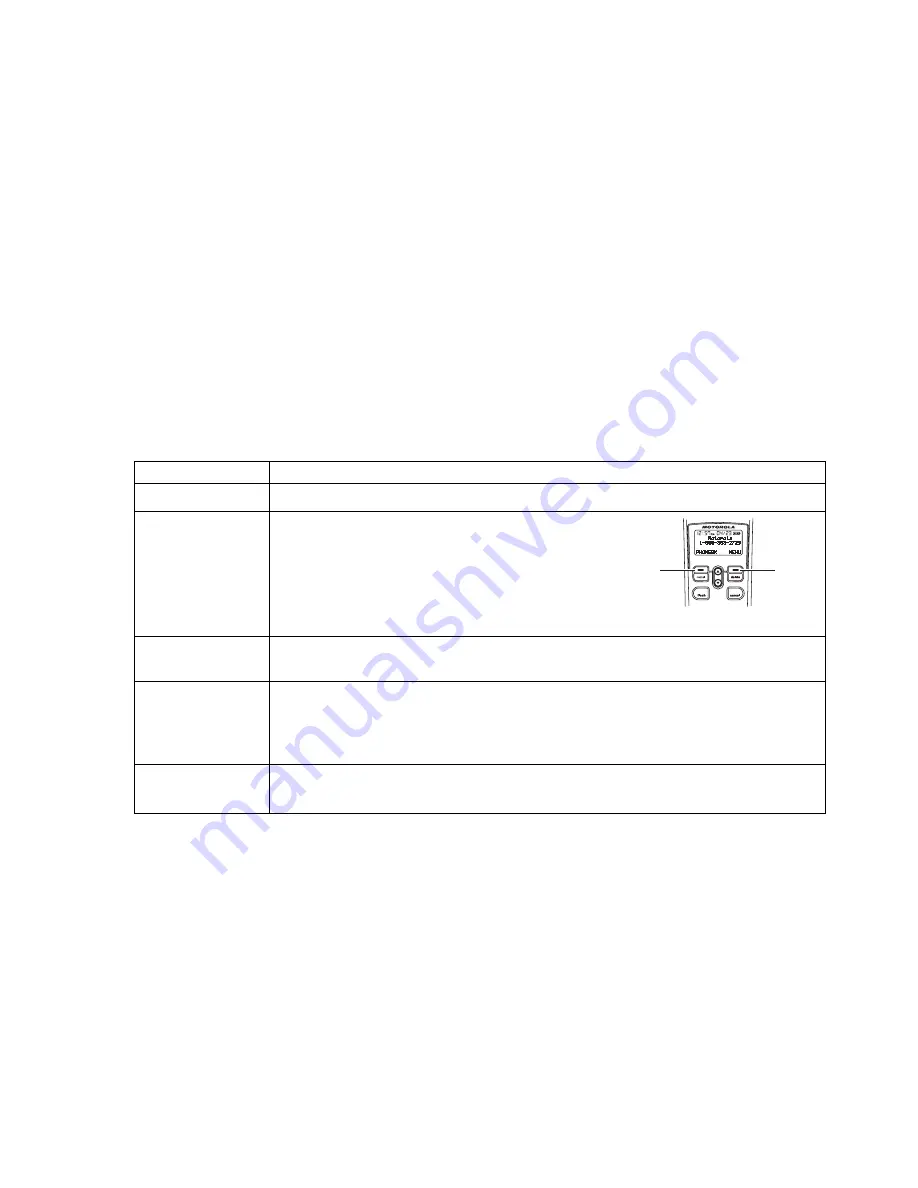
Left and right 
softkeys 

The softkeys are located above the 

REDIAL

 and 

DELETE

 keys. Use the 

softkeys to select features listed directly 
above the button on the display. Available 
functions change as you move from one 
screen to the next. 

Scroll keys 

Use to navigate through menu options. (An up and down arrowhead 

v

 indicates additional options are available.) 

Redial  

Press to see the last five numbers dialed. Use the scroll key to select 
a number from the list. Press 

ON/FLASH


or 

SPKRPHONE


to dial the 

selected number. Press 

OFF/CANCEL


to exit the redial review list 

without dialing a number. 

Delete 

Use to edit phone numbers and names, and to delete items from the 
phonebook. 


ON

OFF

Left

soft key

Right
soft key

Содержание C51 Series

Страница 1: ...C51 Series Connected System Phone Digital 5 8 GHz Expandable Model Family SD7581 Users Guide ...

Страница 2: ...reserves the right to revise this publication and to make changes in content from time to time without obligation on the part of Motorola to provide notification of such revision or change Motorola provides this guide without warranty of any kind either implied or expressed including but not limited to the implied warranties of merchantability and fitness for a particular purpose Motorola may make...

Страница 3: ......

Страница 4: ...rview 3 Main Menu Display Overview 4 Battery Safety Instructions 5 Installing the Handset Battery 6 Installing Base Unit Batteries optional 7 Selecting a Location for Your Base Unit 8 Connecting the Base Unit 9 Charging the Handset Battery 9 Installing the Mounting Bracket optional 10 How to Use this Guide 11 Using Your New System 12 ...

Страница 5: ...ng Tones and Volume 17 Setting the Date and Time 18 Display Language Menu 19 Color Handset Display Options 20 Naming Your Handset and Base Unit 21 Setting an Alarm 23 Reviewing Caller ID Records 24 Using the Phonebook 25 Adding a Phonebook Entry 26 Dialing a Phonebook Entry 27 Editing a Phonebook Entry 27 Deleting a Phonebook Entry 28 ...

Страница 6: ...ng Your Messages 32 Using the Remote Access Feature 33 Using Your System with Multiple Handsets 34 Setting Intercom Options 34 Using Your Phone as an Intercom 35 Transferring Calls Between Handsets 36 Changing the Order of Devices 37 Changing Default Phone Line Settings 38 Registering a New Handset 38 Troubleshooting 39 Warranty 41 ...

Страница 7: ...h can be determined by turning the equipment off and on the user is encouraged to try to correct the interference by one of the following measures Reorient or relocate the receiving antenna Increase the separation between the equipment and receiver Connect the equipment into an outlet on a circuit different from that to which the receiver is connected Consult the dealer or an experienced radio TV ...

Страница 8: ... that contains among other information a product identifier in format US AAAEQ TXXXX If requested this information must be provided to the telephone company The Ringer Equivalence Number REN is used to determine the number of devices that may be connected to the telephone line Excessive RENs on the telephone line may result in the devices not ringing in response to an incoming call In most but not...

Страница 9: ...d of your right to file a complaint with the FCC if you believe it is necessary The telephone company may make changes in its facilities equipment operations or procedures that could affect the operation of the equipment If this happens the telephone company will provide advance notice in order for you to make necessary modifications to maintain uninterrupted service If trouble is experienced with...

Страница 10: ...devices allowed to be connected to a telephone interface The termination on an interface may consist of any combination of devices subject only to the requirement that the sum of the RENs of all the devices does not exceed five If this equipment does cause harmful interference to radio or television reception which can be determined by turning the equipment on and off the user is encouraged to try...

Страница 11: ...t place this product on an unstable surface such as a table shelf or stand The product may fall causing serious damage 6 Slots and openings in the back or bottom of the base unit and handset are provided for ventilation To protect them from overheating these openings must not be blocked by placing the product on a soft surface such as a bed sofa or rug This product should never be placed near or o...

Страница 12: ...tages or other risks Incorrect reassembly can cause electric shock when the product is subsequently used 12 Do not overload wall outlets and extension cords as this can result in the risk of fire or electric shock 13 Unplug this product from the wall outlet and refer servicing to an authorized service facility under the following conditions When the power supply cord or plug is damaged or frayed I...

Страница 13: ...istinct change in performance 14 Avoid using a telephone other than cordless during an electrical storm There is a remote risk of electric shock from lightning 15 Do not use the telephone to report a gas leak in the vicinity of the leak 16 Only put the handset of your telephone next to your ear when it is in normal talk mode ...

Страница 14: ... helps us facilitate warranty service and permits us to contact you should your Motorola product require an update or other service Registration is not required for warranty coverage To register your product online visit http broadbandregistration motorola com Product registration is not available in Canada Please retain your original dated sales receipt for your records For warranty service of yo...

Страница 15: ...4 Redial log of last five numbers dialed 5 Phone On Flash 6 Temporary tone dialing key 7 Speakerphone 8 Microphone 9 Connect to other registered devices 10 Add pause in number 11 Up and down scroll key 12 Phone Off Cancel 13 Headset jack 2 5 mm 14 Delete 15 In use Ringer and new message indicator ...

Страница 16: ... Message playback controls 5 Speaker In use and new message indicator 6 Volume control buttons 7 Redial last number dialed 8 Phone on Flash 9 Speakerphone 10 Connect to other registered devices 11 Up and down scroll keys 12 Phone off Cancel 13 Delete 14 Left and right softkeys 15 LCD Display ...

Страница 17: ...n appears only when the handset is in the cradle or with LOW BATTERY message Caller ID Display Overview 1 Time of day the call was received 2 Name of caller 3 Left softkey option 4 Right softkey option 5 Order of call and number of calls received 6 Caller s phone number 7 Date the call was received NOTE Caller ID information is supplied only if you subscribe to the service with your telephone comp...

Страница 18: ... the battery with an incorrect battery type Use only the battery that came with your phone or an authorized replacement recommended by the manufacturer Keep batteries out of the reach of children Remove batteries if storing over 30 days The rechargeable batteries that power this product must be disposed of properly and may need to be recycled Refer to your battery s label for battery type Contact ...

Страница 19: ...present 2 Remove the battery door by pressing down on the indentation and sliding downward 3 Plug the battery connector into the receptacle Make sure the black wire is on the right 4 Insert the battery into the battery compartment 5 Replace the battery door 6 Attach the belt clip optional ...

Страница 20: ...User Guide 7 Installing Base Unit Batteries optional 1 Push the battery door latch forward using a small tool to remove it from the base unit 2 Insert four AA batteries not included 3 Replace the battery door ...

Страница 21: ...SD7581 User Guide 8 Selecting a Location for Your Base Unit ...

Страница 22: ...jack see Installing the Mounting Bracket Charging the Handset Battery The initial battery charge time is 10 12 hours After the initial charge a maintenance charge of eight hours should be sufficient Be sure to place the handset in its base when not in use to insure maximum daily performance NOTE If your handset displays a LOW BATTERY message or the handset seems completely inactive the LCD is blan...

Страница 23: ...own 3 Align the tabs of the mounting bracket with the slots on the bottom of the base unit 4 Push the mounting bracket forward sliding it into place There is a click when it is seated correctly 5 After connecting the phone and power cords see instructions on the previous page align the base unit with the mounting studs on the wall jack Slide the base unit down on the mounting studs until it locks ...

Страница 24: ...OPTIONS are only visible on the display and allow you to access menus such as Ringer Alarm Clock and Phonebook When you see the FEATURES OPTIONS font in this guide use the softkeys to access the feature menu and to see the available options The left and right softkeys are located above the REDIAL and DELETE keys Use the softkeys to select features and options that appear on the display directly ab...

Страница 25: ...sted directly above the button on the display Available functions change as you move from one screen to the next Scroll keys Use to navigate through menu options An up and down arrowhead v indicates additional options are available Redial Press to see the last five numbers dialed Use the scroll key to select a number from the list Press ON FLASH or SPKRPHONE to dial the selected number Press OFF C...

Страница 26: ...e an intercom call Volume controls Press the VOL keys on the left side of the handset to adjust the listening volume to a comfortable level When you are not on a call use the volume control keys to turn the ringer volume to HIGH MED LOW or OFF Page The PAGE button is found only on the base unit directly behind the handset cradle Use the PAGE button to register new devices and to locate misplaced h...

Страница 27: ... icons and LEDs Handset Information Indicator Description Call muted The microphone is muted The ringer is off E The battery is charging v The speakerphone is in use Base Unit LEDs LED Description in use On when a handset is off hook up light page On when the handset is charging in the cradle Flashes when paging a handset ...

Страница 28: ...esired feature e g Ringer Date Time Language 3 Scroll to the option you wish to change e g Day volume Ringer Tone Key Beeps 4 Press the CHANGE softkey You will see and or hear the available options 5 Continue to press CHANGE or use the scroll keys to sample the settings until you reach the desired selection 6 Press the DONE softkey to save the new setting 7 Scroll to the next option you wish to ch...

Страница 29: ...ight hours The default setting for night hours is from 9 PM to 6 AM Ringer Tone Scroll through the list to hear samples of each available ring tone Plays when you receive a call from a number not stored in your phonebook 20 ring tones are provided Five additional spaces allow you to download ring tones from www openLCR com a third party website that allows you to purchase additional ring tones ima...

Страница 30: ...s when you receive a call from a number stored in your phonebook Alarm Tone Scroll through the list to hear samples of each available ring tone Sounds when your alarm goes off Key Beeps On Off Link to ringer When on the keys beep when pressed Turns key beeps on when the ringer is on and off when the ringer is off ...

Страница 31: ...OTES Time Enter the current time Time Format 12 hour clock 24 hour clock Date MM DD or DD MM Enter the current date in the selected format Date Format Month and Day MM DD Day and Month DD MM Year YYYY Enter the current year You must set this option even if you have caller ID Night Time Enter the range of nighttime hours for use with the night volume ringer setting e g From 09 00 PM To 06 00 AM ...

Страница 32: ...Francais If you accidentally change the language setting follow these steps 1 Press OFF CANCEL until you are at the standby screen 2 Press the right softkey once 3 Press the scroll button up once 4 Press the left softkey once 5 Scroll to the desired language and press the left softkey ...

Страница 33: ...play contrast lighter or darker Wallpaper 10 images are supplied with the handset You can download additional images from www openLCR com Displays in the background of your handset screen Menu Color Five color options available Backlite timer 10 second intervals ranging from 10 to 60 Sets the amount of time before your display fades to black Base Setting Day time ON Always ON The handset display b...

Страница 34: ...er in which the handset was registered to the base unit and remains part of the name To name your handset or base unit 1 Press the MENU softkey on device you wish to rename 2 Scroll to and select Name Base or Name Handset 3 Use the BACKSP softkey or the DELETE key to erase the current name Use the keypad to enter the new name See the key chart on the next page 4 Press the DONE softkey when you hav...

Страница 35: ...active When the cursor is a flashing box upper case Shift characters are active Buttons Number of Presses No Shift Buttons Number of Presses Shifted 1 2 3 4 5 1 2 3 4 5 1 space 1 1 _ 1 2 a b c 2 2 A B C 2 3 d e f 3 3 D E F 3 4 g h i 4 4 G H I 4 5 j k l 5 5 J K L 5 6 m n o 6 6 M N O 6 7 p q r s 7 7 P Q R S 7 8 t u v 8 8 T U V 8 9 w x y z 9 9 W X Y Z 9 ...

Страница 36: ...he keypad to enter the time you wish the alarm to sound 4 Press 1 for AM or 2 for PM when prompted 5 Press the On Off softkey to set the alarm occurrences e g On Once On Daily Off 6 Press the DONE softkey when you have finished making all of your changes 7 Press the EXIT softkey or OFF CANCEL to the main screen ALARM CLOCK SETTINGS NOTES On Once On Daily Off One time only alarm event Daily alarm e...

Страница 37: ...handset 2 Scroll to and select Recent calls 3 Use the scroll key to move up or down the list The system displays the most recent call first 4 Press the OPTIONS softkey to Store or Delete one or all call records 5 Press the FORMAT softkey to change the way a number is dialed 1 area code number area code number or number only 6 Press the EXIT softkey or OFF CANCEL after you have completed your revie...

Страница 38: ...p to 49 names with numbers Stored names can be up to 11 characters long numbers can be up to 24 digits NOTES If the phonebook is full the handset will display PHONEBK FULL when you try to add an entry While entering numbers press the PAUSE key twice to add a two second pause for instance if you need to wait for an outside line A letter P appears in the number on the display ...

Страница 39: ...er 4 Enter the name up to 11 characters or the number up to 24 digits Use the BACKSP softkey or DELETE key to edit the name and number entries NOTE To move to the next option e g Name Number or Ringer you can press the corresponding softkey or press down on the scroll key 5 Select the Ringer option to choose a ring tone that plays when you receive a call from this phone number 6 Press the CHANGE s...

Страница 40: ...K softkey on any registered handset or the base unit 2 Scroll to the desired entry 3 Press the OPTIONS softkey to edit the entry OR Press the VIEW softkey to change the dialing format by using the FORMAT softkey e g 1 area code number area code number or number only 4 Scroll to and select EDIT 5 Scroll to and select Name Number or Ringer 6 Use the BACKSP softkey or DELETE key to edit the name and ...

Страница 41: ...honebook entry 1 Press the PHONEBK softkey on any registered handset or the base unit 2 Scroll to the desired entry 3 Press the OPTIONS softkey 4 Scroll to and select DELETE 5 Press the YES softkey at the Delete item prompt The display reads Phonebk entry deleted ...

Страница 42: ...ing machine The menu is also used to change your base unit s settings and customize any additional devices e g cell docks cameras handsets you add to your system To set up your answering machine devices 1 Press the MENU softkey on a registered handset or the base unit 2 Scroll to and select Setup devices 3 Scroll to ANS MACH 4 Press the SETUP softkey 5 Scroll to and select the option you wish to c...

Страница 43: ... OGM Record OGM Change OGM Ring Number 3 4 5 6 toll saver Selecting the toll saver option allows you to check for messages from a remote location without accruing charges for the call If the answering machine picks up right away there are new messages If the phone continues to ring there are no new messages ...

Страница 44: ... Number Forward ON OFF The Forward Msg s feature must be set to ON or messages will not be forwarded View Unit ID Enter a phone number for message forwarding Set the feature to ON and press the MEMO MSG FWD button When you have new messages your system dials the programmed Set Forward Number After answering enter your Security ID for remote access Record Quality Med qual Longr Hi qual Shortr Selec...

Страница 45: ...oll to and select Messages The handset automatically goes into speakerphone mode and announces the available options Press 2 to play messages press 2 again to stop Press 0 while playing a message to erase Press 1 to review Press 3 to skip Press 4 to turn off or on Press 5 to record new memo Press 7 to repeat menu again 2 You can select the desired option at the audio prompt or scroll to the desire...

Страница 46: ...iew Press 3 to skip Press 4 to turn off or on Press 5 to record new memo Press 7 to review menu again 3 Press the corresponding number key for the desired option 4 Hang up to end the review session NOTE If the answering machine is set to OFF the system will answer on the tenth ring announce Answer off and wait seven seconds for your security ID code If no code is entered the system ends the call Y...

Страница 47: ...ing features Setting Intercom Options To set your intercom options 1 Press the MENU softkey 2 Scroll to and select Set Intercom 3 Scroll to and select the option that tells the handset how to answer a page pick up automatically after either the first or third ring and answer in speakerphone mode or turn off auto answer 4 Press the EXIT softkey to return to the main screen ...

Страница 48: ...re 1 When not on a call press the CONNECT TO button on any handset 2 Scroll to the name of the device that you wish to contact 3 Press the PAGE softkey Both devices beep 4 Answer the page by pressing the OK softkey or ON FLASH 5 Press OFF CANCEL on either handset to end the call ...

Страница 49: ... call on hold 2 Scroll to and select the handset you wish to contact e g Handset B 02 3 Answer the page by pressing the OK softkey or ON FLASH on the other handset 4 Announce the call if you wish and then press the CONF softkey to join all handsets on the call 5 Press OFF CANCEL to transfer the call NOTE If the second handset does not respond within 30 seconds the outside call returns to the first...

Страница 50: ... REORDER menu To change the order of registered devices 1 Press the MENU softkey 2 Scroll to and select Device Reorder 3 Scroll to and select the device you wish to move An asterisk appears beside the device name 4 Use the scroll key to move the arrow to the location to which you wish to move the device 5 Press the MOVE softkey to reposition the item 6 Press the EXIT softkey to return to the menu ...

Страница 51: ...th your base unit are pre registered You can register up to 12 devices e g handsets cameras cell docks to your base unit For information on registering other devices please consult the user guide To register a new handset 1 Press the MENU softkey 2 Scroll to and select Register 3 Press and hold the base unit s PAGE button located on the base unit in the charging cradle Wait Registering appears on ...

Страница 52: ...display when the battery needs charging If there is no dial tone First try all the suggestions above If you still do not hear a dial tone disconnect the base unit from the telephone jack and connect a different phone If there is no dial tone on that phone contact your local telephone company If there is noise static or a weak signal when you are away from the base unit You may be out of range Eith...

Страница 53: ...ls while using your phone Disconnect your base unit from the telephone jack and plug in a different telephone If you still hear other calls contact your local telephone company Common Troubleshooting Steps for Your Cordless Phone If the handset or base unit does not seem to be responding normally try putting the handset in its base If it does not seem to respond do the following in the order liste...

Страница 54: ...consumer purchaser of the product unless otherwise provided for below Decorative Accessories and Cases Decorative covers bezels PhoneWrap covers and cases Length of coverage limited lifetime warranty for the lifetime of ownership by the first consumer purchaser of the product Monaural Headsets Ear buds and boom headsets that transmit mono sound through a wired connection Length of coverage limited...

Страница 55: ...omeone other than Motorola or its authorized service centers are excluded from coverage Altered Products Products or Accessories with a serial numbers or date tags that have been removed altered or obliterated b broken seals or that show evidence of tampering c mismatched board serial numbers or d nonconforming or non Motorola housings or parts are excluded from coverage Communication Services Def...

Страница 56: ...hip the Products Accessories or Software at your expense to a Motorola Authorized Repair Center To obtain service you must include a a copy of your receipt bill of sale or other comparable proof of purchase b a written description of the problem c the name of your service provider if applicable d the name and location of the installation facility if applicable and most importantly e your address a...

Страница 57: ...usions may not apply to you This warranty gives you specific legal rights and you may also have other rights that vary from state to state or from one jurisdiction to another Laws in the United States and other countries preserve for Motorola certain exclusive rights for copyrighted Motorola software such as the exclusive rights to reproduce and distribute copies of the Motorola software Motorola ...

Страница 58: ...Connected System Phone Digital 5 8 GHz Expandable Model Family SD7581 525831 001 02 06 ...

Отзывы: