


Chapter 2
Using your CL900
Using the cameras with Motion QuickNav 37
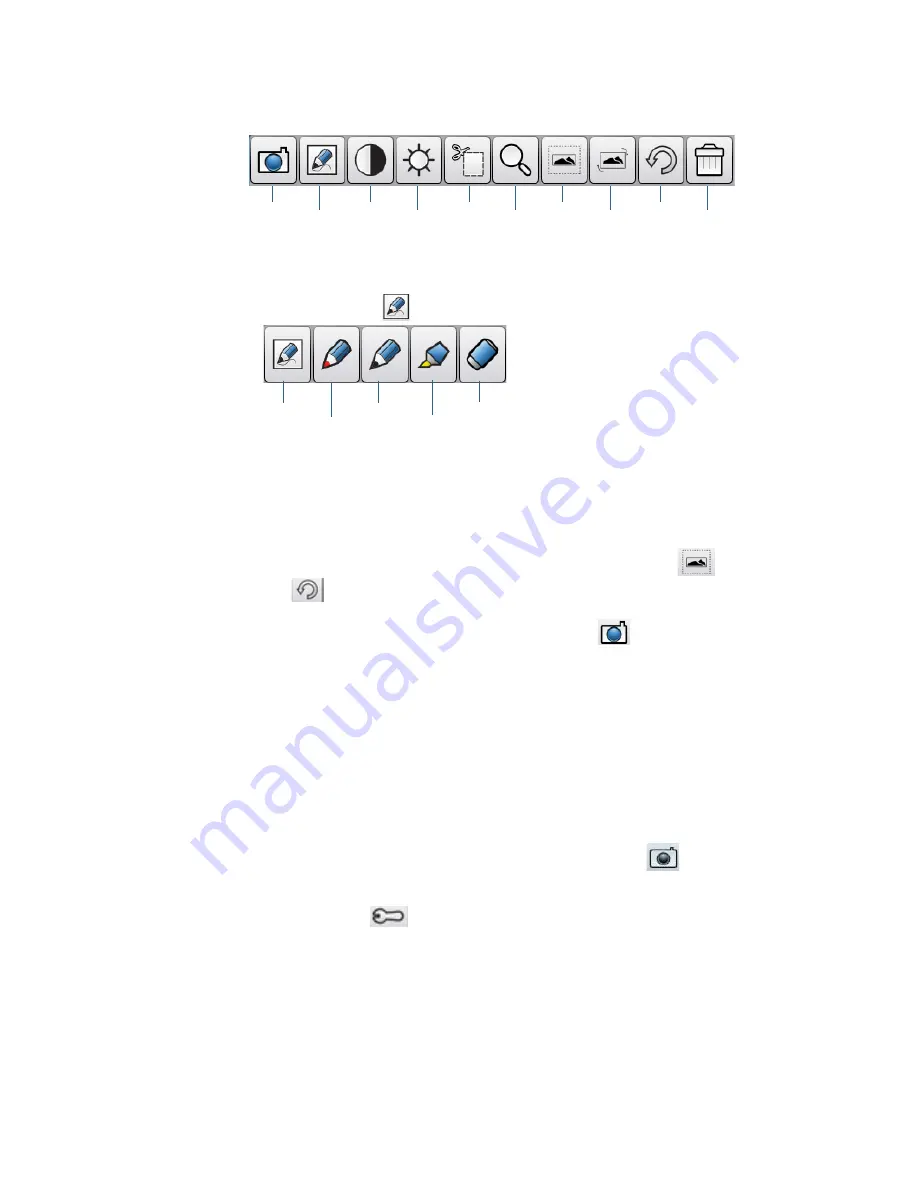
2. Tap an icon from the edit tool bar at the bottom of the edit window to make changes:
Motion QuickNav edit tool bar
3. Tap the pencil icon
to enter annotate mode.
4. Tap the desired pen color or highlighter. Use the eraser if necessary. Then tap the pencil
icon again to return to the edit tool bar.
5. Make any other adjustments by selecting the appropriate icon. For example, you can
crop, zoom, rotate, or adjust brightness or contrast. You can add white space to the top,
bottom, right or left side of the photo by selecting the extend icon
. Tap the undo
icon
to remove your edits.
6. When finished editing the photo, tap the camera icon
to return the viewfinder.
Your edits are saved automatically.
7. Either select another photo to edit or return to camera mode.
Switching cameras
When using Motion QuickNav as your camera application, you switch between using the
web camera and documentation camera from the Motion QuickNav Camera Options menu.
To switch between the web camera and documentation camera
1. Open the
Motion QuickNav tool bar
then tap the camera icon
to open the
viewfinder. If you are in view, the web camera is active.
2. Tap Options icon
located at the top of the viewfinder.
return contrast crop extend undo
to annotate brightness zoom rotate delete
viewfinder
to
return black pencil eraser
to red pencil highlighter
edit tool bar


