


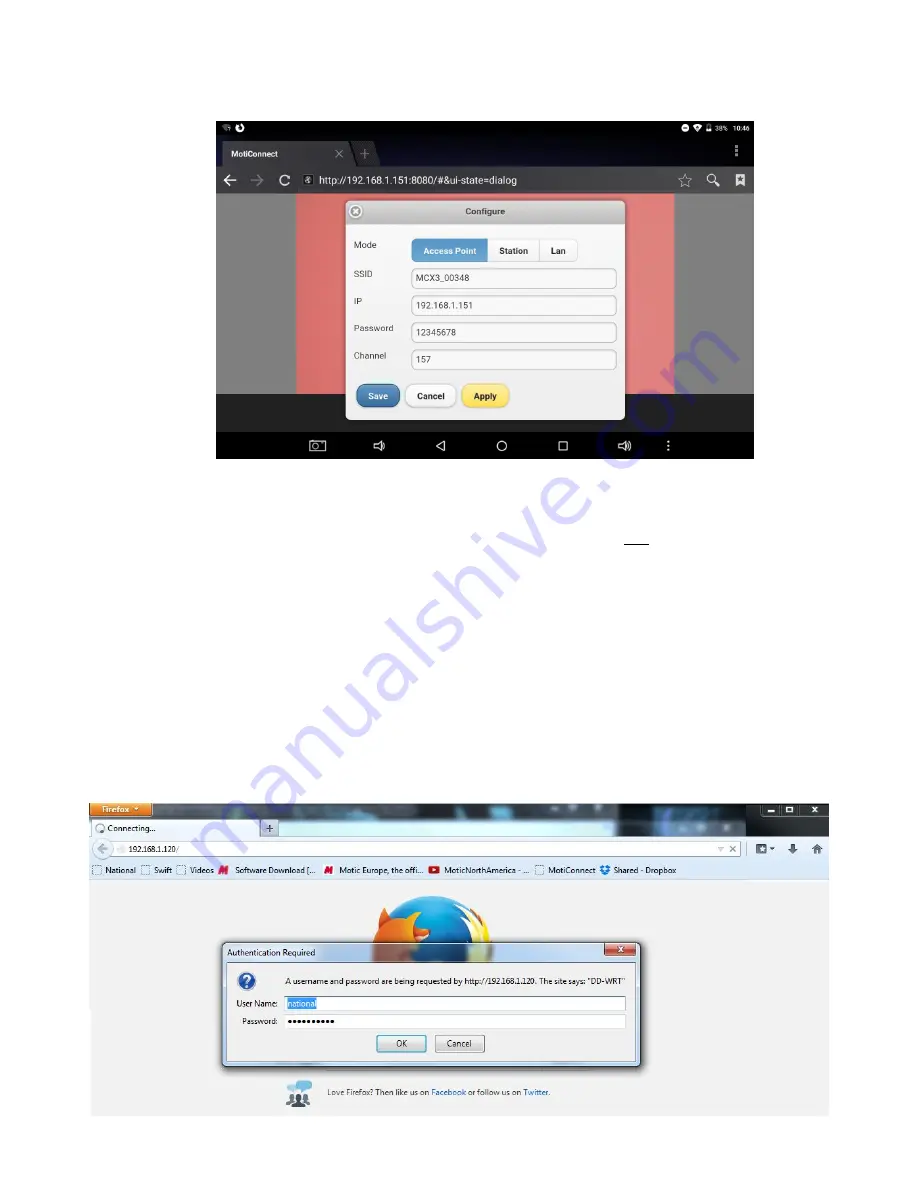
6.
When using either Channel 1 or 6, the camera can be used in 2.4Ghz mode.
7.
If you wish to change the camera mode to 5Ghz, change the Channel to 149 or 157
8.
Once changed, you will need to click on Save first, then Apply. Make sure to write down any and all changes
you make on this tab. Any changes made here will affect how you connect to the camera later.
9.
The camera will disconnect and no longer be available for detection on any 2.4Ghz devices.
10.
With your 5Ghz device, locate the camera on your available WiFi devices. The SSID and Password will
remain the same unless you changed it on the Configure Tab.
11.
Open the MotiConnect app, select image adjustment icon, select H264, close and re-open the app.
12.
There should be a noticeable increase in frames per second. (FPS rate will vary by device)
Linking the Moticam
X
3
to a network (Wired using RJ-45)
1)
Connect an Ethernet cable from the RJ-45 port on the Moticam X3 to the back of your router in one of the LAN
ports and turn on the Moticam X3.
2)
Go to your router’s configuration page (usually 192.168.0.1) and log into the router.


