

http://www.motic.com
Date: 21.01.2014
Connect to the Moticam T WiFi signal
1. Each Moticam T transmits its own WiFi signal to which you can directly connect your
WiFi Device.
2. The Moticam T’s SSID signal name is printed on a label on the camera. To log into your
camera, simply connect your WiFi device to that signal. The password for the network by
default is 12345678.
Using a Wifi device that operates with Android or iOS
* For best performance, we recommend to use WiFi devices, such as tablets, with a screen
not smaller than 8 inches. For iOS devices we suggest using iOS 5 or higher while for
Android Devices we suggest using Version 4.0 or higher.
1. To operate and use the camera on your tablet, please download our free App called
MotiConnect. For iPad you can find this on AppStore, for Android devices you can find
this on Google Play.
2. You can also use certain web browsers such as Chrome, Firefox or Safari to view,
measure and capture without the need of the App. To view the camera stream on your
browser, please type in the IP number also shown on the label on the camera. For
example 192.168.1.151. On your browser, type 192.168.1.151:8080 and you will be
connected straight to the camera.
Use the Moticam T on your Wifi enabled computer
The Moticam T can also be used with Motic Images Plus software for Windows computers. If
you have a WiFi enabled laptop, you can install Motic Images Plus from the CD provided. To
view the camera in our product’s MI Devices interface, simply log your computer onto the
Moticam T’s WiFi signal, by selecting this Wifi connection and entering the password. Then
open the MI Devices interface by clicking on the camera icon within Motic Images Plus and
select Moticam T from the drop down menu. Then click on Open.
Using the camera on an eyepiece
1. Install the Motic Images Plus application program from the CD included.
2. Remove the Dust Cap (B) from the camera (A) and attach the focusable lens (C).
3. Choose the right size eyepiece adapter (D) and attach this to the focusable lens.
4. Attach this assembly to your microscope’s eyepiece by tightening the centering screws
on the eyepiece adapter.
5. Connect power supply to the camera. The blue light will turn solid when the camera is
in operation.
6. Connect to the Moticam T WiFi signal. Please see the instructions as below.
Using the camera on a Trinocular Microscope
1. Install the Motic Images Plus application program from the CD included.
2. Remove the Dust Cap (B) from the camera (A) and attach the microscope’s C-Mount
adapter (*Please note that the C-Mount adapter is specific to your microscope. For
Motic microscopes, please consult the relevant Motic Accessory list and choose an
appropriate adapter for your Moticam. Depending on the type of adapter and micro
scope, the C-Ring (E) may be necessary between the camera and the C-mount
adapter).
3. Connect power supply to the camera. The blue light will turn solid when the camera is
in operation.
4. Connect to the Moticam T WiFi signal. Please see the instructions as below.
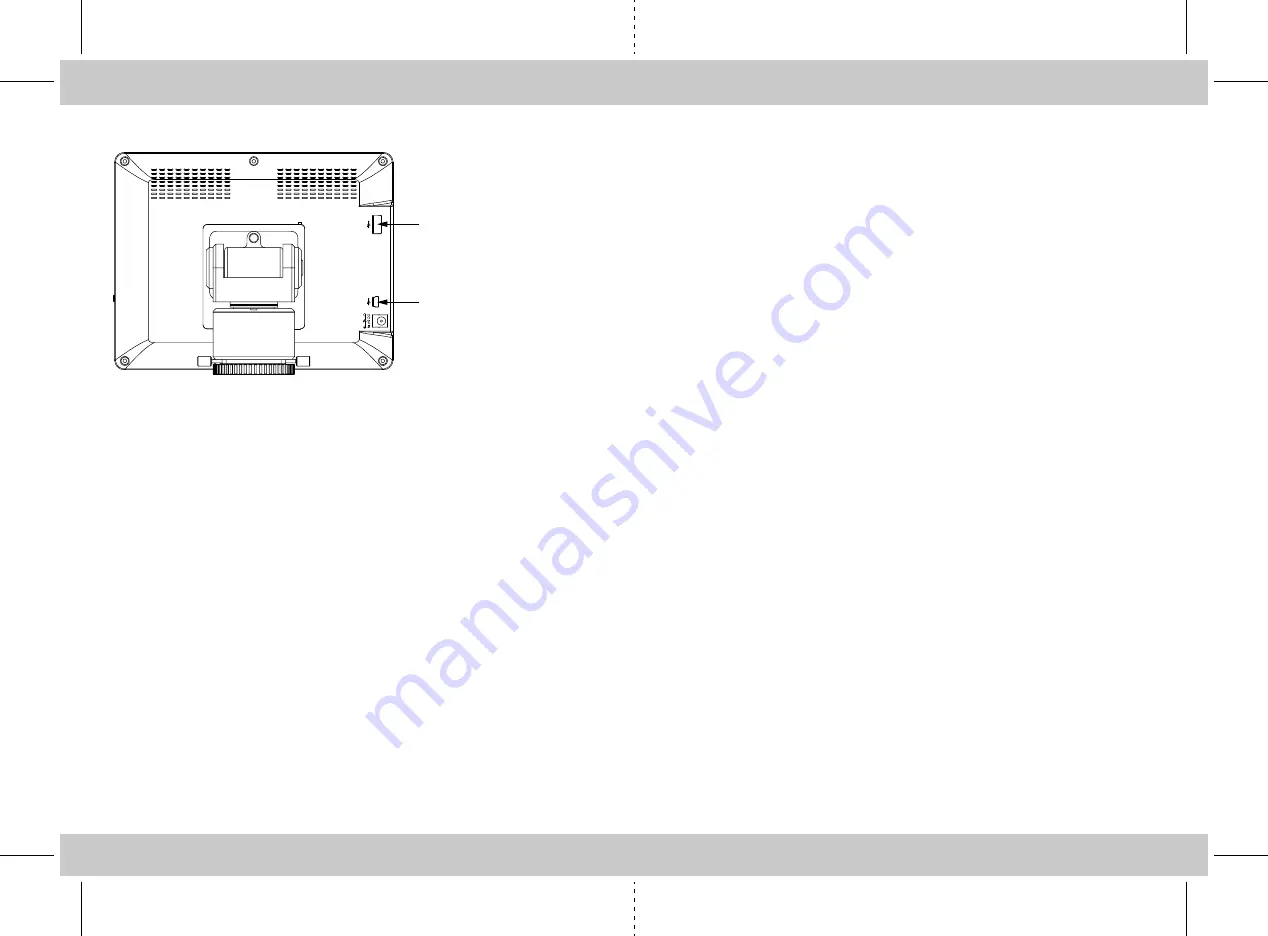
2. Min USB Port: User can
connect their PC and MoticamT
camera using this mini USB port.
1. Normal USB Port: Users can
use their USB devices using this
port like USB Disk, USB Mouse
and others.