


3. Activate the pairing mode in the Mordomus Software by clicking the
Start
inclusion
button in the device registration menu.
To reach this menu from the main screen click
Configurations → Modules/
Addresses → Plus Button [+]
This mode is limited to 5 minutes in software and on the iSH11M device for
safety reasons.
4. After the iSH11M device shows up in the list make sure to click the button
Allow
.
The connection status indicator should remain off.
From now on the iSH11M device is ready to use.
Method 2 - Manual Setup
1. Activate AP mode and access the configuration page as described in section
5.
2. Enter the (SSID) in the field
WiFi Name
and password
WiFi password
.
Enter
the Mordomus Home Name in the field
Home Name
as defined in
Mordomus -
> Configurations -> Connectivity:
Mordomus Home Name
.
By entering the house name, the fields
Mordomus local IP
and
Mordomus
Port
should be left blank.
3. Activate the pairing mode in the Mordomus Software by clicking the
Start
inclusion
button in the device registration menu.
To reach this menu from the main screen click
Configurations → Modules/
Addresses → Plus Button [+]
This mode is limited to 5 minutes in software and on the iSH11M device for
safety reasons.
4. After the iSH11M device shows up in the list make sure to click the button
Allow
.
The connection status indicator should remain off.
From now on the iSH11M device is ready to use.
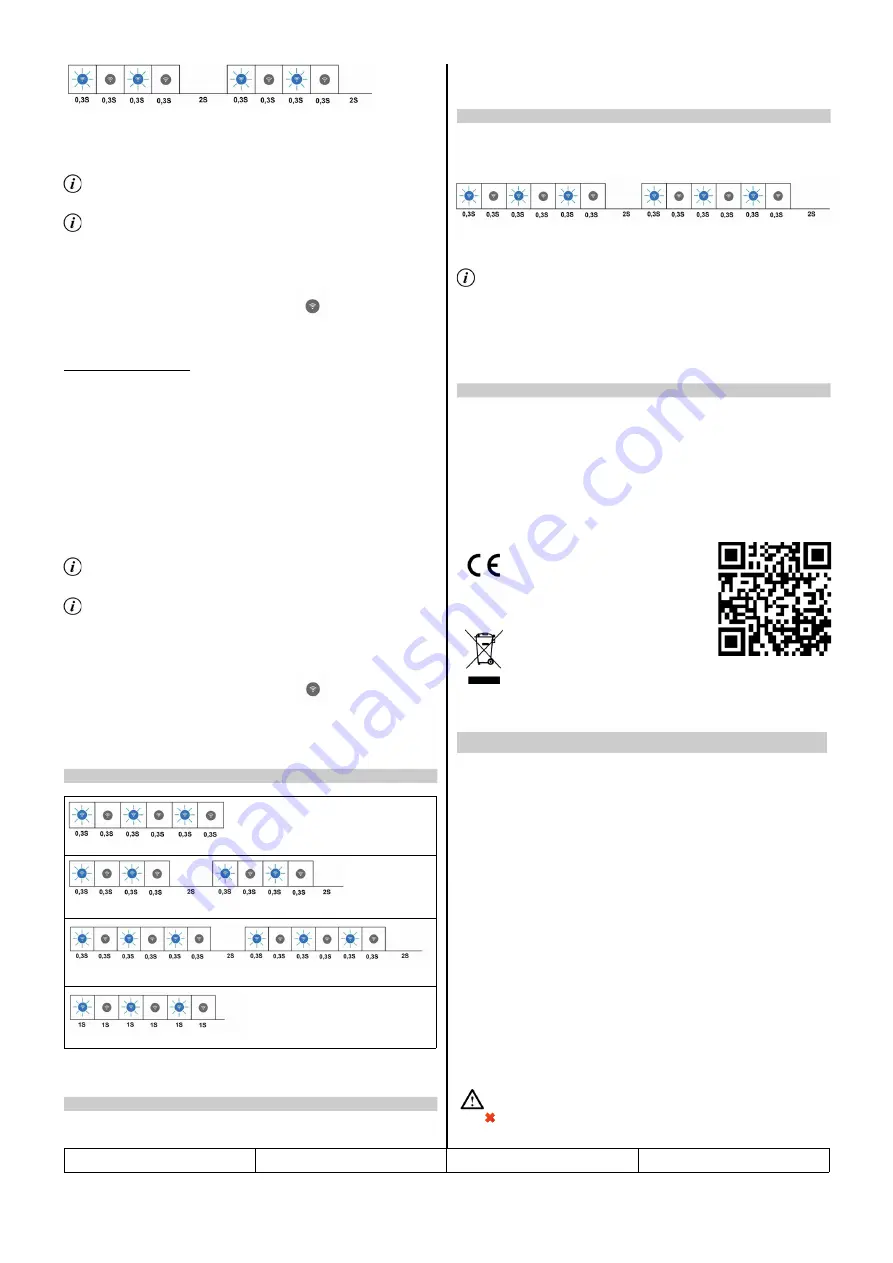
WPS discovery mode.
Connected to Wifi and searching Mordomus.
Access Point mode for manual configuration.
Connecting to Router.
1. Enter AP mode and access the configuration page as described in section 5.
2. Click on the Button
Reset all.
1. Insert a non conductive fine tipped tool into the pinhole on the backside of the
iSH11 and hold for at least 12 seconds to activate Access Point mode. This is
signaled by 3 short blinks of the connection status indicator every 2 seconds.
2.
Using a wireless device (Laptop, tablet, smartphone) connect to WI-FI
network SSID
iSH11M_1234
using the password
00000000
(eight zeroes)
.
The last four digits of the SSID are the same as the last four digits of the
device’s serial number. This mode is limited to 5 minutes on the iSH11M
device for safety reasons.
3. In the address bar of the browser of the device enter the IP
192.168.4.1
in
order to access the configuration page of the iSH11M.
The configuration page of the iSH11M allows for a manual configuration of:
WiFi Name
WiFi Password
Mordomus Home Name
Mordomus Local IP
Mordomus port
The
Reset all
button resets all of the above settings and other configurations to
the factory default values.
This product complies with the Electromagnetic
Compatibility Directive 2014/30/EU.
RoHS
This product conforms with the EU Directive 2011/65,
regarding the restriction of use of certain hazardous
substances in electric and electronic devices.
For EU countries only.
All old electrical and electronic devices must be
separated from normal household waste and disposed
of at designated facilities. For further information
contact your local authorities, waste disposal office or
the shop where you bought the device.
iSH11M – Saída relé com medidor de
e entrada digital Wi-Fi
Características:
•
Saída relé com monitorização de consumo.
•
Entrada digital
Aplicações:
•
controlo de iluminação, tomadas com monitorização de consumo ou
controlo de aparelhos de baixa tensão.
•
Leitura de teclas de pressão.
Especificações Elétricas:
Tensão de alimentação:
110-250VAC / 24 a 60VDC.
Frequência de alimentação:
50/60Hz.
Intensidade de corrente máxima:
16A;
Norma Wi-Fi:
Wi-Fi 802.11 b/g/n, 2,4 – 2,5 GHz.
Especificações físicas:
Dimensões:
41mm X 36mm X 17mm;
Grau de proteção:
IP20, para uso no interior;
ATENÇÃO:
A Mordomus não se responsabiliza por quaisquer danos resultantes
do uso dos nossos equipamentos fora das especificações e/ou para
uma finalidade diferente da prevista.
iSH11M
v.1927
2/6
3. Connection Status indicator codes
4. Resetting the device to factory defaults
5. Activating AP Mode (Access Point)
5.1. Configuration page
PT


