background image

Page 32 


LP User’s Manual - The User Interface 


Page 33


LP User’s Manual - The User Interface

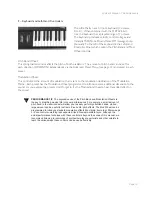
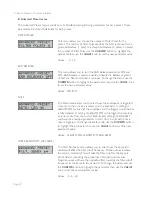
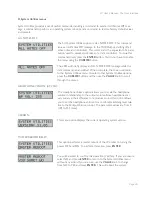
POT MAPPING:

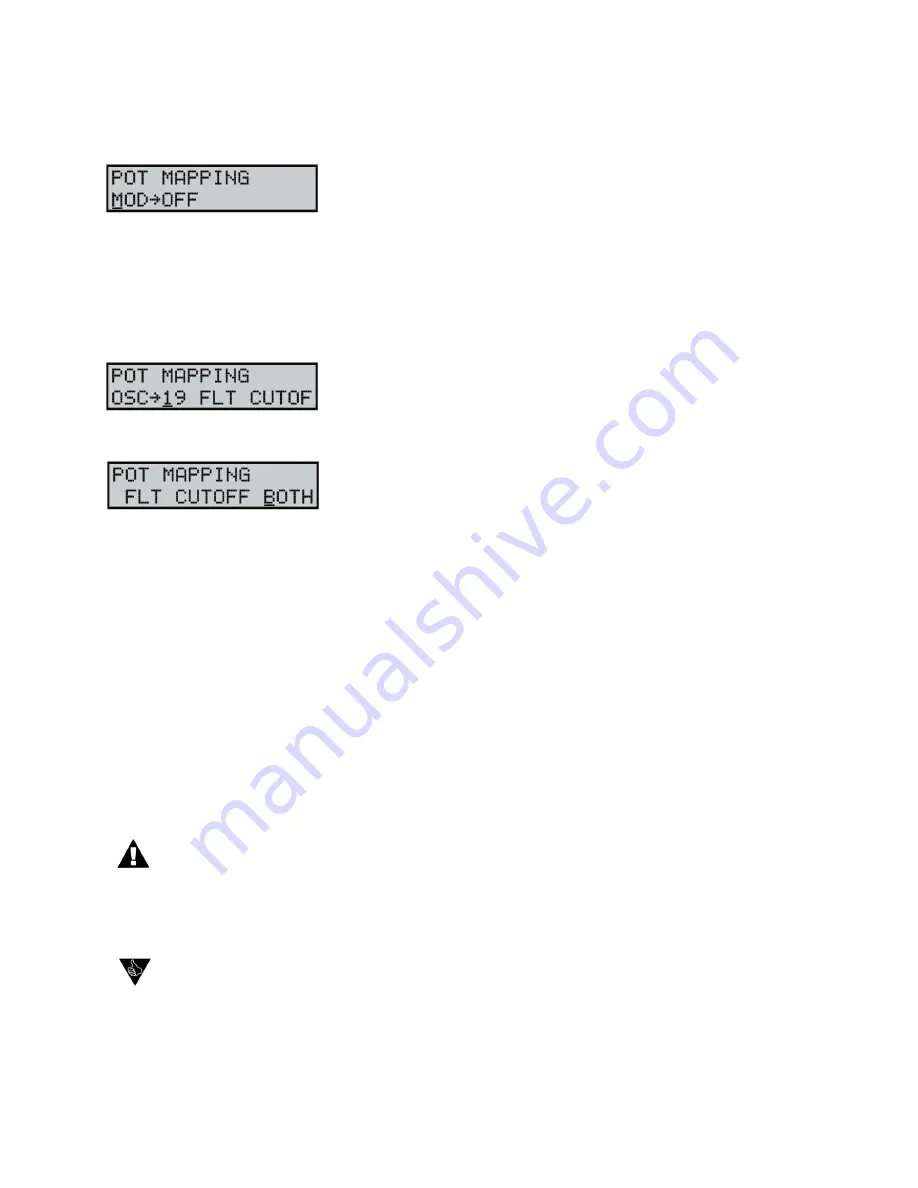
The Pot Mapping menu allows you to make arbitrary MIDI Continuous 
Controller (CC) assignments to each of the four Analog Edit knobs 
on the front panel (MOD, OSC, FILT, and EGR).  Additionally, the four 
knobs can be individually programmed to provide internal, external, 
or combined MIDI control.  Among its many possibilities, Pot Mapping 
allows you to ‘reprogram’ the four panel knobs to control any of the 
LP functions. For example, you could program Pot Mapping to give you 
control of Filter Cutoff, Resonance, Overload and EG Amount, all at the 
same time. 

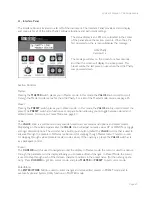
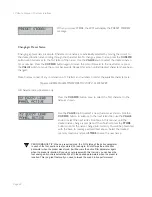
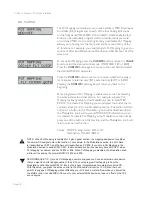
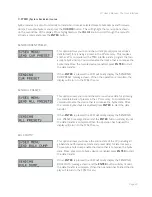
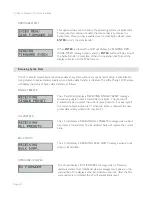
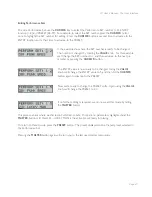
To set up Pot Mapping, press the 

CURSOR

 button and use the 

VALUE

knob to select the desired control knob (MOD, OSC, FILT, or EGR). 
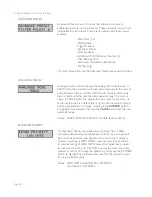
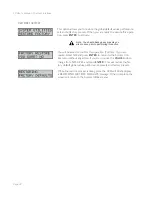
Press the 

CURSOR

 button again to move to the next fi eld and select 

the desired MIDI CC parameter. 

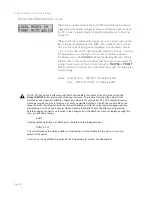
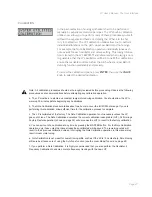
Press the 

CURSOR

 button once more to select whether the assign-

ment applies to internal only (INT), external only (EXT) or BOTH.  
Pressing the 

CURSOR

 button again will return you back to the 

beginning.

Once programmed, Pot Mapping is enabled in a section by selecting 
the active parameter in that section.  For example, suppose Pot 
Mapping is already setup for the Modulation knob to send MIDI 
CC#10.  To activate Pot Mapping, you would press the button that is 
currently active (i.e. lit) in the Modulation section.  The button will turn 
off (now no button in the Modulation group will be illuminated), and 
the Modulation knob will now send MIDI CC#10 information when 
it is rotated.  To disable Pot Mapping in the Modulation section, simply 
press one of the buttons in that section, and the Modulation knob will 
return to its normal function. 

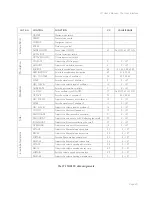
Values:  MIDI CC assignments:  OFF, 0-127

Destination:  INT, EXT, BOTH

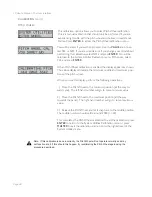
NOTE:  When Pot Mapping is enabled for a given panel section, the mapping assignment overrides 
the normal CC assignments in that section. For example, in the Modulation section, the LFO Rate 
is transmitted as CC#03, and the Amount transmitted as CC #06. If you set up Pot Mapping in the 
Modulation section to send MIDI CC#21, the Modulation knob will exclusively transmit CC#21 when 
Pot Mapping is enabled, and not CC#03 or #06. When Pot Mapping is disabled, the Modulation knob 
will revert to sending the normal MIDI CC’s #03 and #06.

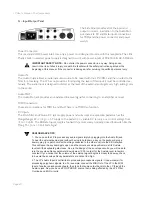
PERFORMANCE TIP:  Here’s a Pot Mapping example: suppose you have an external audio device 
that you want to control independently of the LP. You could program Pot Mapping to have the 
Modulation control transmit MIDI CC #xx, but only have it programmed for external control (EXT). 
With this setup, you press the active control in the Mod section (either the LFO Rate or Amount 
switch) to engage Pot Mapping without affecting your LP’s sound or state. Now when you adjust the 
the MOD control, it sends MIDI CC#xx out to your external MIDI device, but has no effect on the LP’s 
sound engine.

Содержание Little Phatty

Страница 1: ...ction 18 F Keyboard LH Controllers 19 G Input Output Panel 20 H Interface Panel 21 THE USER INTERFACE Preset Mode 23 Master Mode 25 A Menus 25 B Advanced Presets 30 C System Exclusive 33 D System Utilities 35 Performance Sets 42 How the LP handles MIDI 44 APPENDICES A Master Mode Menu Flow Chart 46 B The Calibration Preset 47 C Tutorial 48 D MIDI Implementation 53 E Service Support Information 54 ...

Страница 2: ...ination of durability and feel I hope you appreciate this small but important aspect of the product I must recognize the hard working team that created the Phatty Of course it starts with Bob and his vision for the product The Engineering team of Cyril Lance Steve Dunnington and Mike Peio made it happen The design of any product is always the product of many minds but the Phatty design starts with...

Страница 3: ...con indicates technical information for the advanced user or the technically curious In a perfect world everyone would read the User s Manual from cover to cover before connecting and playing their new instrument For those of you who don t live in a perfect world and can t wait to play your new synthesizer completely understandable the following should get you set up and running quickly Note We en...

Страница 4: ...dial to scroll through the presets All preset locations 00 99 are loaded with sounds from the factory There are a total of 100 locations in memory for presets all are user programmable Note that once a preset is called up you can tweak the parameters to your liking using the front panel controls Any changes made to the current preset will cause the PRESET button to change its illumination from amb...

Страница 5: ...as controls to select the modulation Source LFOTriangle LFO Square LFO Sawtooth LFO Ramp Filter EG or Oscillator 2 the LFO Rate the modulation Destination Pitch Filter Waveform or Oscillator 2 and the modulation Amount parameters The output of the Modulation section is routed through the Modulation Wheel when the Mod Wheel is all the way forward the Mod Source passes to the Mod Destination at the ...

Страница 6: ...er Socket and Switch provides power to the LP Power is ON when the switch is in the up position 2 Audio jacks provides monophonic audio input and audio output connections The Audio Input jack allows external signals to be processed by the Little Phatty 3 ControlVoltage jacks provides ControlVoltage Expression Pedal inputs for Pitch Filter andVolume parameters and a keyboard gate input to trigger t...

Страница 7: ... settings of the filter parameters and the Filter ADSR envelope The signal then passes to the amplifier stage where theVolume ADSR envelope shapes it Finally the signal is routed to the output section where the final level is set by the MasterVolume control The keyboard is the main control source of the Little Phatty Each time a key is pressed the keyboard produces Pitch CV and Gate signals The Pi...

Страница 8: ...stored and edited panel sounds Note that once you change preset numbers any sounds Note that once you change preset numbers any changes to the previous preset will be lost unless the changes are saved Editing a preset is simple There are four analog editing controls on the front panel one for each of the four sound shaping sections Modulation Oscillators Filter and Envelope Generators Each control...

Страница 9: ...plained below The frequencies of the oscillators are controlled by a number of sources The main source is the keyboard The keyboard creates a voltage that allows the oscillators to be played in an equal tempered scale The glide circuit can be switched in between the Keyboard CV and the oscillators to slow the changes between notes portamento The Keyboard CV is mixed with the Octave switch CV the F...

Страница 10: ...t reinforces the harmonics of the reset oscillator Use the Oscillator 2 Frequency control to hear this effect Depending on how it is ap plied the effect can be aggressive or warm and vocal Frequency Oscillator 2 has a switch labeled OSC 2 FREQ that allows the analog edit control to adjust the frequency of Oscillator 2 relative to Oscillator 1 The pitch of Oscillator 2 can be adjusted up or down 7 ...

Страница 11: ...is gives the filter a character that can sound vocal buzzy or zappy depending on how it s used When the resonance is turned up past about 3 o clock on the analog edit dial the filter begins to self oscillate at the cutoff frequency producing a sine wave tone Other filter section controls include Keyboard Amount KB AMOUNT Envelope Generator Amount EGR AMNT and OVERLOAD The KB AMOUNT parameter allow...

Страница 12: ...llate creating a sine wave with the same frequency as the cutoff frequency Keyboard Control Amount KB AMOUNT When the KB AMOUNT switch is selected the analog edit control is used to adjust the amount of post glide keyboard voltage that is routed to the filter cutoff frequency When the edit control is rotated fully clockwise the filter cutoff follows the key played on the keyboard A higher key will...

Страница 13: ...then slowly fades out until it is silent In synthesis terms this progression is called an envelope a shape that defines the changes that occur in a sound over time An envelope can define any aspect of change in a sound volume timbre or pitch The circuits that create envelope control signals in synthesizers are called Envelope Generators EGs The Little Phatty has two identical EG circuits When trig...

Страница 14: ...he corre sponding envelope Release When the RELEASE switch is selected the analog edit control is used to adjust the Release time the time for the envelope to return to zero from 1 msec to 10 seconds Additional Control The KB GATE jack on the side panel is a trigger input that accepts a footswitch momentary normally closed like the Moog FS 1 or a gate signal Pressing the footswitch or applying a g...

Страница 15: ...he LFO The frequency is adjustable from 0 2 Hz to 500 Hz Since the LFO rate extends well into the audio range this allows the LFO to be used for clangorous FM like modulations Amount When the AMOUNT switch is selected the analog edit control is used to adjust the maximum amount of modulation sent to the Mod Wheel Source The SOURCE switch selects the source of the modulation Each time the switch is...

Страница 16: ... LP using headphones while silencing the signal at the Output jack You can also use the OUTPUT ON OFF switch to turn off the output if you are using the LP as a controller and wish to control external gear without hear ing the LP The output is ON when the switch is lit Headphone Jack The HEADPHONE jack is a 1 4 headphone output for use with standard headphones TheVolume control adjusts the level a...

Страница 17: ... the Modulation Matrix Each preset has the Modulation Wheel programmed to introduce some additional dimension to the sound As you explore the presets don t forget to try the Modulation Wheel to hear this added effect on the sound PERFORMANCE TIP The expressive use of the Pitch Bend and Modulation Wheels is the key to breathing musical life into your performances For example a small amount of pitch...

Страница 18: ...s no MIDI thru function CV Inputs The Pitch Filter andVolume CV jacks supply power and will accept an expression pedal such as the Moogerfooger EP 1 ring 5 5 supply to the pedal tip variable CV return or a control voltage from 5 to 5Volts The KB Gate Input accepts a footswitch a momentary normally closed footswitch like the Moog FS 1 or a 5Volt Gate Signal PERFORMANCE TIPS 1 You can use the LP to ...

Страница 19: ...s compare button allowing you to toggle between stored and edited presets For more on Preset Mode see page 23 Value The VALUE knob is a continuous rotary encoder used to access menus and options and select presets Depending on the selected parameter the VALUE knob will adjust numeric values UP or DOWN or toggle amongst discrete options The encoder has a built in push button called the VALUE switch...

Страница 20: ...e rate is set using the GLIDE RATE control in the oscillator section Octave Up Down The OCTAVE UP and OCTAVE DOWN switches affect the octave selection for both oscillators The range is 2 1 0 1 2 Pressing either switch once will light the switch amber and adjust the octave ac cordingly Pressing the same switch a second time will adjust the octave again and change the illumination from amber to red ...

Страница 21: ...lors and the LCD will display either PRESET ACTIVE the original sound or PANEL ACTIVE the edited sound NOTE When switching between Master and Preset modes the last used preset appears in the display Preset Mode Storing Presets To store a preset press the ENTER button This button doubles as the STORE button in Preset mode as indicated on the front panel Store is used to save an edited preset Panel ...

Страница 22: ...ase only Press the CURSOR button once to select the first character in the name as shown Use the VALUE knob to select a new character as shown Use the CURSOR button to advance to the next letter then use the VALUE knob to select the next letter Continue in this manner until the desired name change is complete When finished press the STORE button to enter the name change into memory You will be pre...

Страница 23: ...er for editing repeatedly pressing the CURSOR key will step through the parameters You can also press the MASTER button to disable the CURSOR mode At this point the VALUE knob allows you to step through the menu entries again When you reach the end of the menu entries advancing the VALUE knob will wrap back to the first entry A Master Mode Menus Here are the Master Mode menu items a flow chart of ...

Страница 24: ...ses through the current value InTRACK mode the parameter value moves in the same di rection as the knob is rotated left or right until the value and knob position are identical To change modes use the CURSOR button to highlight the parameter then use the VALUE knob to set the new parameter value Values PASS THRU SNAP TRACK the default value isTrack KEYBOARD PRIORITY The Keyboard Priority menu allo...

Страница 25: ...s used to turn control of the synth engine ON or OFF locally i e the keyboard wheels and any front panel controls that can also receive MIDI It does not disable any MIDI transmitting or receiv ing A setting of OFF will prevent double triggering in the event you are using a MIDI sequencer and have both IN and OUT connected and the sequencer passes the IN through to the OUT TheTune parameter is used...

Страница 26: ...alues Local Control ON OFF the default is ON Tune ON OFF AUTO the default is ON NOTE While you are in this menu with AutoTune enabled the output of the LP will be muted the Output ON OFF button status will not change however The reason for muting the output is that AutoTune uses a special Calibration Preset tone which isn t very musical The LP s output will remain muted as long as you stay in this...

Страница 27: ... be stored see Preset Mode on page 23 To exit Precision Mode press the MASTER or PANEL or PANEL or button The last edited parameter in Precision Mode will be remembered until it is changed in Precision Mode or the unit is powered down Values The default parameter is Volume Attack SYSEX MENU SYSEX System Exclusive is a set of commands to transmit and receive selected presets bulk dumps and firmware...

Страница 28: ...ou to select how the envelopes are triggered when more than one key is pressed on the keyboard A setting of LEGATO ON means that the envelopes aren t retriggered until the key is fully released A setting of LEGATO OFF will retrigger the envelope on a new note from the current EGR level A setting of EGR RESET will force the envelope generators to start from 0 volts each time a note is triggered To ...

Страница 29: ...e parameter then use the VALUE knob to set the new parameter value Values OSC2 NOISE PITCH BEND PB The Pitch Bend menu allows you to individually set the positive and negative ranges for the Pitch Wheel The settings are specified in semitones To change either parameter use the CURSOR button to highlight the parameter then use the VALUE knob to select the new parameter value Values UP 0 2 3 4 5 7 1...

Страница 30: ...e Modulation section The button will turn off now no button in the Modulation group will be illuminated and the Modulation knob will now send MIDI CC 10 information when it is rotated To disable Pot Mapping in the Modulation section simply press one of the buttons in that section and the Modulation knob will return to its normal function Values MIDI CC assignments OFF 0 127 Destination INT EXT BOT...

Страница 31: ...e the display will return to the SYSEX menu SEND ALL PRESETS This option allows you to send the system exclusive data for archiving the complete bank of presets in the LP s memory To complete this command enable the device that is to receive the SysEx data Once the remote SysEx device is enabled press ENTER to start the data transfer When ENTER is pressed the LCD will briefly display the SENDING A...

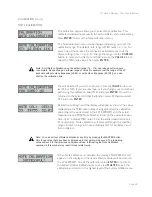
Страница 32: ...he Little Phatty s LCD screen will display the status of SysEx data transfers as follows SINGLE PRESETS The LP will briefly display a RECEIVING SINGLE PRESET message whenever a single preset is transmitted via SysEx The preset will automatically be stored at the current preset location For example if the current preset location is 31 when the SysEx is received the new preset data will be written i...

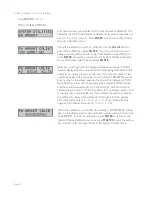
Страница 33: ...turn to the System Utilities menu To select other System Utilities options press the CURSOR button and then use the VALUE knob to scroll through the menus HEADPHONE VOLUME HPVOL The HeadphoneVolume option allows you to scale the headphone volume in relationship to the output volume Since headphones can vary widely in their efficiency to reproduce sound this control allows you to set the headphone ...

Страница 34: ...t NO and press ENTER to return to the System Utili ties menu without any action If you are sure use the VALUE knob to change from NO toYES and press ENTER This will restore the fac tory default global values performance presets and factory presets While the restore process is taking place the LCD will briefly display a RESTORING FACTORY DEFAULTS message When complete the screen will return to the ...

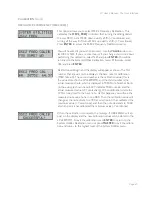
Страница 35: ...tion in this manner may result in inaccurate tuning e Note Calibration is not meant for overall tuning drifts such as if the LP is 10 cents sharp Small tuning drifts are best taken care of using the AutoTune function see the Local Mode Tune menu page 28 f If you perform a Note Calibration it is highly recommended that you also perform the Oscillator 2 Frequency Calibration to ensure accurate frequ...

Страница 36: ... the minimum middle and maximum posi tions of the pitch wheel When you see this display perform the following operations 1 Move the Pitch Wheel to the minimum position all the way to wards you The left hand number will go to some minimum value 2 Move the Pitch Wheel to the maximum position all the way towards the panel The right hand number will go to some maximum value 3 Release the Pitch Wheel a...

Страница 37: ...calibration select NO and press ENTER You will be returned to the System Utilities Calibration menu Otherwise select YES and press ENTER Calibration will begin and the display will appear as shown The values displayed are the MIDI note number being calibrated the calibration value this is the value stored in the LP s EEPROM and the actual measured note in MIDI Note Number Cents in the example show...

Страница 38: ...ns plus two semitones The second number is the calibration value this is the value stored in the LP s EEPROM and the third number is the actual measured note which is displayed in MIDI Note Number Cents in this example 62 36 indicates MIDI note 62 and the actual measured note is 36 cents sharp All Pitch Amount calibrations are based on MIDI note 60 so for a calibration value of 2 the target note v...

Страница 39: ...te for calibration MIDI note 60 The second number is the calibration value this is the value stored in the LP s EEPROM and the third number is the actual measured note which is displayed in MIDI Note Number Cents in the example shown here 64 37 indicates MIDI note 64 and the actual measured value is 37 cents sharp When calibration starts the LP first tunes itself to the base note As this happens y...

Страница 40: ...rst entry in Set 1 above is Preset 24 the second entry is Preset 58 and so on Performance Sets allow you to sequence up to 32 presets for your specific needs Once the Performance Sets are configured you can call up a set and step though the sequence using the VALUE switch The example on the right shows the preset stored in the first location of Performance Set 3 Preset 99 SUPERCHUNK To step throug...

Страница 41: ...o the next pa rameter by pressing the CURSOR button The ENTRY value is now ready to be changed Using the VALUE knob we ll change the ENTRY value to 5 and then hit the CURSOR button again to advance to the PRESET Now we re ready to change the PRESET entry Again using the VALUE knob we ll change the PRESET to 23 If no further editing is required we can now exit this mode by hitting the MASTER button...

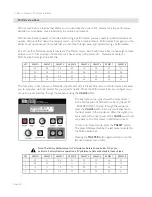
Страница 42: ...the panel filter CUTOFF switch is selected the edit control in the Filter Section generates MIDI CC data corresponding to the Filter Cutoff parameter CC 19 The following chart lists the default MIDI CC data that is generated for each front panel control Notes a The MIDI CC assignments shown for each section are over ridden when Pot Mapping is enabled in that section For more on programming and ena...

Страница 43: ...ON OCTAVE Sets the octave of oscillator 2 75 0 32 48 64 OSC 2 FREQ Adjusts the frequency of oscillator 2 10 0 127 WAVE Sets the waveform of oscillator 2 11 0 127 OSC 2 LEVEL Adjusts the volume level of oscillator 2 16 0 127 Filter CUTOFF Adjusts the filter cutoff frequency 19 0 127 RESONANCE Adjusts the filter resonance parameter 21 0 127 KB AMOUNT Adjusts the amount of pitch CV affecting the cuto...

Страница 44: ...nus Here is a flow chart of the Master Mode Menus With the exception of the Advanced Preset parameters which are individually stored with each preset all Master Mode menu parameters effect the LP globally Advanced Presets are stored individually with each preset ...

Страница 45: ...ter preset 99 The Calibration Preset is a single oscillator squarewave tone that plays Oscillator 1 at full level This preset is used primarily for the LP S AutoTune function but it can also be used for tuning the LP with an external tuner Since the CA preset can be modified like any other preset it s also useful as a default starting point for preset development Note that the Calibration Preset c...

Страница 46: ...cally related overtones of the base pitch To explain what that means let s consid er an example if the base pitch is 100 Hz harmonics will occur at 200 Hz 2 x 100 300 Hz 3 x 100 400 Hz 4 x 100 etc The levels of the harmonics are always much lower than the level of the base pitch and they decrease as the frequency goes up so a 200hz harmonic will be louder than a 300Hz harmonic which will be louder...

Страница 47: ...richest sounding of the four waves It contains all of the harmonics and has a bright buzzy sound Sawtooth waves are ideal for brass and string sounds bass sounds and rich accompaniments The square wave possesses a hollow sound compared to the sawtooth owing to the fact that it contains only odd harmonics This hollow characteristic is ideal for distinctive lead and sustained pad sounds An interesti...

Страница 48: ...ccording to the filter s slope which is a measure of how well the filter works The slope of a filter is expressed in decibels per octave dB Oct The Little Phatty filter is rated at 24 dB Oct which creates a dramatic reduction in unwanted frequencies This is a highly desirable quality for subtractive synthesis Another important filter parameter is the filter resonance Resonance amplifies the freque...

Страница 49: ...ed from a Gate signal that is generated every time a key is pressed on the keyboard Once triggered as long as the key is held down i e the Gate signal is present the EG envelope will evolve according to the control settings The LP s Envelope Generators have four stages that can be set individually Attack The time to go from zero volts to the maximum voltage the fade in time Decay The time to go fr...

Страница 50: ...le analog synth like the LP can be used for incredibly expressive sounds given solid programming and playing technique So what is the best way to configure and program these synthesis components effectively The answer could fill a book s worth of explanations and examples Two such recommended books on this subject are PowerTools for Synthesizer Programming by Jim Aiken available from Backbeat Book...

Страница 51: ...rs follow the OCTAVE switch setting providing a total range of seven octaves With no octave transposition the transmitted range is 48 84 C3 C6 Velocity Note ON Note OFF O X O X After touch X X Pitch Bend O O Programmable from 0 to 12 semitones Control change O O 1 3 5 6 7 9 11 15 16 18 19 21 31 65 68 69 74 75 77 Program change True Number O 00 99 O 00 99 System Exclusive O O System Commands Song P...

Страница 52: ... will examine the product for any obvious signs of user abuse or damage as a result of transport If the product has been abused damaged in transit or is out of warranty we will contact you with an estimate of the repair cost How to initiate your warranty Please initiate your warranty on line at www moogmusic com by clicking on the Product Register tab If you do not have web access fill out the all...

Страница 53: ...Attenuator to 10 on the dial This will produce the pulsating amplitude modulation known as tremolo Adjust the LFO Rate to taste For a sharp volume chopping effect use the LFO Square wave output in place of the LFOTriangle out To produceTimbral Modulation Using a 1 4 patch cable connect the CP 251 LFOTriangle output to an Attenuator Input With another 1 4 patch cable connect the Attenuator Output t...

Страница 54: ... on the dial and set the Master level to 10 Adjust the Mix er 1 and 2 levels to balance the LFO and Noise signals and use the Master level to set the effect intensity You can also use the Mixer s OffsetVoltage control by itself to provide an additional steady CV signal or combine it with the LFO and Noise An interesting effect is to mix the LFO and Noise source together with a negative offset set ...

Страница 55: ...h LFO ramp Filter EG Oscillator 2 Destination Pitch Oscillator 2 Filter Wave Amount 0 to 100 Keyboard 37 keys C C Transmits polyphonic MIDI Note On Off with velocity Performance Controls Pitch Wheel programmable up to 12 semitones Modulation Wheel 0 to 100 FineTune 3 semitones Glide ON OFF Octave UP DOWN 2 octaves Output ON OFF MasterVolume Analog Edit Potentiometers 4 User Interface LCD Display 2...

Страница 56: ...contour We also hear the frequency of the sound go slightly higher when the string is plucked and then drop slightly as the note fades This is the pitch envelope contour A synthesizer can create these kinds of changes by applying electrically generated envelopes to oscillators affecting pitch filters affecting tone and amplifiers affecting volume Envelope Generator A circuit that generates an enve...

Страница 57: ...cy Modulation describes the technique of using one oscillator to modulate the frequency of another In FM the modulating oscillator is called the modulator while the other oscillator is known as the carrier The carrier oscillator is the one you hear When the modulator frequency is very low about 6Hz the effect is described as vibrato As the modulator frequency is raised into the audio range new mod...

Страница 58: ...bilities to a sound such as a pitch cloud effect when noise modulates an oscillator In the Little Phatty noise is available as a modulation source only but external noise sources such as from the CP 251 Control Processor can be applied through the LP s Audio Input Oscillator A circuit that electronically vibrates When used as a sound source an oscillator is the electronic equivalent of a vibrating...

Страница 59: ... wave has only odd harmonics and sounds bright but hollow like a clarinet A rectangular wave can vary in shape but typically has a bright but thin sound and a triangle wave s harmonics are so low in amplitude that it sounds muted and flutelike VCA Short forVoltage Controlled Amplifier aVCA is an amplifier circuit where the gain is a function of the control voltage In the Little Phatty theVCA is pa...

Отзывы: