background image

©2011 


Choosing Riding Clothing and Protective Gear


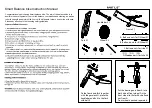
When choosing to ride a bicycle, the riders should always consider the clothing they    


will wear. Any loose clothing parts or strings can get caught in a bicycles moving parts


and cause an accident. Be sure there are no loose cords, strings, over sized cuffs or pant 


legs. Loose pants should be tied or tucked into a sock. A leg band is often used to keep 


pants from getting caught in the chain of the bicycle. Be sure shoelaces are tied tightly,  


and do not hang out. (Fig. 2.8)  


Dress for the weather keeping in mind that when cycling, the wind can be colder than   


just walking or standing. Reflective clothing is always recommended for cycling. Avoid 


wearing all black, or dark clothes. A brightly colored jacket or shirt is a great way to 


help motorists and others see you.


Choosing to wear protective gear is the riders or parents responsibility and is highly    


recommended. Protective gear is available to cover knees and elbows, backs and 


shoulders and more. 


Use of protective gear can greatly reduce injuries while riding. If protective    


gear is worn, be sure that it does not interfere with steering, braking and  


pedaling. Know your own abilities, and do not ride beyond them. (Fig. 2.9)

BEF

ORE Y

OU RIDE

2.9

2.8

12

Содержание MULTI SPEED

Страница 1: ...THIS MANUAL CONTAINS IMPORTANT SAFETY PERFORMANCE AND MAINTENANCE INFORMATION READ THE MANUAL BEFORE TAKING YOUR FIRST RIDE ON YOUR NEW BICYCLE AND KEEP THE MANUAL HANDY FOR FUTURE REFERENCE...

Страница 2: ...Correct Correct Incorrect CORRECT FITTING Make sure your helmet covers your forehead INCORRECT FITTING Forehead is exposed and vulnerable to serious injury 2011...

Страница 3: ...cific Cycle and its products For questions regarding performance assembly operation parts or returns contact the experts at Pacific Cycle directly by calling toll free 1 800 626 2811 8 00am 5 00pm Cen...

Страница 4: ...intain your bicycle You will save time and the inconvenience of having to go back to the store if you choose to write or call us concerning missing parts service questions operating advice and or asse...

Страница 5: ...not repeat the warning of possible injury or death whenever the risk of falling is mentioned A SPECIAL NOTE FOR PARENTS It is a tragic fact that most bicycle accidents involve children As a parent or...

Страница 6: ...Warning Note to parents Fit Helmets Protective Gear Clothing Safety Checklist Riding Safety Operation Security Maintenance Storage 1 PARTS IDENTIFICATION Single Speed Bicycle Multi Speed Bicycle 6 7...

Страница 7: ...aller children s bicycles also contain training wheels Handlebar stem Front brake Brake pad Front fork Front hub Wheel reflector Rear brake lever Handle bar Front reflector Seat Rear reflector Seat st...

Страница 8: ...etc Seat Rear reflector Seat post Quick release Rear Brake Gear control cable Shi lever Handlebar stem Head set Head tube Top tube Down tube Seat tube Seat stay Front derailleur Chain wheel Bo om Bra...

Страница 9: ...ot touch the ground easily The rider can simply move forward of the saddle while mounting and dismounting the bicycle The saddle can be adjusted lower if the rider is uncomfortable this high but note...

Страница 10: ...d from the frame beyond its Minimum Insertion or Maximum Extension mark If your seat post extends from the frame beyond these markings the seat post or frame may break which could cause you to lose co...

Страница 11: ...ould cause you to lose control and fall Failure to properly tighten the stem binder bolt the handlebar binder bolt or the bar end extension clamping bolts may compromise steering action which could ca...

Страница 12: ...ble have good ventilation fit correctly cover forehead Always wear a properly fitted helmet which covers the forehead when riding a bicycle Many states require specific safety devices It is your respo...

Страница 13: ...ss for the weather keeping in mind that when cycling the wind can be colder than just walking or standing Reflective clothing is always recommended for cycling Avoid wearing all black or dark clothes...

Страница 14: ...wear Ensure rims run true and have no obvious wobbles or kinks Ensure all wheel spokes are tight and not broken Check that axle nuts are tight If your bicycle is fitted with quick release axles make...

Страница 15: ...at front and rear derailleurs are adjusted and function properly Ensure shift levers are securely attached Ensure derailleurs shift levers and control cables are properly lubricated Frame and Fork Che...

Страница 16: ...good clean condition at all times Periodically inspect all reflectors brackets and mounting hardware for signs of wear or damage Replace immediately if damage is found Front rear reflectors should be...

Страница 17: ...aled driveways Be extra careful at intersections and when preparing to pass other vehicles Familiarize yourself with all the bicycle s features Practice gear shifts braking and the use of toe clips an...

Страница 18: ...aws regarding night riding Many areas require the use of lights for night riding in addition to a full set of CPSC compatible reflectors Ensure bicycle is equipped with a full set of correctly positio...

Страница 19: ...nearby 7 Before entering a street Stop look left right and left again for traffic If there s no traffic proceed into the roadway 8 If riding downhill be extra careful Slow down using the brakes and m...

Страница 20: ...you have control over how quickly the bicycle comes to a stop It is also important to know the environment that you are riding on For example a dry paved road is very predictable when stopping But if...

Страница 21: ...he bicycle to lose steering function leading to a crash To best avoid this apply the front and rear brakes simultaneously while shifting your body weight back slightly to compensate for braking force...

Страница 22: ...nough gear overlaps that these gears are not needed Fig 2 13 Internal Gears no derailleur An internal gear system is one where the gears are housed within the rear hub of the bicycle With internally g...
Страница 23: ...using a possible danger when you attempt to pedal again Remember always pedal through the gear change on a derailleur equipped bicycle Rear Shifter The rear shifter right will have an indicator that r...

Страница 24: ...pedaling should be avoided on derailleur bikes because the chain can jam and cause the bike to become unstable Fig 2 17 SECURITY You just bought a new bicycle Don t lose it It is advisable that the fo...

Страница 25: ...om bracket bearings of your bicycle have been submerged in water they should be taken out and re greased This will prevent accelerated bearing deterioration If paint has become scratched or chipped to...

Страница 26: ...need replacement parts or have questions pertaining to the assembly of your bicycle call the service line direct at Tools Required Phillips head screw driver 4mm 5mm 6mm and 8mm Allen keys Adjustable...

Страница 27: ...3 3 Check handlebar stem clamp bolts to be sure they are properly tightened and handlebar can not move The angle of the handlebar can be adjusted To adjust loosen all of the handlebar stem clamping b...

Страница 28: ...e fork assembly in place slide the handlebar assembly onto the fork tube Replace the top cap and bolt Tighten the top cap bolt only until the handlebar assembly and fork have no free play but so that...

Страница 29: ...a step washer be sure the step fits into the key hole at the top of the wheel slot Tighten the two outer axle nuts evenly Tighten one side part way then tighten the other side and repeat until both si...

Страница 30: ...e lock nut until you start to feel some resistance with the fork 6 Try to close the handle If it closes easily open it up and tighten the lock nut further If it is too difficult to close open the hand...

Страница 31: ...ed far enough into the frame to hide the Minimum insertion mark on the seat post Riding a bicycle with the seat post above this line is dangerous and can cause injury to the rider or damage to the bic...

Страница 32: ...each pedal spindle Start each pedal spindle by hand to avoid stripping the threads Note that the right hand pedal attaches to the chainwheel side crank arm with a right hand clockwise thread The left...

Страница 33: ...adjustment barrel loosen the cable anchor bolt until you can see a hole through the anchor bolt for the cable wire to attach thread the cable wire through the cable anchor and snug the cable anchor by...

Страница 34: ...hten the locknut the brake will end up centered Repeat the steps until the brake is centered Brake is correctly adjusted when The brake pads do not drag on the rim when the brake is open Both brake pa...

Страница 35: ...t hand to pull the brake cable tight through the cable anchor again inspecting that the cable end is seated in the brake lever and the barrel adjuster of the brake Tighten the cable anchor as much as...

Страница 36: ...e where both brake pads are an equal distance away from the rim While keeping the nut still re tighten the Allen bolt Squeeze the brake lever a few times to be sure that the brake is centered Repeat a...

Страница 37: ...until the brake lever does not have any free play Next squeeze the brake lever and allow it to return Check to see if the bearing unit bottoms out on the lower detangler plate If so unscrew the adjust...

Страница 38: ...pper plate Upper cable long casing Single cable casing Cable adjuster Cable spli er Bearing Football ends Lower plate Lower cable Lower cable Locknut Locknut Adjus ng barrel Set for maximum travel Min...

Страница 39: ...an be inserted into the brake carrier Brake adjustment Check to be sure the cable is seated in the brake lever Loosen the cable anchor bolt just enough to allow the cable wire to move freely With your...

Страница 40: ...tered If you run out of adjustment you can go to the other side and loosen the screw slightly to continue adjusting the brake When the brake is correctly adjusted both sides should move evenly when th...

Страница 41: ...ely in the adjustment barrel or cable end rests in the recess of the brake lever Fig 3 37 If the brake cable is disconnected at the disc caliper thread the brake wire through the adjustment barrel loo...

Страница 42: ...evere injury could result from contact with the hot disc Mind your legs as well as your hands These brakes require breaking in Ride and use the brakes gently for 13 miles before using the brakes in do...

Страница 43: ...ple turning clockwise will loosen the cable tension and move the chain away from the wheel while turning counter clockwise will tighten cable tension and direct the chain towards the wheel Shift the r...

Страница 44: ...falls off the largest chainwheel and into the pedals you will need to turn the High limit screw in 1 4 turn increments clockwise until the chain no longer falls off Shift through every gear using the...

Страница 45: ...m your bicycle Remove the hex nut from the caliper brake bolt on the rear of the fork and slide the brake assembly from the fork Place the fender assembly onto the fork making sure the attachment hole...

Страница 46: ...race was included with your bicycle and follow the given instructions for that particular brace C Shape Brace Remove the outer axle nut and washer from the rear wheel axle Place the brace stabilizer w...

Страница 47: ...r fit Fig 3 49 Training Wheel Stabilizer Bracket Remove the outer axle nut and washer from the rear wheel axle Insert the wheel brace into the stabilizer bracket so that the forked end of the stabiliz...

Страница 48: ...adjustments are correct and will allow you to pinpoint any trouble areas If you encounter any problems refer to the appropriate section and make any necessary adjustments Check the tire pressure and i...

Страница 49: ...ess lubricant and keeping these areas clean and dry LUBRICATION NOTE The frequency of maintenance should increase with use in wet or dusty conditions Do not over lubricate remove excess lubricant to p...

Страница 50: ...and the hub do not ride the bicycle Adjustment is required TIRES Tires must be maintained properly to ensure road holding and stability Check the following areas Inflation Ensure tires are inflated t...

Страница 51: ...truding spokes rust or other potential causes Replace the rim tape which covers the spoke ends if damaged 8 Remount one side of the tire onto the rim 9 Using a hand pump inflate the tube just enough t...

Страница 52: ...eck that the wheel can turn freely without excessive side play Cables and Cable Housing Cables and housing are one of the most overlooked parts on the bicycle The first indication that your cables and...

Страница 53: ...operly centered for maximum contact with the rim Replace the brake pads if they are over worn so that the grooves or pattern cannot be seen The brake cable wires should be checked for kinks rust broke...

Страница 54: ...including the pedals chain chainwheel crank set and freewheel Pedals inspection Pedals should be inspected every month taking note of the following areas Check correct tightness into the crank arms If...

Страница 55: ...your bike if the cranks are loose This may be dangerous and will damage the crank arms beyond repair Inspection The crank set should be checked for correct adjustment and tightness every month Bottom...

Страница 56: ...veral specialized tools are needed for disassembly and maintenance of 3 piece cranks Do not attempt service without access to the proper tools Chain Do not ride with a damaged chain The chain must be...

Страница 57: ...the U shaped plate is trailing as the link approaches the chainwheel when pedaling forward Derailleur geared bicycles use narrower chains and require a special tool to fit and remove chain links or t...

Страница 58: ...railleur Systems The derailleur system includes the front and rear derailleurs the shift levers and the derailleur control cables all of which must function correctly for smooth gear shifting to occur...

Страница 59: ...17 The low limit screw determines how far the rear derailleur will travel toward the wheel of the bicycle while the High limit screw determines how far the cage will travel toward the frame 1 Shift th...

Страница 60: ...railleur cage Pull all slack out of the cable by pulling it taut then reconnect the cable and tighten the cable anchor bolt securely 4 Shift the front shifter into the largest gear and pedal the bike...

Страница 61: ...pplied with one front white one rear red two wheel white and four pedal orange reflectors These are an important safety and legal requirement and should remain securely fitted and in good clean condit...

Страница 62: ...Chainring teeth bent or broken Rear or front derailleur side to side travel out adjustment Cross chaining and shifting under load Stiff chain link Loose pedal axle bearing Loose bottom bracket axle be...

Страница 63: ...vers are binding Brakes out of adjustment Brake pads worn down Brake pads toe in incorrect Brake pads rim dirty or wet Brake arms loose Bulge in the rim or rim out of true Brake mounting bolts loose B...

Страница 64: ...e old or faulty Tire tread casing worn Tire unsuited to rim Tire not checked after previous puncture Tire pressure too low Spoke protruding into rim Remedy Replace axle True wheel Adjust hub bearings...

Страница 65: ...ain your sales receipt for any possible warranty claims Your Name Address Date Purchased Place of Purchase Model Brand Information Wheel Size Color Serial Number Model Date Code WARRANTY Serial number...

Страница 66: ...below If failure of any part should occur due to faulty materials or workmanship during the warranty period the part will be replaced All warranty claims must be submitted to the address below and mus...

Страница 67: ...4902 Hammersley Road Madison WI 53711 Service 1 800 626 2811 www pacific cycle com 2011...

Отзывы: