background image

1

1.0  DESCRIPTION

The 

EXAMINER 1000 

is designed to be 

used  with  vibration  limits  established  in 

ISO Standard 10816 to help you detect 

signs  of  malfunction  or  changes  in 

rotating  machinery  during  operation.  This 

is  accomplished  with  overall  vibration 

(ISO VIB) and envelope measurements. 

Problems with bearings occur when there 

is a microscopic crack or flaw or when there is a breakdown in lubrication 

which leads to metal‑to‑metal interaction. The EXAMINER 1000 is designed 

to detect flaws or a lack of lubrication in bearings and gears at an early 

stage  by  measuring  the  high‑frequency  impacts  through  acceleration 

envelope methods. 

Vibration measurements are made by pressing the accelerometer sensor 

against designated Measurement Points on your equipment with either 

the stringer probe or with the magnetic base.

2.0  CONTROLS AND FUNCTIONS

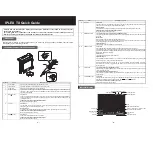
ON/SELECT  Button

  —  Press  this  button  to  turn  power 

on

. Power 

automatically turns 

off

 after ten minutes of non‑use. 

After  turning  the  EXAMINER  on,  press  the  ON/SELECT  button  again  to 

select the measurement type. Pressing and holding the ON/SELECT button 

while  collecting  data 

will HOLD the display 

value,  indicated  by 

the word HOLD in the 

display. To release from 

HOLD mode, press the 

ON/SELECT 

button 

again.

Type of 

Measurement

Value of Measurement

Units of 

Measure

0.09

g

GE

in/s

mm/s

V
A
E

LoBat

HOLD

Low Battery 

Indicator

Type of Measurement

Indicator

Hold Reading 

Indicator

Содержание EXAMINER 1000

Страница 1: ...Manual EXAMINER 1000 Vibration Meter with Electronic Stethoscope 15 Columbia Drive Amherst NH 03031 USA Phone 603 883 3390 Fax 603 886 3300 E mail support monarchinstrument com Website www monarchins...

Страница 2: ...tributor for details SAFEGUARDS AND PRECAUTIONS 1 Read and follow all instructions in this manual carefully and retain this manual for future reference 2 Do not use this instrument in any manner incon...

Страница 3: ...MENTS IN THE EXAMINER 1000 8 9 0 GETTING STARTED IN YOUR PLANT 9 10 0 ESTABLISHING A DATA COLLECTION ROUTE 10 11 0 RECORDING DATA FOR A MACHINE 10 12 0 WHAT ARE YOU MEASURING 11 12 1 Multi Parameter M...

Страница 4: ...leration envelope methods Vibration measurements are made by pressing the accelerometer sensor against designated Measurement Points on your equipment with either the stringer probe or with the magnet...

Страница 5: ...OSCOPE REFER TO OPERATORS MANUAL FOR INSTRUCTIONS CONNECTIONS SENSOR IN AUDIO OUT Measurement Types Units V velocity mm s in s A acceleration g E envelope ge Monarch Instrument 15 Columbia Drive Amher...

Страница 6: ...for each Measurement Point 5 0 WHAT IS PREDICTIVE MAINTENANCE Predictive Maintenance can be defined as collecting information from machines as they operate to aid in making decisions about their healt...

Страница 7: ...downtime and the possibility of catastrophic failure but allows them to effectively order parts schedule manpower and plan multiple repairs during scheduled downtime 5 1 Benefits of Predictive Mainte...

Страница 8: ...these measurements shows how a machine s condition changes over a period of time Analyzing these along with other measurements provide insight into the condition of the machine and which components ma...

Страница 9: ...aring and how fast Lubrication analysis is the earliest warning of a developing problem 7 0 SELECTING MACHINERY AND MEASUREMENTS Maintenance personnel have always made visual and hands on inspections...

Страница 10: ...Program 7 1 3 Redundant Machines Redundant Machines are typically small size equipment that have redundancy This group typically has the largest percentage of all machines in a plant and yet they are...

Страница 11: ...kHz to measure them 7 3 Selecting Measurement Intervals Measurement intervals are set based on the classification of the machine its repair history and the amount of data required for a detailed tren...

Страница 12: ...record keeping of collected data Establish a standard naming convention so you can communicate your results to the rest of maintenance Uniquely identify each machine and establish a starting point fo...

Страница 13: ...data collection Points on each Machine Several Points will have numerous readings i e VEL and ENV and Temp 3 Establish a Route with the Machines grouped by physical location 4 Walk the Route collecti...

Страница 14: ...Vertical excessive vertical vibration can indicate mechanical looseness as well as imbalance Axial excessive axial vibration is a strong indicator of misalignment It s important to note that these ar...
Страница 15: ...a in this zone Simply select the measurement Point which gives the best signal Avoid painted surfaces unloaded bearing zones housing splits and structural gaps When measuring vibration with a hand hel...

Страница 16: ...ty Stinger Mounted Vibration Sensor Magnetically Mounted Vibration Sensor Load Zone 15 0 EVALUATING THE OVERALL VIBRATION MEASUREMENTS Three general principles are commonly used to evaluate your vibra...

Страница 17: ...mples of machines in this category Class ll Medium sized machines typically electrical motors with 15 kW to 75 kW output without special foundations rigidly mounted engines or machines up to 300 kW on...

Страница 18: ...ENVELOPE MEASUREMENTS Use the same techniques of comparison as for Overall Vibration readings Remember acceleration envelope is an advanced early warning of a developing problem High values do not ne...

Страница 19: ...djustable volume control with off position Power Two 2 AA cells Operating Time 20 hours continuous without headphones Weight Instrument 7 oz 0 19 kg Complete kit 2 85 lbs 130 kg Dimensions 6 3 x 3 3 x...

Страница 20: ...will be compared CPM Unit of frequency measurement cycles per minute Displacement A scalar quantity specifying the change of position of a body measured from the resting position Dynamic Force A force...

Страница 21: ...cursion on a dynamic waveform also true peak and zero to peak Periodic Monitoring Measurements recorded at intervals of time Piezoelectric A material in which electrical properties change when subject...

Страница 22: ...ssion Path The path from source excitation to sensor Trending The plot of a variable over time used as an indicator of change Velocity A vector quantity of the time rate change of displacement D 19 10...

Страница 23: ...r details VIBRATION SEVERITY PER ISO 10816 1 Machine Class I small machines Class II medium machines Class III large rigid foundation Class IV large soft foundation in s mm s 0 01 0 28 0 02 0 45 0 03...

Страница 24: ...nstrument is committed to excellence and quality in manufacturing sales and service The Professional s Choice Track It Data Loggers Panel Tachometers DataChart Paperless Recorders Speed Sensors Portab...

Отзывы: