Customer Service 908-368-1025
︱
www.modwayfurniture.com
Page 2 of 2
EEI-2253
BAR TABLE
2
B
A
E
2
1
3
2
2
E
D
D
F
B
E
2
1
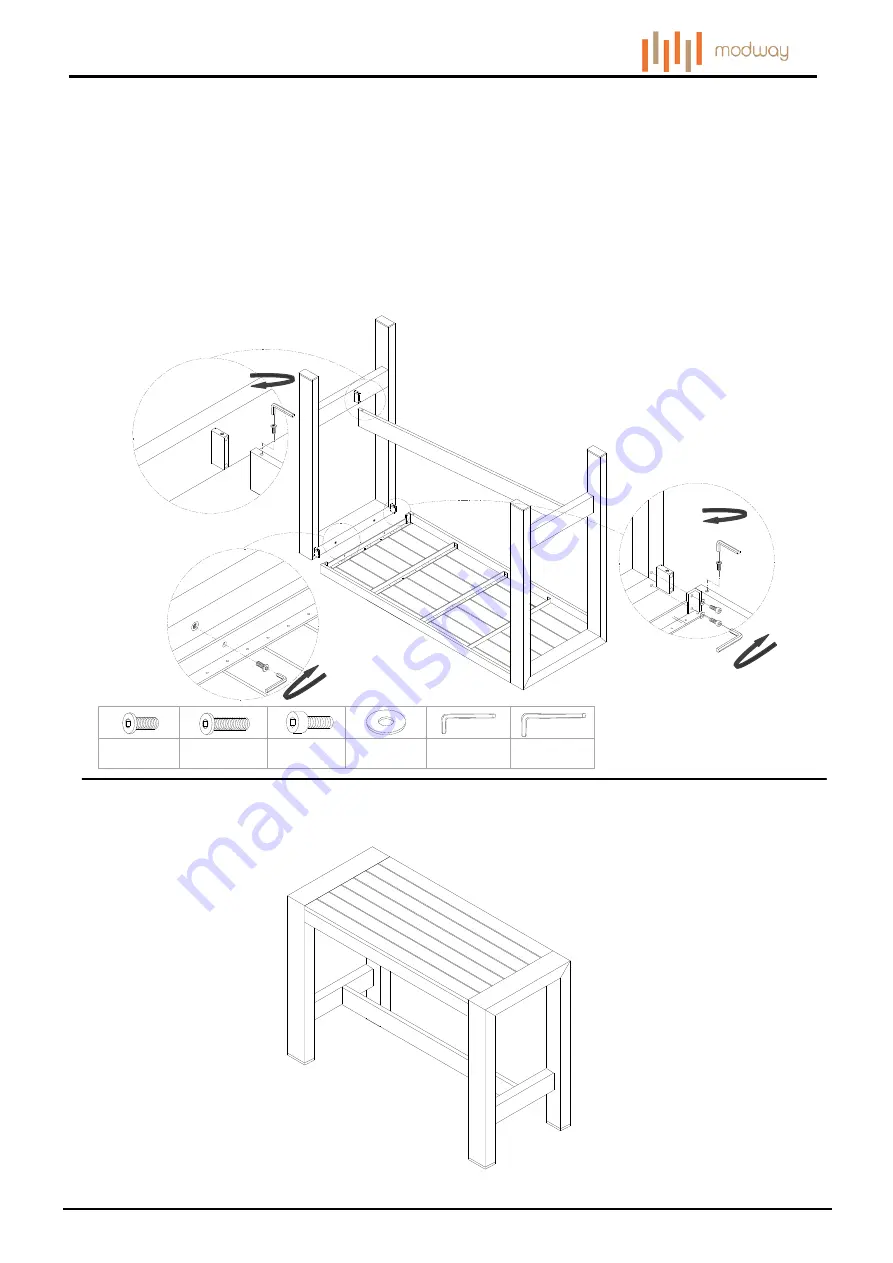
STEP 1:
Ax4
Bx6
Fx1
Cx8
Dx8
Ex1
Hardware & Tool required
STEP 2:
1
Assembly is completed. The table is ready to enjoy now!
Carefully turn over the assembled table.
C
C
2
Please put the
Table Top (1)
upside down on a carpeted or padded area.
Remove the plastic covers which pre-install in the end of the
Table Top (1)
by using
Allen Wrench (E/F)
.
Insert 1 piece of
Leg (2)
into
Table Top (1)
and
bottom Stretcher (3)
as shown.
Insert 2 pieces of
Bolt (B)
from the pre-drilled holes on the bottom of the
Table Top (1)
into
each side on the bottom of
Leg (2)
.
Insert 2 pieces of
Bolt (A)
from the pre-drilled holes on the side rail of the
Table Top (1)
into
each end of
Leg (2)
as shown.
Insert 4 pieces of
Bolt (C)
with 4 pieces of
Flat Washer (D)
from the pre-drilled holes on the side of the
Table Top (1)
into
each end of
Leg (2)
as shown.
Insert 1 piece of
Bolt (B)
from the pre-drilled holes on the bottom of the
Bottom Stretcher (3)
into
the
Leg (2)
as shown.
Do not fully tighten
Bolts (A&B&C)
at this step.
Repeat the same steps for the remaining 1 piece of
Leg (2).
Use
Allen Wrench (E)
to tighten all
Bolts (A&B)
and
Allen Wrench (F
) to tighten all
Bolts (C)
clockwise until secure
.


