background image

General Saturn Install Instructions

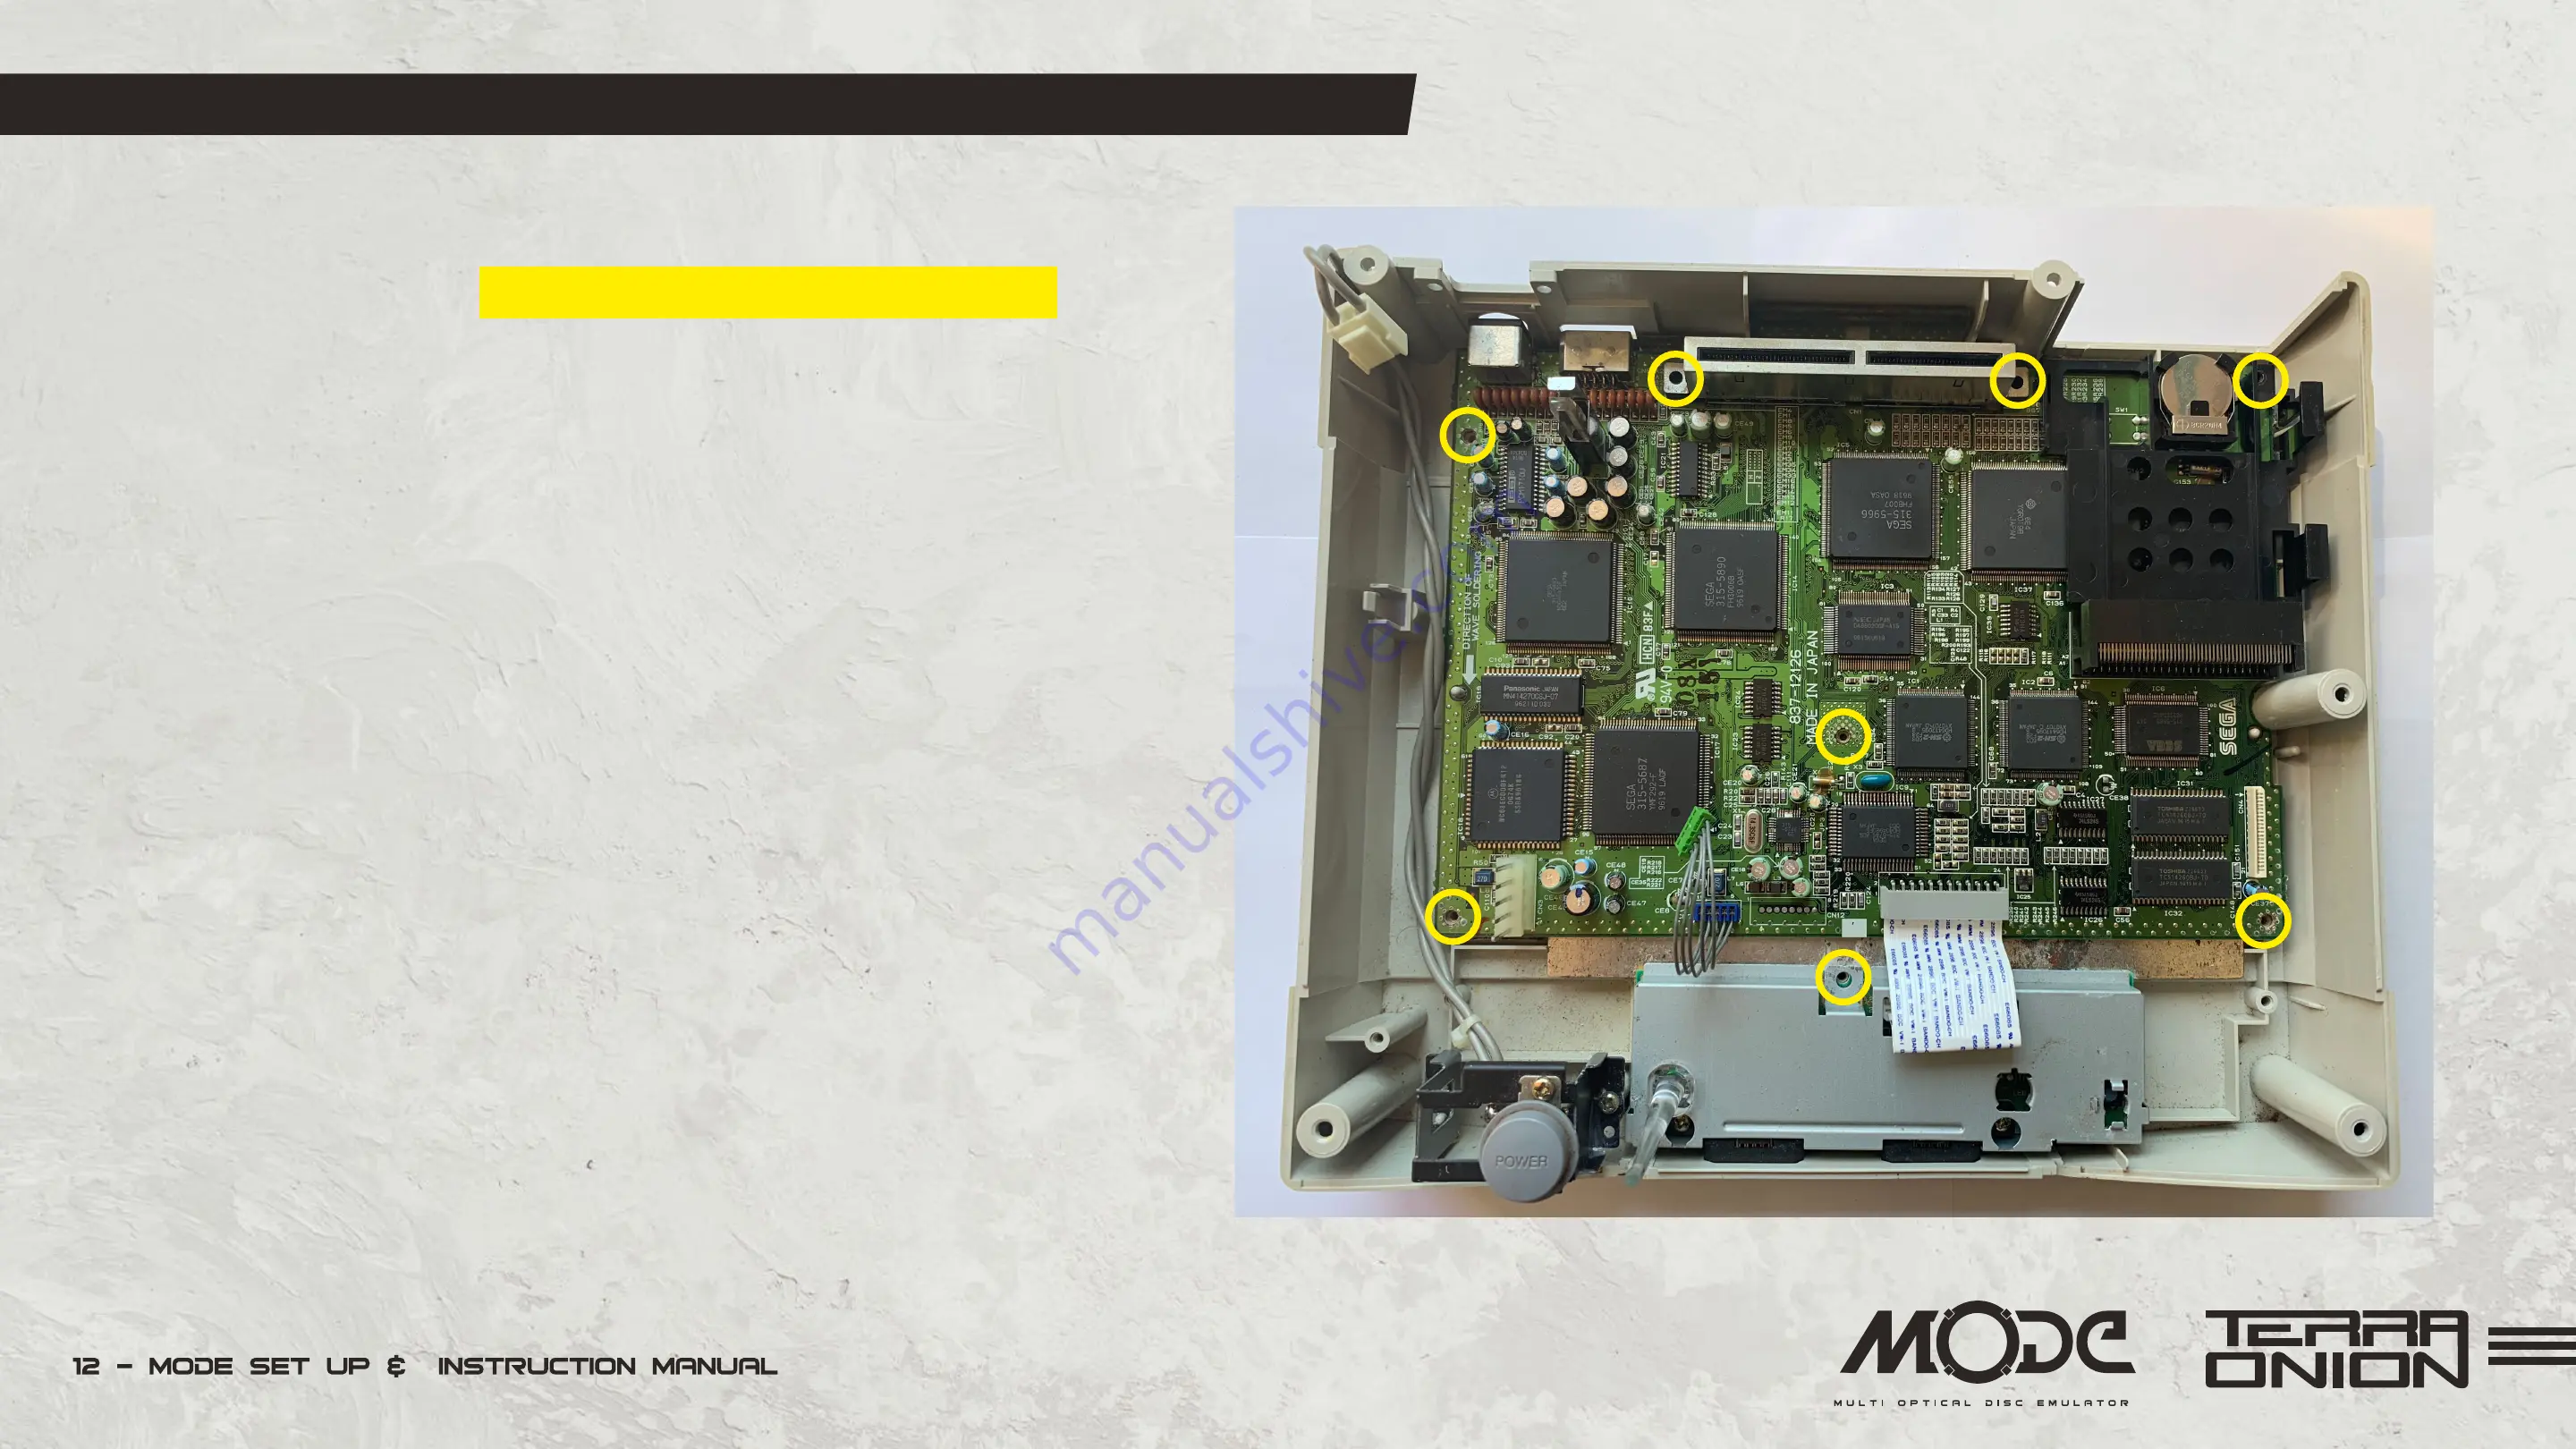
• Next, you need to remove the metal plate that covers the Sega 
Saturn motherboard by 

unscrewing the 8 screws that hold it

 in 

place.  You will also need to temporarily disconnect the ribbon cable 
connecting the controller board from the main motherboard.   This 
is located at the front of the console. Removing the metal shielding  
is required because the plastic standoffs that the optical drive sat 
on block the MODE PCB from being installed and the standoffs are 
screwed  from the underside.  Please note the Saturn with the PSU 
in the lid does not need the metal shielding removed as the pegs 
can be removed from the top.  Please do so now.

Содержание Terraonion

Страница 1: ...1 MODE SET UP INSTRUCTION MANUAL SET UP INSTRUCTION MANUAL REV 0 2 SET UP INSTRUCTION MANUAL REV 0 4...

Страница 2: ...This Installation Guide is a work in progress an advanced revision is forthcoming Please visit our Discord channel for further assistance https discord gg JexuJVW if you have any questions or concerns...

Страница 3: ...6 MODE PCB Layout and Connectors 8 Saturn Install Instructions 18 Dreamcast Install Instructions 23 Setting up your Storage Device 24 MODE Menu and Interface 29 Multi Disc Games 30 Updating the Firmw...

Страница 4: ...MicroSD card slot Supports both exFAT and FAT32 formats of greater than 2TB Compatible with Redump and Tosec images for both Dreamcast Saturn Compatible with CDI GDI CCD MDF BIN ISO WAV CUE images Plu...

Страница 5: ...s to be created in order to access Downloads section You can find the serial number one of two ways On the MODE PCB itself there is a box that says serial and it will have a printed serial number labe...

Страница 6: ...tor MicroSD Slot Leds Switch 1 SW1 Switch 2 SW2 Disc swap return to menu button USB Connector Expansion Port Reserved for possible future use SATA Drive Connector Saturn 20 PIN Data Connector Expansio...

Страница 7: ...MODE PCB Layout and Connectors Bottom MODE PCB Dreamcast Connector...

Страница 8: ...Saturn Install Instructions...

Страница 9: ...in the lid of the unit Accessories included in the MODE box 2 SATA drive screws to hold down a hard disk or SSD 4 adhesive feet to secure MODE to the console enough for 1 console 1 Optional Sega Satur...

Страница 10: ...disconnect the wiring from the connected wiring from the CD Assembly Then set the lid aside Disconnect any cables and data ribbon cable from the Saturn optical drive and lift the drive out of the con...

Страница 11: ...ons On the rear of the console remove the 2 black screws securing the power supply in place Remove the power supply by unplugging the white connector in the rear remove any screws from the power suppl...

Страница 12: ...cting the controller board from the main motherboard This is located at the front of the console Removing the metal shielding is required because the plastic standoffs that the optical drive sat on bl...

Страница 13: ...General Saturn Install Instructions Flip the metal plate over and remove the screws securing the posts You can safely set aside both the posts and screws as they will no longer be needed...

Страница 14: ...t with the original 8 screws Insert the four sticky feet into the MODE PCB screw holes Then remove the film from the bottom of the sticky feet and install MODE onto the metal plate When using a hard d...

Страница 15: ...nectors with the same pin number into the corresponding MODE connection 2 pin connectors must only go in the 2 pin connection and so on If you have two connecters 2 pin and 4 pin plug the ribbon cable...

Страница 16: ...ully as installing the cable wrong will damage MODE and your Saturn Remove the one screw near the white power connector on the PSU Pull Gently up this side of the PCB There are two different power sup...

Страница 17: ...top as shown right After installing the power cable push the PSU PCB back down onto the pins and reinstall the screw If you are using the optional power cable move the switch position to external pow...

Страница 18: ...Dreamcast Install Instructions...

Страница 19: ...General Dreamcast Install Instructions Remove Modem or BBA adapter Remove four screws from each corner of the underside of the Dreamcast Flip the Dreamcast over and remove the lid...

Страница 20: ...the 2 pin power cable going into the PSU from the motherboard Remove the 2 screws holding it in place and gently lift the PSU out Remove screws 3 holding down GD ROM assembly Remove GD ROM assembly Pl...

Страница 21: ...was located MODE attaches to this point Insert the four sticky feet into the MODE PCB screw holes Then remove the film from the bottom of the sticky feet and install MODE onto the metal plate When us...

Страница 22: ...e film from the bottom of the sticky feet and install MODE onto the metal plate Reinstall the PSU Close up the Dreamcast if you are not planning to perform advanced installations noted further down in...

Страница 23: ...the same folder however that is not a requirement More on multi disc games in a later section MODE supports nested sub folders This allows for additional sorting capabilities such as folders for regi...

Страница 24: ...at a time Right or Left moves the cursor a page up or down A button to launch a game activate menu option or navigate into a folder B button to go back in the interface when navigating folders or exi...

Страница 25: ...ically is used to send signals to the Saturn that the drive bay is open which is used for disc switching If you intend to run MODE with the Saturn top cover removed this option will bypass the lid swi...

Страница 26: ...nge the regular reset button functionality Normal reset of game unless an optional reset wire is connected see advance install below Reset Output Signal Disabled or Pulse on BTM When enabled the reset...

Страница 27: ...enable this you first need to download the game database file which has the images and game information prepopulated in it Place this file on the root of one of your storage devices Power your consol...

Страница 28: ...ss the Start or A button again to launch the game or the B button to go back to the menu Pressing Start button while in the covers list will automatically launch the game without showing the extra inf...

Страница 29: ...d hold the A button one more time and select Launch Current Queue to play the multi disc game You can clear all discs in the queue by selecting Clear Disc Queue from the contextual menu Dreamcast disc...

Страница 30: ...so provides some other information such as current firmware and FPGA details Press the A button on the game controller to flash the new firmware or press B to cancel and not update MODE uses a single...

Страница 31: ...the microSD card to the USB or SATA while inside MODE Answer MODE currently does not have a way to transfer data from SD Card to USB or SATA and vice versa Question The advanced cover art menu system...

Страница 32: ...Question My Sega Saturn has the pc trap board in it Is MODE compatible Answer Yes it is However you will need to remove the trap board and purchase a longer Saturn ribbon cable due to the short cable...

Страница 33: ......

Отзывы: