


PG 11
©Copyright 2020 Mobilate LLC All rights reserved
P/N: 400.160 Rev 3
PG 10
©Copyright 2020 Mobilate LLC All rights reserved
P/N: 400.160 Rev 3
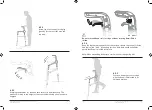
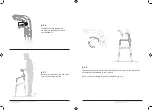
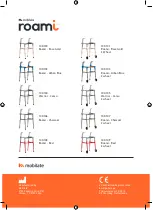
ASSEMBLY
5
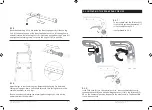
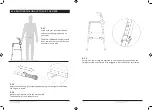
For safety and stability, your Roami
PMA must be properly assembled
before any use. Do NOT use unless
it is properly assembled.
Your Roami PMA comes almost fully
assembled. You will need to simply
install (affix) the rear legs and adjust
the height on front and back legs
prior to first use.
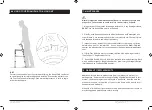
If you are unable to properly
assemble Roami, please contact the
manufacturer, Mobilate at:
[email protected]
+1.210.284.1312
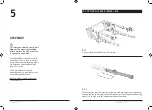
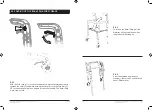
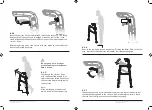
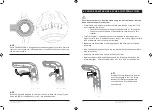
5.1 FITTING THE REAR LOWER LEGS
5.1.1
Lay the folded Roami PMA on a flat surface.
5.1.2
Slide the Lower Leg (15) assembly inside the Rear Leg Upper (11) making sure
to keep the Spring Pin (14b) inside the leg facing to the inside of the Rear Leg
Upper (11) to align with the adjustment holes when fitted.