


FX312 & FX412 VERSION 2.0
MLR ELECTRONIQUE
14
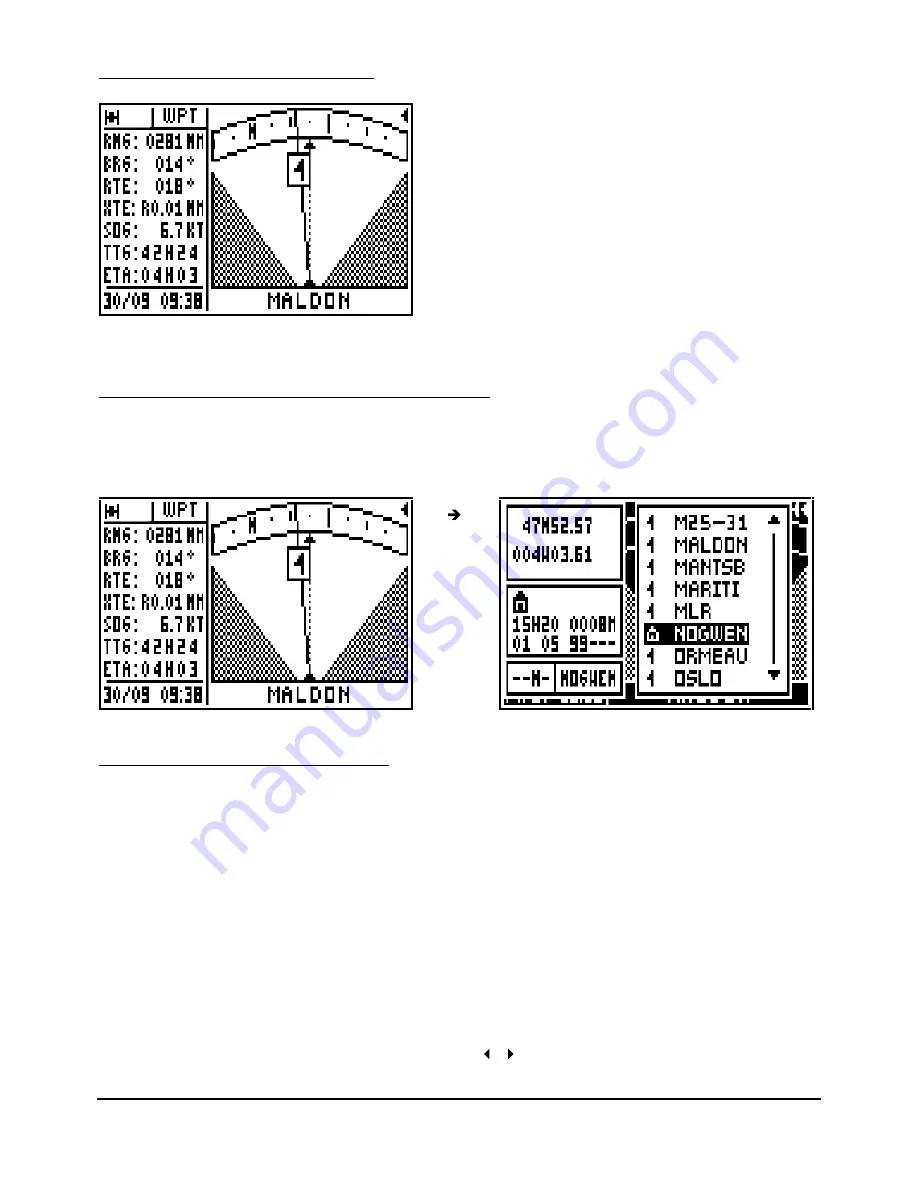
3.3.4 – GO TO WAYPOINT RADAR
Your course is represented by the dotted
line in the centre of the screen. A
continuous line with the destination
waypoint icon is displayed to show the
bearing of the waypoint from your current
course. When the dotted line (vessel
course) is directly over the line with the
waypoint you are on course. If two
arrows are shown simultaneously this
indicates that the waypoint is outside of
the display area.
3.4. – CHANGING THE DESTINATION WAYPOINT
From the GOTO WAYPOINT function, press the 9
WXY List
key to display the list of your
waypoints, then select the new destination waypoint while proceeding in the same way as
paragraph B.3.1 ACTIVATE THE GOTO WAYPOINT FUNCTION.
3.5. – CREATING A NEW WAYPOINT
With your receiver you can create a new waypoint by following the instruction windows
displayed after pressing the GoTo key or from the WAYPOINT MENU.
From the GOTO WAYPOINT function, press the Menu key then press key 3 (or select 3-
ENTER/NEW and press Enter).
When the entered waypoint window is displayed, enter the NAME of the waypoint, select an
ICON for representation in the PLOTTER function, enter a COMMENT (optional), enter the
LATITUDE and the LONGITUDE then press Enter to validate your entry and store the new
waypoint.
Note: To enter a letter, press repeatedly the corresponding key (e.g. to enter a B, press 3 times
on key 2). Once the letter or the number is displayed, the cursor will advance automatically to
the next character. If you make a mistake, use the
arrow keys to move back or to advance


