3Installing the option devices
Installing the solenoid valve set 3-45
shows the solenoid valve installation procedures and the solenoid valve connector connection
procedures. The installation procedures are as follow. This work must be carried out with the drive unit power
turned OFF.
1) Install the solenoid valve set <1> on the No.2 arm side. Fixing at the T slot on the No.2 arm side with two fixing
screws and two nuts attached for T slots. Install in the position of 10mm from the arm end.
2) Connect the hand output cable within No.2 arm. Make a cut in the one grommet <2> on No.2 arm-cover (3) by
the cutter etc. (Draw the hand output cable from here)
3) Loosen the fixing screw and remove the No.2 arm cover <3> and the arm cover A(2) <13>. Since the air tube
is connected, No.2 arm cover <3> is completely inseparable.
4) Pass the hand output cable <4> of the solenoid valve set to grommet <2> which made a cut. And connect
with hand output cable (GR1, GR2) <5> of the robot arm side in No.2 arm. Connect the same connector
names.
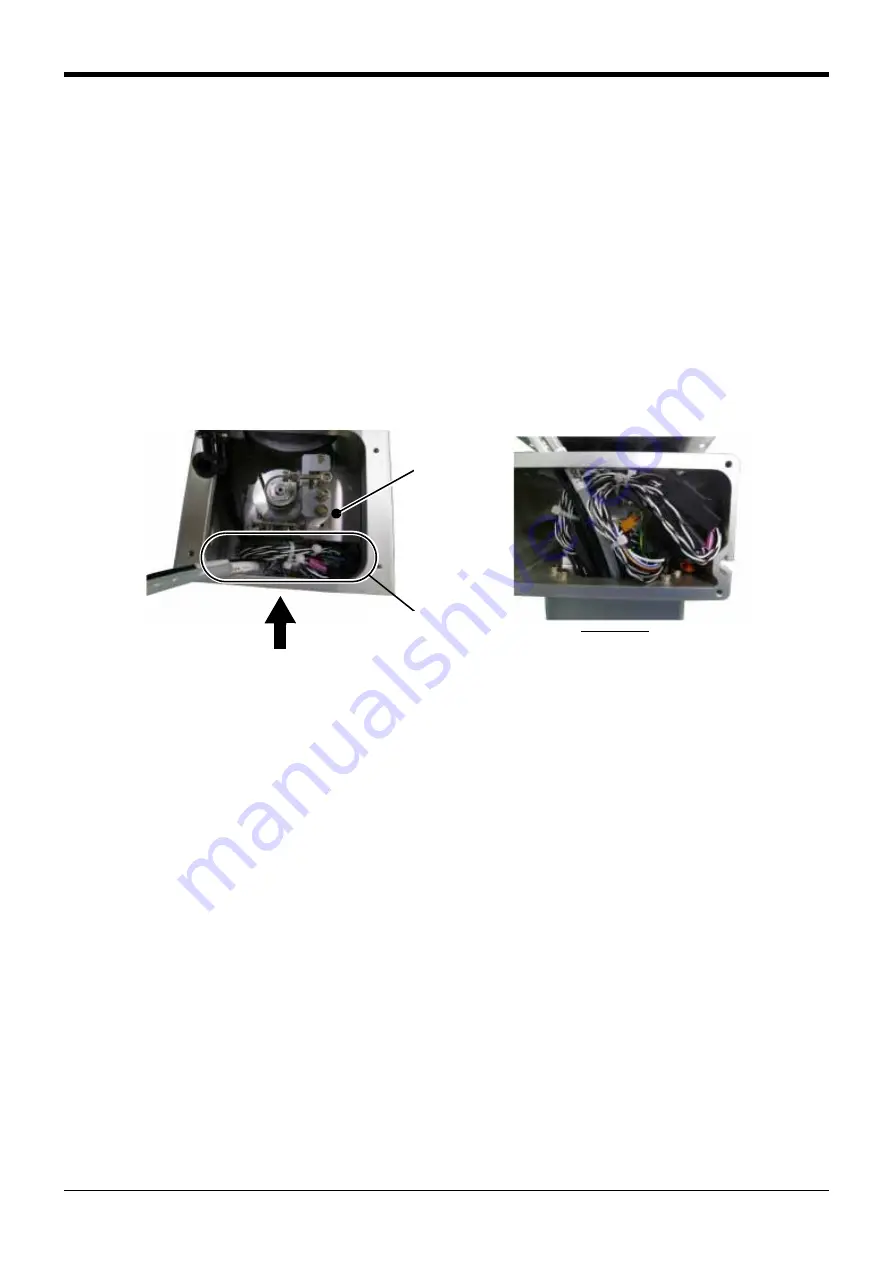
Note : Please see the hand output cable from the arm cover A (2) <13> side, and store it outside the bracket. If
the cable enters within the bracket, it will rub to the timing belt and will become the cause of breaking
down.
Fig.3-2 : Storing of the hand output cable
5) Install the No.2 arm cover <3> and the arm cover A(2) <13> as before. Be careful not to catch any the cables.
6) Connect primary air piping with the two φ6 air hoses (customer preparation). Connect between the "R" port
(6) of the solenoid valve set and the "RETUEN"<8> on No.2 arm cover, and between"P" port <7> and
"AIROUT"<9>.
7) Connect secondary air piping with the φ4 air hose (customer preparation).
There are two connection methods as follows.
a) Connect with the tools of customer preparation direct from the solenoid valve set. The fixing place of
the air hose which can be used of the customer is shown in
b) Connect via the air hose piped in robot arm previously.
Note: In the robot arm, fourφ4 air hoses are piped to the secondary piping air joint in motor cover J3
<11> from the secondary piping air joint of J2 axis upper part <10> previously.
(If more numbers of piping are necessary, please pipe to the tools directly)
And, please prepare separately the air hose for connection from the secondary piping air joint <11>
to the tools. (The conversion coupling is attached(φ4 to φ3))
<Reference> : The air hose which can be passed in the shaft is four φ4 hoses maximum. If you utilize
the hand tube optional, it can let the optional hand input cable pass further. Refer to the
"standard specifications" for detail.
Bracket
Cable should be stored in
outside of the bracket.
A
View from A
(Arm cover A(2) <13> side)
Содержание RH-3SQHR3515
Страница 1: ...Mitsubishi Industrial Robot RH 3SQHR3515 INSTRUCTION MANUAL ROBOT ARM SETUP MAINTENANCE BFP A8840 C ...
Страница 2: ......
Страница 111: ......


