MODELS: WD-57733 / WD-65733 / WD-73733 / WD-57734 / WD-65734 / WD-73734 / WD-C657
WD-Y577 / WD-Y657 / WD-57833 / WD-65833 / WD-73833
Page 33
2. Manual Keystone Geometry Alignment (There are 2 modes of adjustment: FULL and TOUCH UP)
FULL ADJUSTMENT MODE: Part 1
(
Note: if data is out of range, you may need to do a reset before starting - press “1” then “INFO”
)
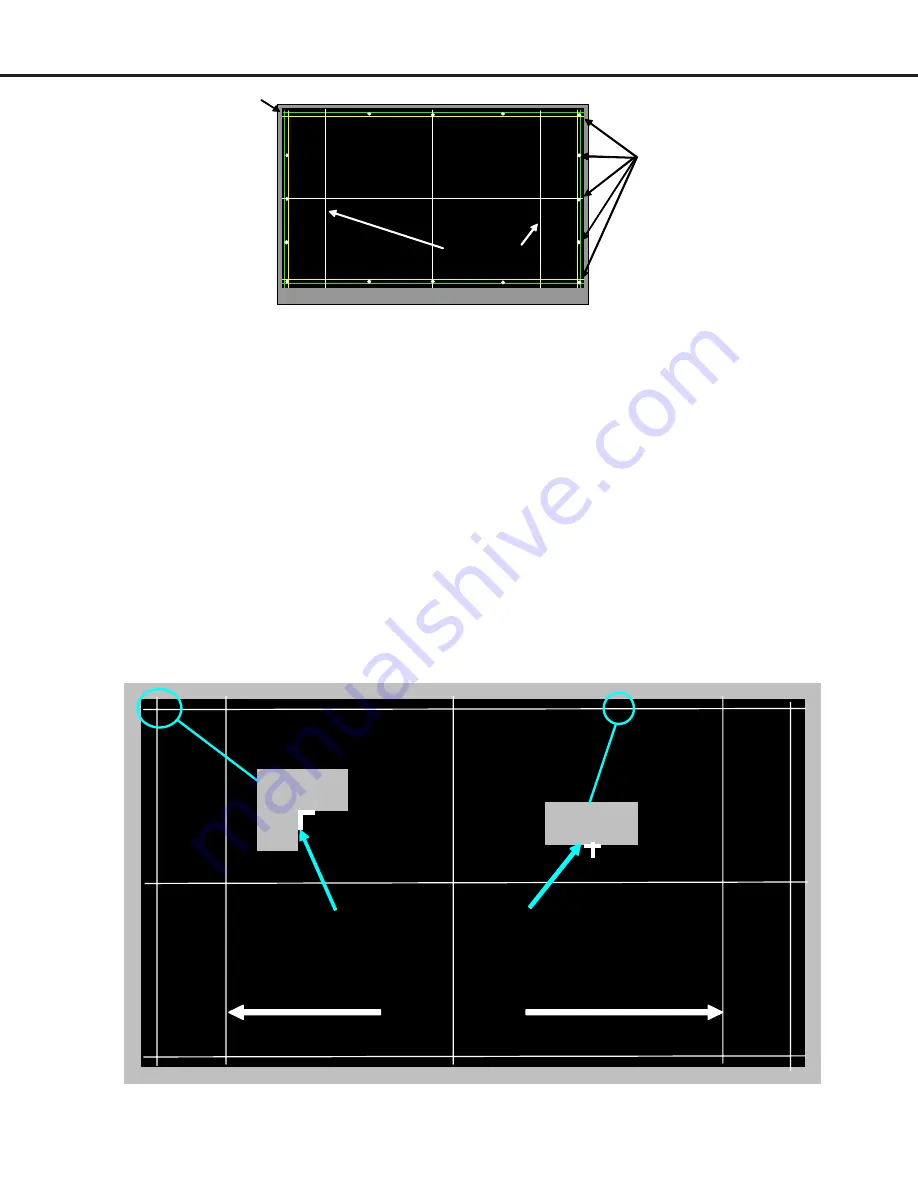
1. When entering the Keystone Adjustment mode you will see the test pattern as shown in the drawing above.
The point in the upper left corner will be a cross.
2. Starting from the 1st point (upper left corner) use the “UP/DOWN/LEFT/RIGHT” buttons to adjust the
selected point (selected point is the one that is a cross)
3. Align each point in a straight line, use the bezel as a reference. See example drawing below.
NOTE: Only the cross will move. The pattern will not change.
4. Use “FASTFORWARD” button to move between each point or “REWIND” to go back.
Part 2
5. After all 16 points are aligned properly, pressing the “FASTFORWARD” button again automatically activates
the 4:3 mode (there is no change in the display). There are 11 patterns, each with a small variation of
distortion in the 4:3 mode vertical lines. Continue pressing “FASTFORWARD” to cycle through the 11
patterns until you find the straightest 4:3 lines, then go to step 6.
6. Press the “ENTER” button to save the adjustment and “EXIT” to leave the Adjustment Mode..
Note
: There will be no indication that the save was successful.
Pressing “FASTFORWARD” will cycle through 11 different geometry options. Select the
straightest option by pressing “ENTER”
+
Adjustment Points
(16 Total)
Cursor
+
4:3 Mode Lines
¦
¦
¦
¦
¦
¦
¦
¦
¦
¦
¦
¦
¦
¦
¦
®
4:3 Mode Lines
Part 2
Match same pattern
Move cursor so the cross
Содержание WD-57733
Страница 2: ......


