background image

5. Wiring connections

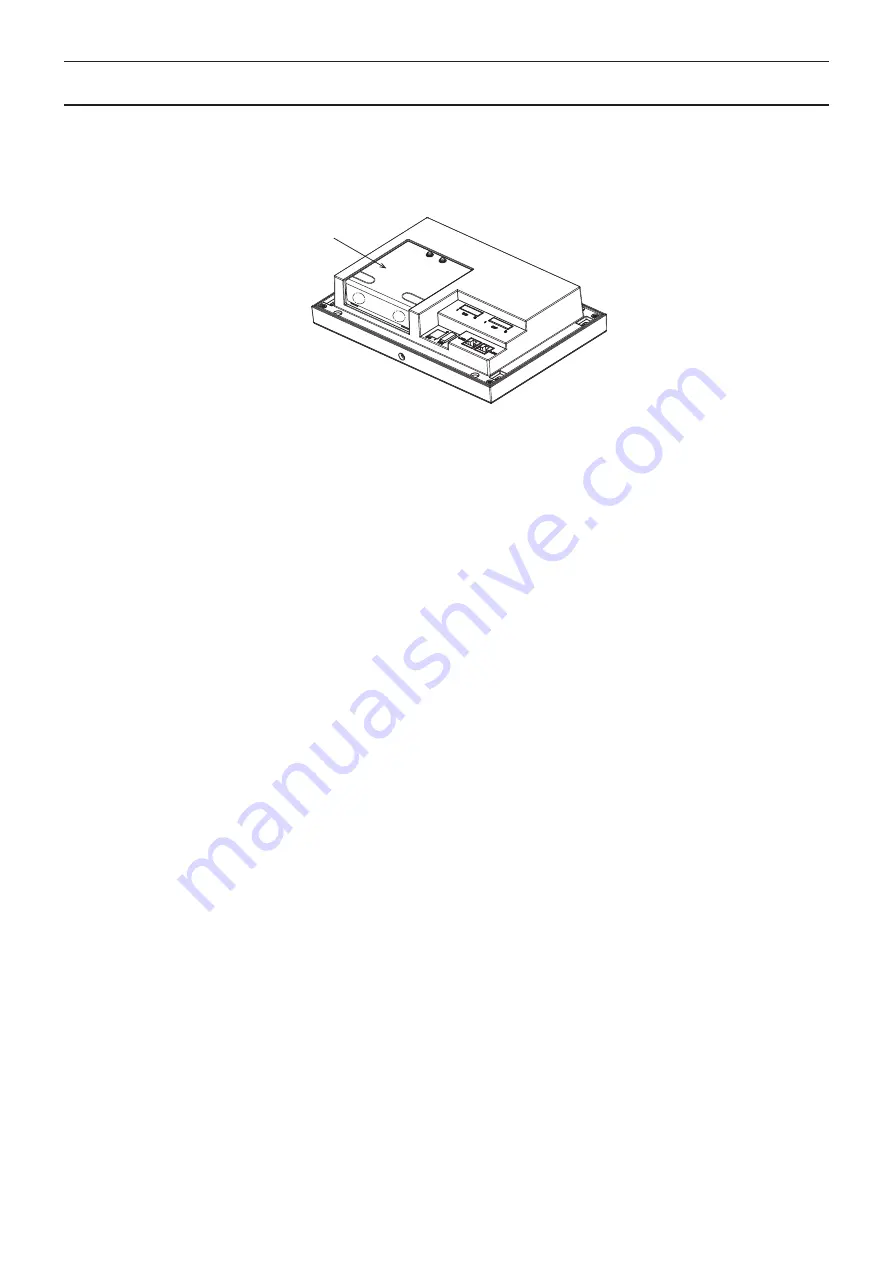
When routing the cables from the bottom, remove the service cover, cut out the knockout holes, cut a slit in the supplied 
rubber bushings (supplied with the AE-200/AE-50), attach the bushings to the knockout holes, insert the cables with no gap, 
and reinstall the service cover.

Service cover

WT07320X01

23

Содержание PAC-YG86TK-J

Страница 1: ... 2 General description of installation 17 3 Selecting the installation site 18 3 1 Required installation space 18 4 Installation 19 4 1 Before installation 19 4 2 Installation method 20 5 Wiring connections 23 For distribution to dealers and contractors only Applicable Model AE 200A AE 50A AE 200E AE 50E Before installing the controller please read this Installation Manual carefully to ensure prop...

Страница 2: ...situation which if not avoided could result in minor or moderate injury General precautions To reduce the risk of injury electric shock or malfunction avoid contact with the sharp edges of certain parts To reduce the risk of injury wear protective gear when working on the controller Precautions for unit installation Properly dispose of the packing materials Plastic bags pose a suffocation hazard t...

Страница 3: ...Required for wall surface installation Use screws that are suitable for the wall type 2 DIN rail As appropriate 3 DIN rail fixing screw As appropriate 1 Required when using DIN rails Use screws that are suitable for the wall type 4 Control box As appropriate 200 mm 7 7 8 in depth or above 1 The total weight of the AE 200A AE 50A AE 200E AE 50E and the Mounting Kit is approximately 2 7 kg Use the a...

Страница 4: ... 2 5 8 148 5 7 8 188 7 7 16 41 1 5 8 4 3 16 38 1 1 2 25 1 1 29 1 3 16 45 1 13 16 35 1 7 16 ø10 7 16 4 5 3 16 4 5 3 16 12 5 1 2 261 2 10 5 16 294 8 11 5 8 317 2 12 1 2 329 2 15 1 2 69 2 2 3 4 Burring hole 4 M4 0 7 1 16 Unit mm in Burring hole 4 M3 0 5 1 16 16 WT07320X01 ...

Страница 5: ...achment supplied Mounting Kit supplied DIN rail attachment supplied Plate A fixing screw supplied with AE 200 AE 50 Hereafter AE 200A and AE 200E unless otherwise specified will be called AE 200 Hereafter AE 50A and AE 50E unless otherwise specified will be called AE 50 WT07320X01 17 ...

Страница 6: ...1 1 1 50 1 1 1 2 Required vertical shift distance When the depth of the control box is below 200 mm 7 7 8 in shift the controllers vertically as shown in the figure below so that their components will not be in contact with each other 200 7 7 8 40 1 5 8 Mounting Kit AE 200 AE 50 body Unit mm in Installation space Control box Unit mm in 18 WT07320X01 ...

Страница 7: ...er Refer to the Installation Manual of the AE 200 AE 50 for how to remove the cover 2 Attach the Mounting Kit 3 Reinstall the cover AE 200 AE 50 body Mounting Kit supplied Plate A fixing screw supplied with AE 200 AE 50 AE 200 AE 50 body Cover WT07320X01 19 ...

Страница 8: ...il attachments in the correct orientation as shown in the figure 2 Install the DIN rail on a strong wall surface Mounting location 152 5 1 1 167 6 5 8 152 5 1 1 167 6 5 8 10 7 16 AE 200 AE 50 body DIN rail attachment 1 supplied Screw supplied DIN rail fixing screw DIN rail To a strong wall surface Do not screw the DIN rail fixing screws here Unit mm in 20 WT07320X01 ...

Страница 9: ...3 Mounting the AE 200 AE 50 on the DIN rail Removing the AE 200 AE 50 from the DIN rail WT07320X01 21 ...

Страница 10: ...ws To remove the AE 200 AE 50 after the installation remove the Plate A fixing screws that fix the AE 200 AE 50 and the Mounting Kit Mounting location 147 4 5 13 16 147 4 5 13 16 29 1 3 16 21 7 8 ø4 screws not supplied AE 200 AE 50 body To a strong wall surface Unit mm in 22 WT07320X01 ...

Страница 11: ...om remove the service cover cut out the knockout holes cut a slit in the supplied rubber bushings supplied with the AE 200 AE 50 attach the bushings to the knockout holes insert the cables with no gap and reinstall the service cover Service cover WT07320X01 23 ...

Страница 12: ...Please be sure to put the contact address telephone number on this manual before handing it to the customer HEAD OFFICE TOKYO BLDG 2 7 3 MARUNOUCHI CHIYODA KU TOKYO 100 8310 JAPAN WT07320X01 872C600A20 ...

Отзывы: