8. ETHERNET CONNECTION
8.4 PLC Side Setting
8 - 55
1
P
R
EP
ARA
T
OR
Y
P
R
OCEDURES
FOR
MONIT
O
R
ING
2
D
E
VICE RA
NGE
T
H
A
T
CAN
B
E
SET
3
ACCESS
RA
N
G
E
F
O
R MONIT
O
R
ING
4
HOW T
O
MONIT
O
R
REDUNT
ANT
SYS
TEM
5
BUS CONNECTION
6
DIR
E
CT
CONNECTION T
O
CPU
7
COMP
UT
E
R
L
INK
CONNE
C
T
ION
8
E
T
HE
RN
E
T
CONN
E
C
T
ION
Confirming the communication state of
Ethernet module
(1) When using the Command Prompt of Windows
.
Execute a Ping command at the Command Prompt of
Windows
.
(a) When normal communication
C:\>Ping 192.168.0.19
Reply from 192.168.0.19: bytes=32 time<1ms
TTL=64
(b) When abnormal communication
C:\>Ping 192.168.0.19
Request timed out.
(2) When abnormal communication
At abnormal communication, check the followings and
execute the Ping command again.
• Mounting condition of Ethernet communication unit
• Cable connecting condition
• Confirmation of switch and network parameter setting
• Operation state of PLC CPU (faulty or not)
• IP address of GOT specified by Ping command
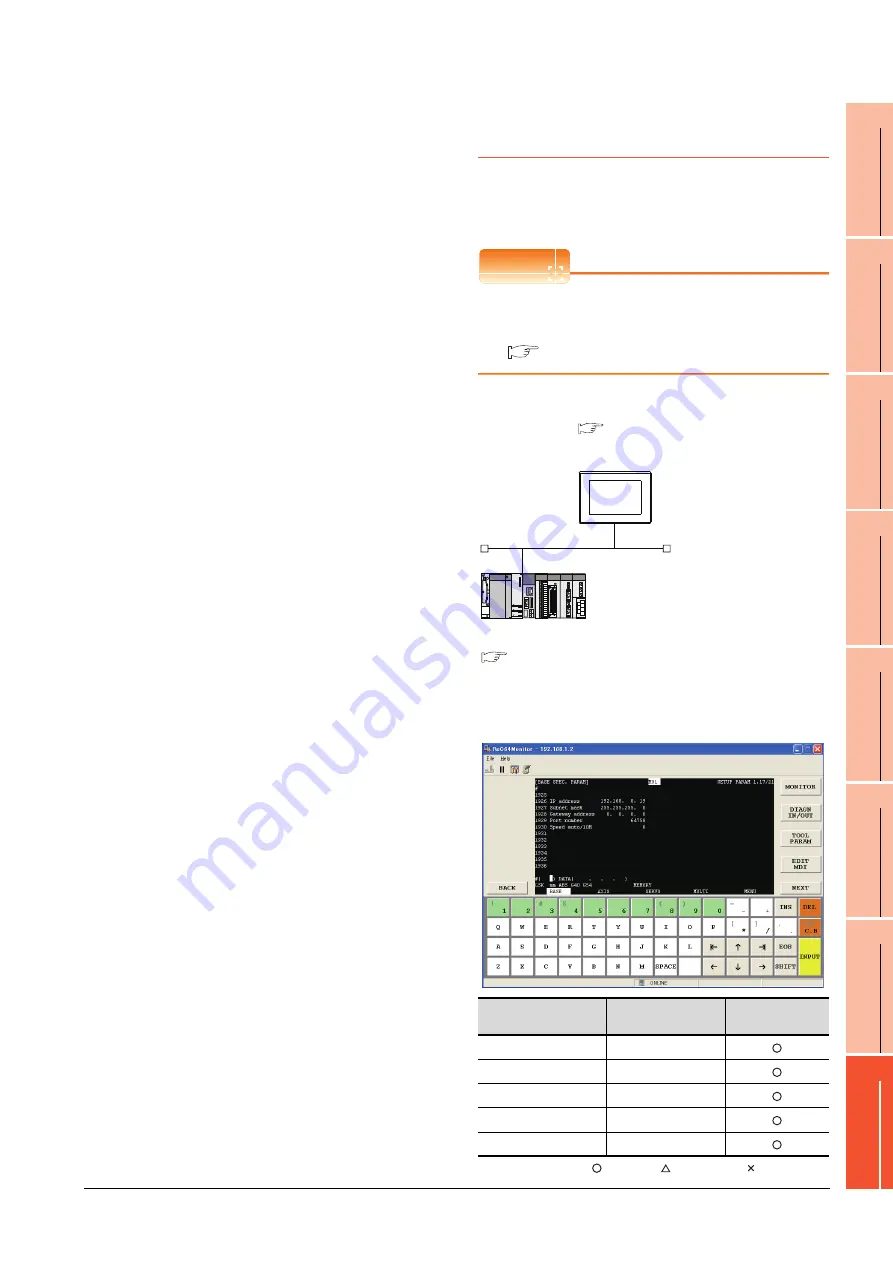
8.4.13 Connecting to Display I/F
(CNC C70)
This section describes the settings of the GOT and Display
I/F (CNC C70) in the following case of the system
configuration.
POINT
POINT
POINT
Display I/F (CNC C70)
For details of the Display I/F (CNC C70), refer to the
following manual.
C70 Series SET UP MANUAL
System configuration
IP address settings of CNC C70
(1) Remote monitor tool
: Necessary : As necessary : Not necessary
Item
Set value
Setting necessity at
GOT connection
IP address
192.168.1.2
Subnet mask
255.255.255.0
Gateway address
0.0.0.0
Port number
64758 (fixed)
Speed auto/10M
0 (fixed)
<GOT> (The settings other than the
following are set to the default)
Network No.
: 239
PLC No.
: 1
IP address
: 192.168.1.1
Port No.
: 5001
Communication format : UDP (fixed)
Network No.
: 239
PLC No.
: 2
IP address
:192.168.1.2
Port No.
: 5001
Communication format
: UDP(fixed)
<Q17nNCCPU> (The settings other than the
following are set to the default)
[Controller Setting] and [Ethernet] of GT
Designer3
■
■
Содержание GT15
Страница 2: ......
Страница 34: ...A 32 ...
Страница 92: ......
Страница 110: ...2 18 2 DEVICE RANGE THAT CAN BE SET 2 9 MELSEC WS ...
Страница 134: ...3 24 3 ACCESS RANGE FOR MONITORING 3 7 Connection to the Head Module of CC Link IE Field Network System ...
Страница 186: ...5 10 5 BUS CONNECTION 5 2 System Configuration ...
Страница 218: ...5 42 5 BUS CONNECTION 5 4 Precautions ...
Страница 254: ...6 36 6 DIRECT CONNECTION TO CPU 6 6 Precautions ...
Страница 286: ...7 32 7 COMPUTER LINK CONNECTION 7 6 Precautions ...
Страница 350: ...8 64 8 ETHERNET CONNECTION 8 5 Precautions ...
Страница 368: ...9 18 9 MELSECNET H CONNECTION PLC TO PLC NETWORK 9 5 Precautions ...
Страница 420: ...11 26 11 CC Link IE CONTROLLER NETWORK CONNECTION 11 5 Precautions ...
Страница 440: ...12 20 12 CC Link IE FIELD NETWORK CONNECTION 12 5 Precautions ...
Страница 490: ...13 50 13 CC Link CONNECTION INTELLIGENT DEVICE STATION 13 5 Precautions ...
Страница 510: ......
Страница 564: ...15 54 15 INVERTER CONNECTION 15 7 Precautions ...
Страница 668: ......
Страница 712: ...21 12 21 MULTIPLE GT14 GT12 GT11 GT10 CONNECTION FUNCTION 21 5 Precautions ...
Страница 713: ...MULTI CHANNEL FUNCTION 22 MULTI CHANNEL FUNCTION 22 1 ...
Страница 714: ......
Страница 760: ...22 46 22 MULTI CHANNEL FUNCTION 22 5 Multi channel Function Check Sheet ...
Страница 761: ...FA TRANSPARENT FUNCTION 23 FA TRANSPARENT FUNCTION 23 1 ...
Страница 762: ......
Страница 860: ...REVISIONS 4 ...
Страница 863: ......


