background image

Contact Miseno at (855) 480-2915 or email [email protected] with any questions. Copyright ©2019, Miseno. All rights reserved

PAGE 3

Skirted HET Single- and Dual-Flush Toilet

Installation Instructions

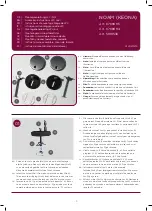
Step 4. Connect the water supply.

Q.

 Route the supply line tube from behind the bowl and 

connect it to the water shut-off valve.

R.

 Open the valve slowly and check for leaks at both the 

valve connection and tank connection

Step 5. Flush rod adjustment (dual-flush only)

WaterLine

Water

Shut-O

ff

Vavle

S. 

Use the thumbscrew on the fill valve inside the toilet 

tank to adjust waterline level to the waterline mark on 
the valve riser.

Push Button

Button

Locknut

Rod Locknut

Push Rod

Tank

Flush Valve

Short Flush Button

Long Flush Button

T. 

The flush button is pre-assembled and 

adjusted at the factory, but may require proper 
alignment and adjustment of the flush rods 
upon installation. 

First position the lid so that it is aligned where 
it will sit in its final resting position, then check 
to make sure the button assembly also aligns 
correctly with the actuators on the flush valve. 
If adjustment is needed, loosen the button 
locknut and reposition. Retighten the locknut.

Second, make sure the tip of the push rods 
lightly touch the top of the flush valve buttons. 
To increase or decrease rod length, first loosen 
the rod locknut, then adjust the threaded rod to 
the desired length. Retighten the locknut to 
secure the rod.

Содержание MNO490EC

Страница 1: ... under bolt caps Remove old toilet base by carefully lifting it off the floor Clean flange and plug the drain with a rag to prevent sewer gas from escaping Remove rag before placing new toilet To remove old toilet Floor Outlet Flange 12 305mm T Connection Bolts T Bolts Floor Outlet Flange Wax Ring Flange Seal Plate T Bolt Connection Nuts Washer Connection Bracket for Attaching Toilet to Floor Flan...

Страница 2: ...and snap on decorative caps Sealant or Plumber s Putty Flange Connection Holes Outlet Horn Decorative Cap Connection Screw Base Tank Connection Bolts 2 Flexible Supply Tube Rubber Coupling Gasket Tank Connection Washer 2 Bottom Tank Connection Washer 2 Nuts 2 Tank Connection Gasket 2 Tank Flapper Chain Hook to be attached to trip lever Step 3 Install toilet tank to base L Lay tank on clean stable ...

Страница 3: ...rk on the valve riser Push Button Button Locknut Rod Locknut Push Rod Tank Flush Valve Short Flush Button Long Flush Button T The flush button is pre assembled and adjusted at the factory but may require proper alignment and adjustment of the flush rods upon installation First position the lid so that it is aligned where it will sit in its final resting position then check to make sure the button ...

Страница 4: ...ose Flapper is not seated properly Water level is not set to proper height Low water pressure Obstruction in bowl Short flush Turn on water supply at angle stop valve Loosen fill valve nut and turn fill valve away from back of tank Clean drain guard of debris Turn off water and clean inside of fill valve Loosen fill valve nut and turn fill valve away from back of tank Check chain length and flush ...

Страница 5: ...does the warranty cover The warranty covers the vitreous china product that is defective in materials or workmanship What does the warranty not cover Failures to fittings due to chlorine or other chemicals Installation and labor costs you incurred for replacement Repair costs and dmage due to leaks from supply line failures Products not installed per Miseno s instructions Product that were subject...

Отзывы: