13
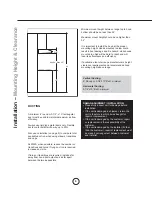
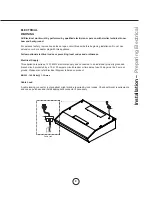
For Mounting Under a Kitchen Cabinet (Fig 1)
6HOHFWSUHIHUUHGGXFWORFDWLRQYHUWLFDORUKRUL]RQWDOLI
ducting air out of kitchen. Refer to page 10 for details.
%HJLQLQVWDOODWLRQE\UHPRYLQJWKH¿OWHUVLILQVWDOOHG
3. Reinforce cabinet with 1”x2” wood strips if additional
strengthening is required or if cabinets are
framed.
4. Cut out the required openings for duct and electrical
access by following the dimensions on page 8;
make sure the duct opening is large enough to apply
GXFWWDSH5HIHUWR)LJIRUPLQLPXPGXFWFXWRXW
dimensions
5. Position range hood in the desired mounting location
DQGIDVWHQKRRGRQWRFDELQHWZLWK0ZRRGVFUHZV
provided.
6. Install
electrical.
7. Install duct work and duct tape.
5HLQVWDOO¿OWHUV
9. Power up hood and check for leaks around duct tape.
duct/silver
tape
Duct
opening
cutout
Add 1x2
wood strips
electrical
Fig 1
6KRZQDVYHUWLFDO´[´GXFWLQJ
Installation –
Mounting the Range Hood
C/L
W
D
Back of
Cabinet
Front of
Cabinet
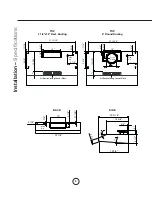
Minimum
duct cut out
6” Round Vertical Ducting
Width : 11”
Depth : 8”
3 1/4” x 10” Rect. Ducting
Width : 11”
Depth : 4
1/2
”
Minimum duct cut out dimensions
* Depth dimensions start 1/2” from wall
*1/2”
Fig 2
Содержание MH20330AS
Страница 1: ...MH20330AS MODEL Installation Use and Care Guide READ AND SAVE THESE INSTRUCTIONS 2015 JUL ...
Страница 2: ......
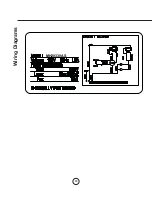
Страница 20: ...Wiring Diagrams 18 MH20330AS ...


