Page 9 of 15
215378, Rev. D
3.
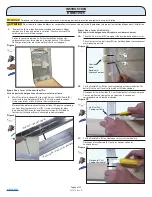
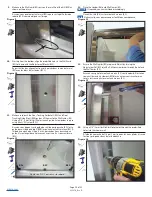
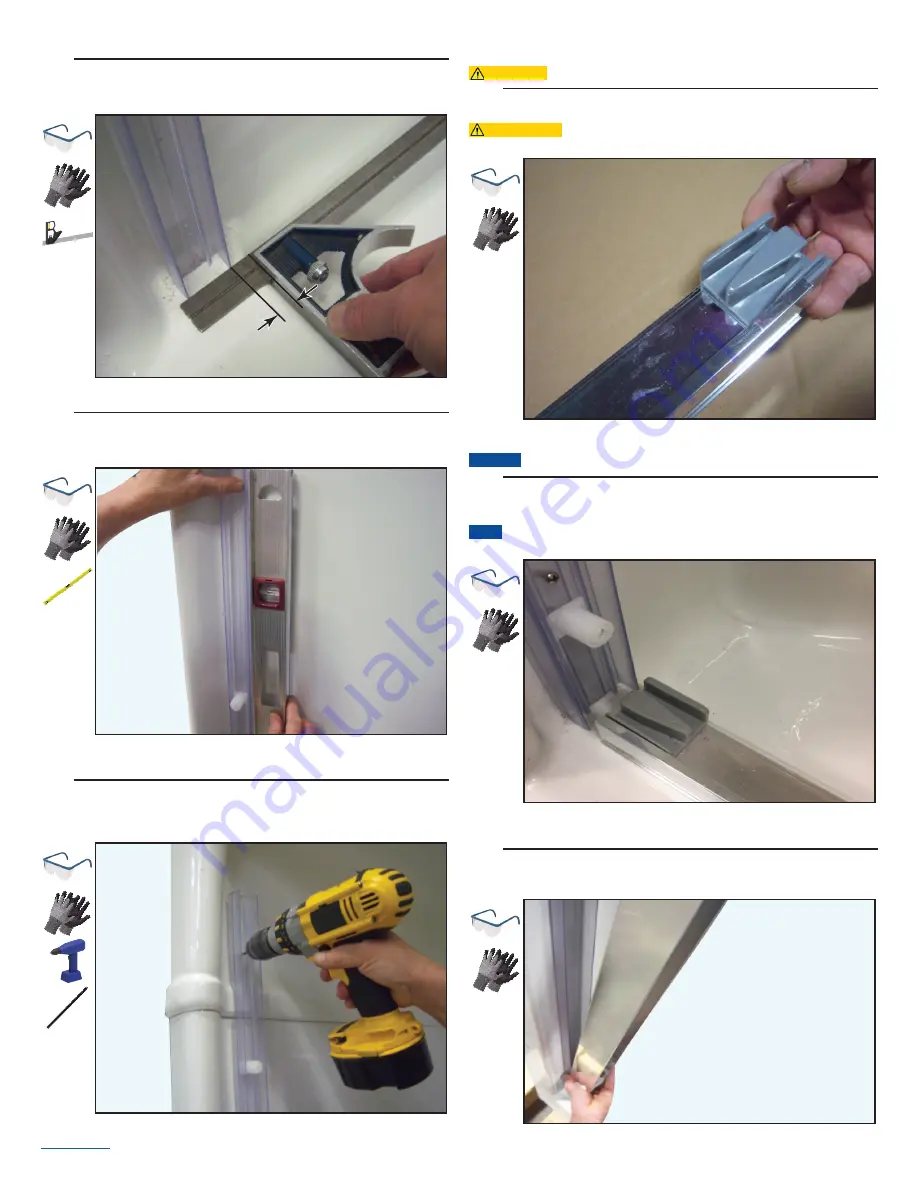
Place Plastic Jamb (B2) ¼” (6 mm) inside from the edge of threshold.
Placez le montant en plastique (B2) à 1/4 po (6 mm) à l’intérieur du
bord du seuil.
4.
Ensure the plastic Wall Jamb (B2) is plumb with level.
Assurez-vous que le montant mural en plastique (B2) est d’aplomb à
l’aide d’un niveau.
5.
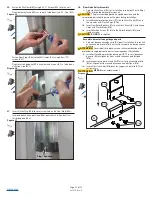
Pre-drill holes in Plastic Jamb (B2) using 1/8” (3 mm) drill bit and screw
to walls with # 6 - 1” PH screws (B15).
Pré-percez les trous dans le montant en plastique (B2) avec une mèche
de 1/8 po (3 mm) et vissez aux murs avec des vis no 6 - 1 po
cruciformes (B15).
6.
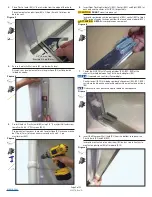
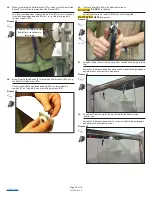
Insert Door Tracking Guide Left (B9L), Center (B9C) and Right (B9R) at
each end and the center of Sill (B10) respectively.
CAUTION
DO NOT
screw into place yet.
Insérez les guides de suivi de porte gauche (B9L), central (B9C) et droit
(B9R) respectivement à chaque extrémité et au centre du rebord (B10).
ATTENTION
NE PAS
visser en place en ce moment.
7.
Center the Sill (B10) with Tracking Guides (B9L, B9C, B9R) at the
shower threshold between the Plastic Jamb adaptors ( B2).
NOTICE
If required, you can trim sill accordingly.
Centrer le seuil (B10) à l’aide des guides d’alignement (B9L, B9C, B9R)
sur la base de la douche entre les adaptateurs de montant en plastique
(B2).
AVIS
Si nécessaire, vous pouvez couper le rebord en conséquence.
8.
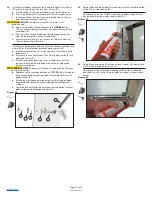
Insert the Aluminum Wall Jamb (B1) from the bottom to top over the
Plastic Jamb (B2) and Sill (B10).
Insérez le montant mural en aluminium (B1) du bas vers le haut sur le
montant en plastique (B2) et le rebord (B10).
Firgure 3
1/4” (6 mm) Gap
Écart de 1/4 po (6 mm)
Firgure 4
Firgure 5
1/8"
(3.2mm)
Firgure 6
Firgure 7
Firgure 8


