Miranda DENSITE FOL-1601 Скачать руководство пользователя страница 9

GUIDE TO INSTALLATION AND OPERATION 

FOL-1601  |  

5


3.3  Local control using the Densité frame control panel 


3.3.1 Overview 

 
Push the SELECT button on the FOL-1601 card edge (see Section 1.4) to assign the local control panel to 
operate the FOL-1601. Use the control panel buttons to navigate through the menu, as described below. 
 
All of the cards installed in a Densité frame are connected to the frame’s controller card, which handles all 
interaction between the cards and the outside world. There are no operating controls located on the cards 
themselves. The controller supports remote operation via its Ethernet ports, and local operation using its 
integrated control panel. 
 
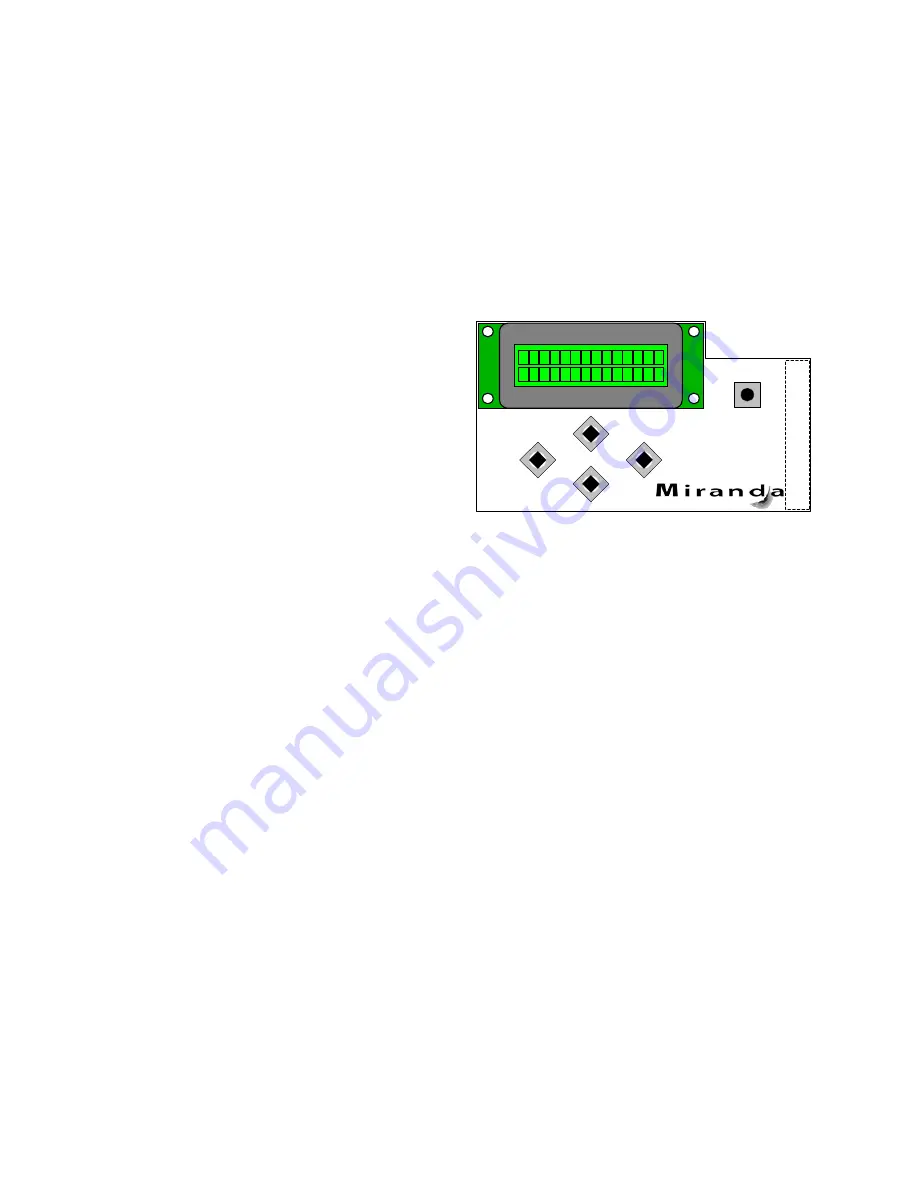
The local control panel is fastened to the controller 
card by a hinged connector, and when installed is 
located in the front center of the frame, positioned in 
front of the power supplies. The panel consists of a 
display unit capable of displaying two lines of text, 
each 16 characters in length, and five pushbuttons. 
 
The panel is assigned to operate any card in the 
frame by pushing the SELECT button on the front 
edge of that card.  


Figure 3.1

  Densité Frame local control panel 


Pushing the CONTROLLER button on the control panel selects the Controller card itself.  


The STATUS LED on the selected card flashes yellow. 

 
The local control panel displays a menu that can be navigated using the four pushbuttons located beneath 
the display. The functionality of the pushbuttons is as follows: 
 
[+]  [–] 

Used for menu navigation and value modification  

 
[SELECT]  Gives access to the next menu level. When a parameter value is shown, pushing this button 

once enables modification of the value using the [+] and [–] buttons; a second push confirms the 
new value 

 
[ESC] 

Cancels the effect of parameter value changes that have not been confirmed; pushing [ESC] 
causes the parameter to revert to its former value. 


Pushing [ESC] moves the user back up to the previous menu level. At the main menu, [ESC] 
does 

not

 exit the menu system. To exit, re-push the [SELECT] button for the card being 

controlled. 

 
If no controls are operated for 30 seconds, the controller reverts to its normal standby status, and the 
selected card’s STATUS LED reverts to its normal operating mode. 
 

3.3.2  Menu for local control 

 
The FOL-1601 has operating parameters which may be adjusted locally at the controller card interface.  


Press the SELECT button on the FOL-1601 front card edge to assign the Densité frame’s local 
control panel to the FOL-1601 

SELECT

ESC

+

-

CONTROLLER

Содержание DENSITE FOL-1601

Страница 1: ...ber Receiver Guide to Installation and Operation M830 9800 101 6 May 2008 Miranda Technologies Inc 3499 Douglas B Floreani St Laurent Québec Canada H4S 1Y6 Tel 514 333 1772 Fax 514 333 9828 www miranda com 2008 Miranda Technologies Inc ...

Страница 2: ... do so Refer all servicing to qualified service personnel Servicing should be done in a static free environment Electromagnetic Compatibility This equipment has been tested for verification of compliance with FCC Part 15 Subpart B class A requirements for Digital Devices This equipment complies with the requirements of EN 55022 Class A Electromagnetic Emissions EN 61000 3 2 3 3 Disturbance in Supp...

Страница 3: ... Front Card edge Interface 2 2 Installation 3 2 1 Unpacking 3 2 2 Installation in the Densité frame 3 2 3 Rear Panel Connectors 3 3 Operation 4 3 1 Control options 4 3 2 Card Edge Status LED 4 3 3 Local control using the Densité frame control panel 5 3 3 1 Overview 5 3 3 2 Menu for local control 5 3 4 Remote Control Using the RCP 100 7 4 Specifications 8 ...

Страница 4: ...GUIDE TO INSTALLATION AND OPERATION FOL 1601 ...

Страница 5: ...r or distance between the transmitter and the receiver Housed in the DENSITÉ frame and easily controllable via the iControl software or the frame controller menu the FOL 1601 occupies only one slot which makes it an ideal cost efficient solution for connecting satellite dishes to a studio or any other application involving seamless terrestrial transmission of L band satellite signals 1 2 Features ...

Страница 6: ...FOL 1601 1 4 Front Card edge Interface The front card edge of the FOL 1601 incorporates two elements Status LED see section 3 2 Select Button see section 3 3 Select Status Status LED SELECT button FOL 1601 Figure 1 6 Front card edge layout ...

Страница 7: ...f and not the rear panel Because a considerable amount of pressure is required to ensure a good optical connection the card must be firmly held in place to avoid being unseated This is achieved by using RF connectors between the rear panel and the card which require even more force to connect and disconnect thus preventing the card from moving when the optical fiber is connected THEREFORE be sure ...

Страница 8: ...cates the status of the FOL 1601 by color and by flashing steady illumination The chart shows how the various error conditions that can be flagged on the FOL 1601 affect the LED status If a cell is gray the error condition cannot cause the LED to assume that status If more than one LED status is possible for a particular error condition the status is configurable via the menu and or via iControl T...

Страница 9: ...l control panel Pushing the CONTROLLER button on the control panel selects the Controller card itself The STATUS LED on the selected card flashes yellow The local control panel displays a menu that can be navigated using the four pushbuttons located beneath the display The functionality of the pushbuttons is as follows Used for menu navigation and value modification SELECT Gives access to the next...

Страница 10: ...H RED ALARM REPORT NONE GPI VERSION FOL 1601 xxx FACTORY DEFAULT RESTORE Notes on the menu items RF OUT GAIN adjust for the correct output level to compensate for optical loss after system installation USER PRESET the FOL 1601 has 5 registers that can store full configuration data Use the LOAD and SAVE menu items to select a register USER 1 to USER 5 and either save the current configuration into ...

Страница 11: ...in square brackets e g OFF ON indicates that OFF is the factory default value 3 4 Remote Control Using the RCP 100 The FOL 1601 can be controlled through a menu accessible using Miranda s RCP 100 remote control panel Please refer to the RCP 100 Guide to Installation and Operation for detailed instructions on installing and operating the RCP 100 and for instructions on how to connect the RCP 100 to...

Страница 12: ...Range 14 to 0dBm NOTE The output power of the companion FLO 1601 transmitter is 3dBm so for short haul circuits with little attenuation it may be necessary to use an optical attenuator at the FOL 1601 input to reduce the incoming power to within the specification RF Outputs Manual Gain Control Range 31dB nominal Output Frequency Range 950 to 2150MHz Output Power Range 20dBm to 60dBm Gain Flatness ...

Отзывы: