31
EN
Before beginning to work, it is necessary to:
1. Before using, the appliance must be in order and safe to use
with the work equipment, especially the power cable and the
extension cable. If everything is not in order, the appliance must
not be used.
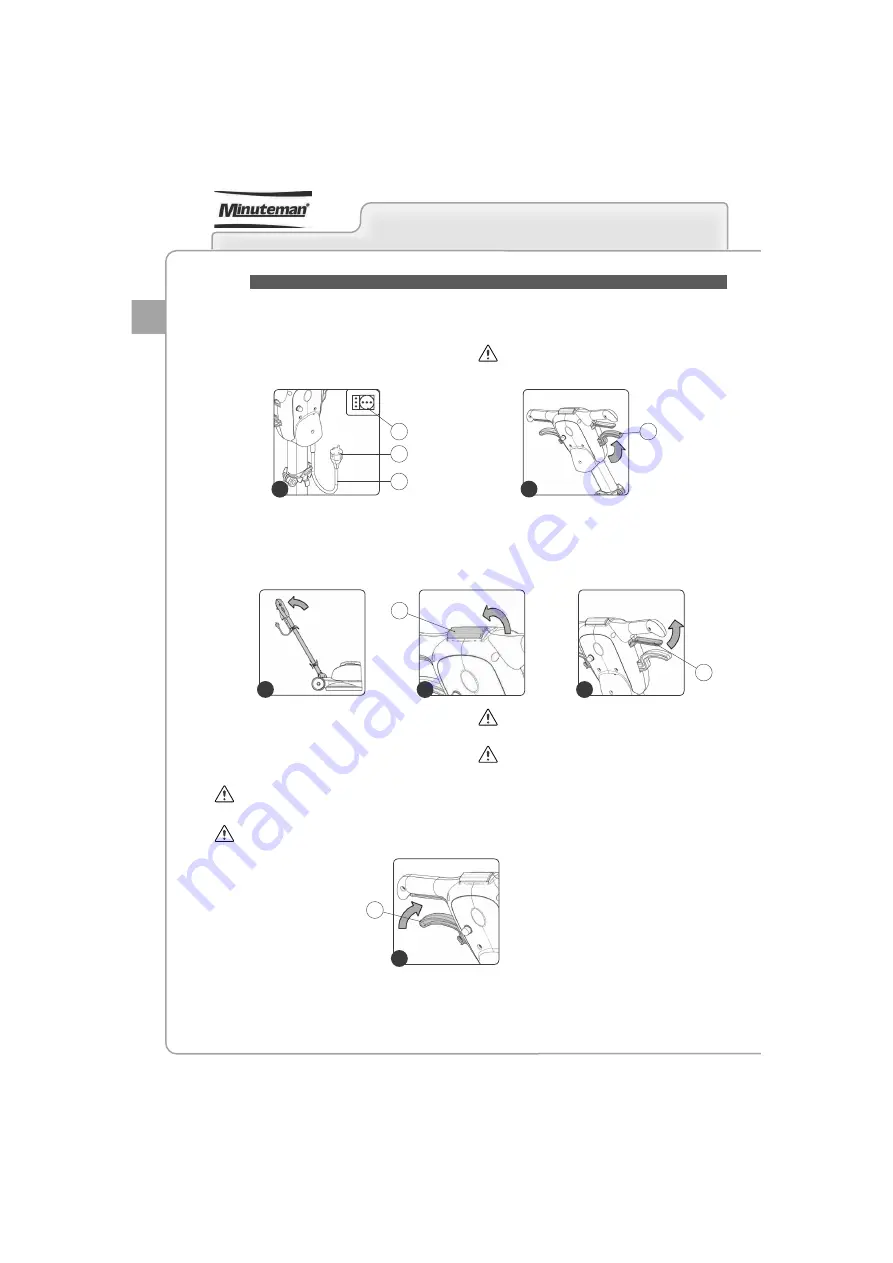
2. Insert the plug (2) of the power supply cable (3) in the mains
supply socket (4)
)LJ
.
3. Release the control handlebar from the vertical position. Press the
control column stop lever (5) in the direction indicated by the arrow
(
)LJ
) and turn the control column towards yourself (
)LJ
).
ATTENTION
: During this operation, do not rest your foot on the
appliance.
WORK
4.
7XUQ WKH FRQWURO FROXPQ WRZDUGV \RX XQWLO \RX ¿QG WKH EHVW
position, this position should be comfortable when using the
appliance.
5. Once the ideal position has been found, release the control
column stop lever (5) to lock the handlebar.
6. Turn the dead man's handle towards you (6) (
)LJ
).
7. Press the control levers main switch (7), located under the grips
on the handlebar (
)LJ
).
8. The appliance will now start to move.
9.
$SSO\ D VPDOO DPRXQW RI GHWHUJHQW VROXWLRQ WR WKH ÀRRU E\
pressing the lever (8) (
)LJ
),
10. Push the appliance with the brush rotating from left to right or
vice versa.
11. Immediately afterwards, push the appliance in the same way but
in the opposite direction, so that about one quarter of the working
width overlaps the previous one.
You can work by moving the car back and forth.
12. We recommend that you vacuum up the dirt-loaded foam at
intervals with the aid of a vacuum cleaner for liquids.
.
ATTENTION
: Work in slow movements to the right and left,
possibly moving back so that the operator always stands on
DQDUHDRIWKHÀRRU\HWWREHFOHDQHGXS
ATTENTION
: Keep the power supply cable behind the
operator, taking care not to operate the appliance in its vicinity
in order not to damage it.
ATTENTION
: Do not insist too much on the same area so as
WR DYRLG GDPDJLQJ WKH ÀRRU DOVR LQ IXQFWLRQ RI WKH W\SH RI
EUXVKRUDEUDVLYHÀRRUSDGFKRVHQ
ATTENTION
: If you need to work in tight spaces you can turn
the control column to the vertical position.
31
2
3
4
6
7
1
4
5
3
6
5
2
Содержание ROS 17 ORB 115V
Страница 2: ......
Страница 3: ...ITALIANO 1 ENGLISH 19 ESPAÑOL 37 FRANÇAIS 55 IT EN ES FR ...
Страница 76: ......


