background image

6

MAINTENANCE OF MACHINE

VACUUM MOTOR

Motor brushes can be replaced with Brush Set, Part No. 741008. Brushes should be replaced only
once. More than once brush replacement will cause very high current consumption. This undue current
consumption lowers overall machine performance and is not in the best interest of economical machine
use.

CARBON BRUSHES IN DRIVE MOTOR

Inspect these brushes once every 18 months or 720 hours.

The brushes can now be inspected by removing the brush caps near the end of the drive motor.
Examine all four brush lengths; if the back end of a brush is even with the edge of the brush holder or
shorter, the brush must be replaced. Replace with Brush Set, Part No. 744155. When installing new
brushes, also inspect cummutator for pits and/or excessive wear. If it is in poor condition, replace
drive motor with Part No. 744154.

CARBON BRUSHES IN BRUSH DRIVE MOTORS

Inspect these brushes once every six months or 360 hours.

Remove scrub head assembly. Examine brush lengths; if the back end of brush is even with the edge
of the brush holder or shorter, the brush must be replaced. Replace with Part No. 833474. When
installing new brushes, also inspect commutator for pits and/or excessive wear. Replace motor with
Part No. 833379 if commutator is in poor condition.

LUBRICATION

1. Grease casters once every week (two fittings per caster) or 15 hours.
2. Oil all moving parts such as hinges and pressure points once every month or every 60 hours.

SQUEEGEE RUBBERS

When the thick rear squeegee rubber is damaged or worn excessively, it will cause streaking and
poor solution pickup. Extended rubber life and be obtained by reversing it, provided it is not torn or
otherwise damaged.

TANKS

At the end of a day’s work (or work cycle, both the vacuum and solution tanks should be drained and
flushed with warm water.

Once a week or 15 hours the vacuum tank should be cleaned of settled debris. This can be done by
lowering the drain hose and washing out the debris.

BATTERIES (956720, 956740)

Periodically remove batteries from machine. Clean batteries, battery tray, and battery compartment
with a solution of baking soda and water. Check all battery cables and wiring for signs of damage or
wear. Replace as needed. Check battery fluid level each charge. Check electrolyte with hydrometer
every 15 hours.

Содержание Powerboss PB32036CE

Страница 1: ...Revised 8 03 OPERATION SERVICE PARTS CARE PowerBoss 32 Floor Scrubber Traction Driven Model PB32036CE PB32036QP ...

Страница 2: ......

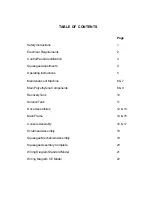
Страница 3: ... 4 Operating Instructions 5 Maintenance of Machine 6 7 Main Polyethylene Components 8 9 RecoveryTank 10 Solution Tank 11 Drive Assemblies 12 13 Main Frame 14 15 ConsoleAssembly 16 17 ScrubheadAssembly 18 Squeegee MechanismAssembly 19 SqueegeeAssembly Complete 20 Wiring Diagram Standard Model 21 Wiring Diagram CE Model 22 ...

Страница 4: ...rforming any maintenance procedures Store or park this machine on a level surface only These machines are designed for level floor operation only DO NOT OPERATE on ramps or inclines Battery acid can cause burns When working on or around batteries wear protective clothing and safety glasses Remove metal jewelry Do not lay tools or metal objects on top of batteries This machine is not suitable for p...

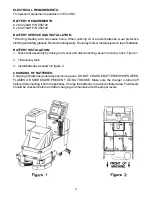
Страница 5: ...p of batteries BATTERY INSTALLATION 1 Raise tank assembly by raising rear cover and disconnecting vacuum recovery hose Figure 1 2 Tilt recovery tank 3 Install batteries as shown in figure 2 CHARGING OF BATTERIES Charging of batteries generates explosive gases DO NOT CHARGE BATTERIES WHEN OPEN FLAMES OR SPARKS ARE PRESENT DO NOT SMOKE Make sure the charger is turned off before disconnecting it from...

Страница 6: ...n Nylon Medium Black Tan Red General cleaning scrubbing vinyl floors ceramic tile concrete floors Dyna Scrub Nylon impregnated Long Light Red General scrubbing with 500 Grit Blue vinyl tile ceramic Silicone Carbide tile epoxy floors Fine Bristle urethane finish Dense Fill uneven concrete floors Power Scrub Nylon impregnated Long Rust Red Blue Moderate aggressive with 120 Grit Silicon scrubbing til...

Страница 7: ...he caster by turning the stem counter clockwise to adjust the caster hieght to allow more down pressure on the squeegee Repeat Step 2 7 Make sure that there is an even deflection on the entire length of the rear blade Adjust the castors and retighten the wing jam nuts to lockthe caster setting in place 8 Pitch adjustment is necessary if the outer ends on the squeegee blade does not contact the flo...

Страница 8: ...vacuum will turn off With the switch in automatic mode the squeegee will automatically lower in forward movement of the machine and vacuum will turn on When the machine is reversed the squeegee will automatically raise and the vacuum motor will turn off 7 Solution Control 2 The solution lever is a mechanical cable that opens the solution valve This lever must be moved to the full on position then ...

Страница 9: ...ush holder or shorter the brush must be replaced Replace with Part No 833474 When installing new brushes also inspect commutator for pits and or excessive wear Replace motor with Part No 833379 if commutator is in poor condition LUBRICATION 1 Grease casters once every week two fittings per caster or 15 hours 2 Oil all moving parts such as hinges and pressure points once every month or every 60 hou...

Страница 10: ...al make sure charger is put in upright position when charging this helps keep unit cool Do not cover charger when it is in use Make sure connectors on inlet and outlet cords are not broken CheckAC input voltage it should be 110 volts 120 volts maximum Replace faulty fuses ammeter timer or other components when necessary 6 Use cycle too short Solution Check voltage on batteries after full charging ...

Страница 11: ...8 ...

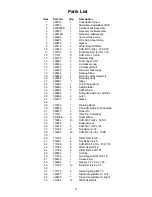
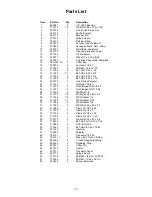
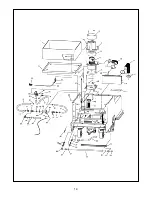
Страница 12: ...Wire Eyebolt 23 320283 2 Skirt Retainer 24 320284 2 Rubber Skirt 25 320280 1 Shroud Weldment Left Side 26 340664 2 Latch 27 260192 2 Sleeve 28 29 715619 1 Warning Decal 30 320279 1 Shroud Weldment Right Side 31 380215 2 Roller Pin 32 711811 2 Hitch Pin Cotterless 33 66 436 A 2 Roller Wheel 34 712822 10 SCR MC 10 24 x 50 SS 35 715628 1 Battery Decal 36 712810 8 SCR MC 10 32 x 3 8 37 711350 8 Nut Ny...

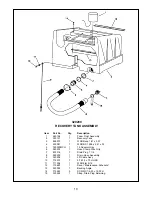
Страница 13: ...SS 1 908 x 2 41 x 03 5 760220MCH 1 1 5Adaptor Gray 6 260203 1 Hose Clamp Wire Grip 7 833316 1 Drain Plug 1 1 4 8 260202 1 Drain Hose Assembly 9 320206 1 Lift Cable Ass y 10 712575 1 5 16 18 x 75 HH SS 11 711506 1 WSR Flat 5 16 12 715620 1 Decal Maintenance Schedule 13 320009 1 Backing Angle 14 712563 5 SCR MC 1 4 20 x 1 00 FH 15 320269 1 Strap Drain Plug Retaining ...

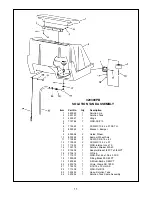
Страница 14: ...le 11 710985 2 SCR SC 3 8 16 x 62 12 710353 2 SCR MC 10 32 x 37 13 711553 2 WSR Internal Lock 10 14 130118 1 Solution Strainer M3 40 15 210409 1 Adapter Brass 3 8 FPT x 3 8 MPT 16 210414 1 O Ring 17 711513 1 WSR Flat 69 x 1 06 x 03 SS 18 700028 1 Fitting Brass 90 3 8FPT 19 320265 1 3 8 Dubl Barb x 3 8 MPT 20 450076 1 Crimp Clamp SS 185R 21 712575 1 5 16 18 x 75 HH SS 22 711506 1 WSR Flat 5 16 23 3...

Страница 15: ...12 ...

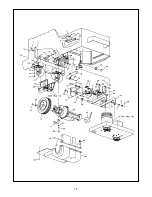
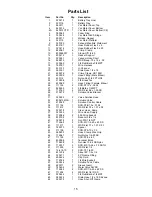
Страница 16: ...ster 23 711373 1 Nut Nyloc 1 4 20 24 711425 2 Nut Flanged Wizz 1 4 20 25 711427 2 Nut Flanged Wizz 10 24 26 711509 6 WSR Flat 1 2 27 711515 12 WSR Flat 38 x 82 x 05 28 711544 16 WSR Helical 1 4 29 711545 12 WSR Helical 5 16 30 711546 4 WSR Helical 3 8 31 711594 2 WSR Flat 56 x 88 x 03 32 711669 1 Clevis Pin 1 2 x 2 25 33 711672 2 Clevis Pin 1 2 x 2 34 712108 3 Clevis Pin 1 2 x 1 25 35 712109 1 Cle...

Страница 17: ...14 ...

Страница 18: ...712760 4 WSR Flat 56 x 1 00 SS 29 210370 1 Solution Valve Bracket 30 31 320253 2 Valve Solution Hose 32 809413MCH 1 Solution Valve 33 210045 1 Solution Control Cable 34 711124 1 SCR ST B 10 x 37 NI 35 711512 1 WSR Flat 75 x 1 37 x 08 36 320218 1 Clear Hose Dump 37 320252 1 Wire Hose Supply 38 712086 2 5 16 Wire Eyebolt 39 830708 1 Reducer 3 8 x 1 4 40 320272 2 Nut PLS 1 4 NPT 41 712565 2 SCR MC 1 ...

Страница 19: ...16 ...

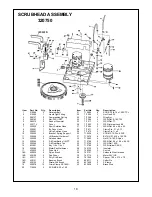
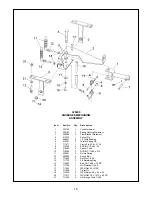
Страница 20: ...1720 4 Retaining Ring E Ext 25 43 711808 1 Cotter Pin 44 712088 1 SCR Hi Lo 8 18 x 75 CE 45 712100 2 Bolt Shoulder 3 8 x 2 25 46 712320 2 WSR Nylon 22 x 45 x 04 Item Part No Qty Description 47 712536 2 SCR MC 10 24 x 62 STPL 48 712540 6 SCR MC 10 24 x 37 TH 49 712638 1 Nut Hex 10 24 SS Nyloc 50 712764 1 WSR SS 10 51 712822 12 SCR MC 10 24 x 50 TH 52 715604 1 Decal Solution 53 715608 1 Forward Deca...

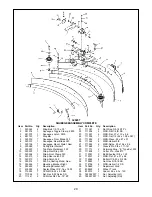
Страница 21: ...8D 430131 2 Bassine Brush 18E 430132 2 Strata Grit Brush 19 450076 10 Crimp Clamp SS 185R 20 710036 2 SCR MC 8 32 x 1 50 Item Part No Qty Description 21 710986 8 SCR SC 3 8 16 x 1 00 ST PL 22 711304 2 Nut Hex 8 32 23 711368 4 Wing Nut 24 711506 4 WSR Flat 5 16 ST PL 25 711517 4 WSR Flat 77 26 711552 2 WSR Internal Lock 8 27 711594 2 WSR Flat 56 x 88 x 03 28 711671 4 Clevis Pin 31 x 2 13 29 711672 ...

Страница 22: ...1 1 Clevis Pin 5 16 x 2 125 8 712536 2 SCR MC 10 24 x 62 9 210400 2 Spacer Tube 10 710592 2 SCR MC 1 4 20 x 2 75 11 430051 2 Return Spring 12 260292 4 Swing Bolt 13 712665 2 Nut Hex 1 4 20 14 711715 2 3 4 Retaining Ring 15 712562 1 Bolt HH 1 4 20 x 75 SS 16 712758 1 WSR Helical 1 4 SS 17 711504 1 WSR Flat 25 I D SS 18 711808 1 Cotter Pin 19 712320 2 WSR Nylon 22 x 45 x 04 20 711517 2 WSR Flat 75 x...

Страница 23: ...l 3 8 16 x 1 500 18 710530 7 SCR MC 8 32 x 50 BR 19 711026 5 Nut Hex 8 32 Nyloc SS 20 711241 2 SCR Hex 3 8 16 x 75 ZP Item Part No Qty Description 21 711367 2 Nut Wing 3 8 16 ST PL 22 711504 4 WSR Flat 1 4 ID SS 23 711507 4 WSR Flat 37 x 1 12 x 06 24 711509 1 WSR Flat 1 2 54 x 1 08 x 087 25 711524 2 WSR Wave 52 x 87 x 01 26 711546 4 WSR Helical 3 8 27 711592 4 WSR Nylon 50 x 1 06 x 06 28 711668 1 ...

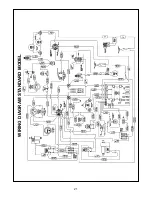
Страница 24: ...21 WIRING DIAGRAM STANDARD MODEL ...

Страница 25: ...22 WIRING DIAGRAM CE MODEL ...

Страница 26: ... All warranteed items become the sole property of Minuteman International Inc or its original manufacturer whichever the case may be Minuteman International Inc disclaims any implied warranty including the warranty of merchantability and the warranty of fitness for a particular purpose Minuteman International Inc assumes no responsibility for any special incidental or consequential damages This li...

Отзывы: