background image

22

Iris priority

8x 01 04 39 0B FF

Iris Priority Automatic Exposure mode

WDR

8x 01 04 39 21 FF

WDR mode

CAM_Shutter

Reset

8x 01 04 0A 00 FF

Shutter Setting

Up

8x 01 04 0A 02 FF

Down

8x 01 04 0A 03 FF

Direct

8x 01 04 4A 00 00 0p 0q

FF

pq: Shutter Position

CAM_Iris

Reset

8x 01 04 0B 00 FF

Iris Setting

Up

8x 01 04 0B 02 FF

Down

8x 01 04 0B 03 FF

Direct

8x 01 04 4B 00 00 0p 0q

FF

pq: Iris Position

CAM_WDRStren

gth

Reset

8x 01 04 21 00 FF

WDR Level Setting

Up

8x 01 04 21 02 FF

Down

8x 01 04 21 03 FF

Direct

8x 01 04 51 00 00 0p 0q

FF

pq: WDR Level Positon

CAM_ExpComp

On

8x 01 04 3E 02 FF

Exposure Compensation ON/OFF

Off

8x 01 04 3E 03 FF

Reset

8x 01 04 0E 00 FF

Exposure Compensation Amount Setting

Up

8x 01 04 0E 02 FF

Down

8x 01 04 0E 03 FF

Direct

8x 01 04 4E 00 00 0p 0q

FF

pq: ExpComp Position

CAM_BackLight

On

8x 01 04 33 02 FF

Back Light Compensation ON/OFF

Off

8x 01 04 33 03 FF

CAM_NR(2D)

-

8x 01 04 53 0p FF

p: NR Setting (0: OFF, level 1 to 5)

CAM_NR(3D)

-

8x 01 04 54 0p FF

p: NR Setting (0: OFF, level 1 to 5)

CAM_Flicker

-

8x 01 04 23 0p FF

p: Flicker Settings(0: OFF, 1: 50Hz, 2:

Содержание UV820S

Страница 1: ...HD Color Video Camera User Manual English...

Страница 2: ...moisture place Don t remove the cover to reduce the risk of electric shock Refer servicing to qualified personnel Never operate the camera under unqualified temperature humidity and power supply Only...

Страница 3: ...llation 4 Camera Highlights 5 Camera specifications 6 Camera interface explanation 7 Remote Controller explanation 8 Usage of IR remote controller 9 VISCA RS 232 pin specs 10 Series COM Control 11 Men...

Страница 4: ...move the camera by seizing the camera head Don t rotate camera head by hand otherwise mechanical trouble will occur This series item must put on the smooth desk or platform and it can not be installed...

Страница 5: ...thorized modification or dismantling Supplied Accessories When you unpack check that all the supplied accessories are included Camera 1 Power adapter 1 Power cable 1 RS232 cable 1 Remote controller 1...

Страница 6: ...nnection before turn on 2 Bottom Dial Switch Setting Set Two DIP switch OFF it is the Working Mode Setting and instruction bottom dial switch SW 1 SW 2 Modes 1 OFF OFF Working mode 2 ON OFF Updating M...

Страница 7: ...080P60 1 1080P50 2 1080I60 1080I60 3 1080I50 1080I50 4 720P60 720P60 720P60 5 720P50 720P50 720P50 6 1080P30 1080P30 7 1080P25 1080P25 8 720P30 720P30 720P30 9 720P25 720P25 720P25 A 1080P59 94 B 1080...

Страница 8: ...menu by press the menu key of remote controller select Restore Default moving the left right key to press Yes then confirm by HOME key RESTORE DEFAULT Restore No Change Value Home OK Menu Back Camera...

Страница 9: ...video format 1080P60 50 S 1080P30 25 S M 1080I60 50 S M 720P60 50 30 25 S M C 2 Output Interface Support DVI can convert to YPbPr and HDMI Output HD SDI selectable 3 Image Sensor 1 3 inch 5 Megapixel...

Страница 10: ...Power indicator light red 4 Remote Controller Receiver light red 5 Bottom dial Switch 6 Tripod screw hole 7 Installation Orientation Hole 8 Rotary Switch video format optional 9 RS232 controller seria...

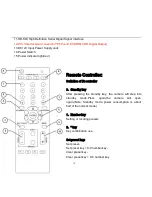
Страница 11: ...Remote Controller Definition of IR controller 0 Standby key After pressing the standby key the camera will step into standby mode Press again the camera will open again Note Standby mode power consump...

Страница 12: ...ear from far Auto focus the camera focus mode is auto Manual focus the camera focus mode is manual 6 Camera address selection Select the camera which want to be controlled 7 key Key combination use 8...

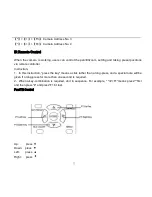
Страница 13: ...mote controller Instruction 1 In this instruction press the key means a click rather than a long press and a special note will be given if a long press for more than one second is required 2 When a ke...

Страница 14: ...running from slow to fast until it run to the endpoint The pan tilt running stops as soon as the key is released 2 Zoom Operation ZOOM OUT press ZOOM key ZOOM IN press ZOOM key Press and hold the key...

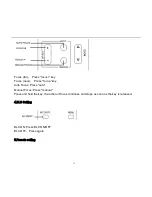
Страница 15: ...ar Press focus key Auto Focus Press auto Manual Focus Press manual Press and hold the key the action of focus continues and stops as soon as the key is released 4 BLC Setting BLC ON Press BLC ON OFF B...

Страница 16: ...reset 10 preset positions in total are available 2 Preset clearing to clear a preset position the user can press the CLEAR PRESET key first and then press the number key 0 9 to clear the relative pres...

Страница 17: ...the camera you want to controller by press the number key 8 Camera Remote Controller Address Setting F1 Camera Address No 1 F2 Camera Address No 2 F3 Camera Address No 3 F4 Camera Address No 4 RS 232C...

Страница 18: ...6 GND 6 DSR 7 IR OUT 7 RTS 8 NC 8 CTS 9 RI Camera Windows DB 25 1 DTR 1 FG 2 DSR 2 TXD 3 TXD 3 RXD 4 GND 4 RTS 5 RXD 5 CTS 6 GND 6 DSR 7 IR OUT 7 GND 8 NC 20 DTR No Function 1 DTR 2 DSR 3 TXD 4 GND 5...

Страница 19: ...18 Camera Mini DIN 1 DTR 1 DTR 2 DSR 2 DSR 3 TXD 3 TXD 4 GND 4 GND 5 RXD 5 RXD 6 GND 6 GND 7 IR OUT 7 NC 8 NC 8 NC VISCA OUT Function 6 GND 7 IR OUT 8 NC...

Страница 20: ...ris data The camera run into the preset no 0 if it was saving After finish this initialization the users can control the pan tilt zoom via RS 232 command VISCA Protocol Part1 Camera Return Command Ack...

Страница 21: ...ast 88 01 00 01 FF I F Clear CommandCancel 8x 21 FF CAM_Power On 8x 01 04 00 02 FF Power ON OFF Off 8x 01 04 00 03 FF CAM_Zoom Stop 8x 01 04 07 00 FF Tele Standar d 8x 01 04 07 02 FF Wide Standar d 8x...

Страница 22: ...door mode OnePush mode 8x 01 04 35 03 FF One Push WB mode Manual 8x 01 04 35 05 FF Manual Control mode CAM_RGain Reset 8x 01 04 03 00 FF Manual Control of R Gain Up 8x 01 04 03 02 FF Down 8x 01 04 03...

Страница 23: ...F WDR Level Setting Up 8x 01 04 21 02 FF Down 8x 01 04 21 03 FF Direct 8x 01 04 51 00 00 0p 0q FF pq WDR Level Positon CAM_ExpComp On 8x 01 04 3E 02 FF Exposure Compensation ON OFF Off 8x 01 04 3E 03...

Страница 24: ...orGain Diret 8x 01 04 49 00 00 00 0p FF p Color Gain setting 0h 60 to Eh 200 CAM_ICR ON 8x 01 04 01 02 FF Infrared Mode ON OFF OFF 8x 01 04 01 03 FF CAM_IDWrite 8x 01 04 22 0p 0q 0r 0s FF pqrs Camera...

Страница 25: ...06 01 VV WW 03 03 FF AbsolutePosit ion 8x 01 06 02 VV WW 0Y 0Y 0Y 0Y 0Z 0Z 0Z 0Z FF RelativePositi on 8x 01 06 03 VV WW 0Y 0Y 0Y 0Y 0Z 0Z 0Z 0Z FF Home 8x 01 06 04 FF Reset 8x 01 06 05 FF Part3 Checki...

Страница 26: ...R Gain CAM_BGainInq 8x 09 04 44 FF y0 50 00 00 0p 0q FF pq B Gain CAM_AEModeInq 8x 09 04 39 FF y0 50 00 FF Full Auto y0 50 03 FF Manual y0 50 0A FF Shutter priority y0 50 0B FF Iris priority y0 50 21...

Страница 27: ...p Memory number last operated SYS_MenuModeInq 8x 09 06 06 FF y0 50 02 FF On y0 50 03 FF Off CAM_LR_ReverseInq 8x 09 04 61 FF y0 50 02 FF On y0 50 03 FF Off CAM_PictureFlipInq 8x 09 04 66 FF y0 50 02...

Страница 28: ...p25 y0 50 0F FF 1920x1080p50 Pan tiltMaxSpeedInq 8x 09 06 11 FF y0 50 ww zz FF ww Pan Max Speed zz Tilt Max Speed Pan tiltPosInq 8x 09 06 12 FF y0 50 0w 0w 0w 0w 0z 0z 0z 0z FF wwww Pan Position zzzz...

Страница 29: ...lt Speed SU M Zoom In 0xFF Addre ss 0x0 0 0x2 0 0x00 0x00 SU M Zoom Out 0xFF Addre ss 0x0 0 0x4 0 0x00 0x00 SU M Focus Far 0xFF Addre ss 0x0 0 0x8 0 0x00 0x00 SU M Focus Near 0xFF Addre ss 0x0 1 0x0 0...

Страница 30: ...0x5 B Value High Byte Value Low Byte SU M Query Zoom Position 0xFF Addre ss 0x0 0 0x5 5 0x00 0x00 SU M Query Zoom Position Response 0xFF Addre ss 0x0 0 0x5 D Value High Byte Value Low Byte SU M Pelco...

Страница 31: ...x 00 0x 80 0x00 0x00 0x A F X O R Focus Near 0xA0 Addr ess 0x 01 0x 00 0x00 0x00 0x A F X O R Set Preset 0xA0 Addr ess 0x 00 0x 03 0x00 Preset ID 0x A F X O R Clear Preset 0xA0 Addr ess 0x 00 0x 05 0x...

Страница 32: ...Byte 0x A F X O R Query Tilt Position 0xA0 Addr ess 0x 00 0x 53 0x00 0x00 0x A F X O R Query Tilt Position Response 0xA0 Addr ess 0x 00 0x 5B Value High Byte Value Low Byte 0x A F X O R Query Zoom Pos...

Страница 33: ...NU key to display the menu using scroll arrow to point at or highlight the selected items 2 EXPOSURE Choose and enter the EXPOSURE item by using up down left right and HOME key MENU Exposure Color Ima...

Страница 34: ...f On G Limit Biggest gain limit 0 7 Flicker Anti Flicker Off 50Hz 60Hz Iris Iris value we have F1 8 F2 0 F2 4 F2 8 F3 4 F4 0 F4 8 F5 6 F6 8 F8 0 F9 6 and F11 for options only available in the mode of...

Страница 35: ...Auto Indoor Outdoor OnePush Manual RG Red Gain 5 5 only available in the mode of Manual BG Blue Gain 5 5 only available in the mode of Manual Sat Saturation 60 200 4 IMAGE Choose and enter the Image...

Страница 36: ...ange Value Menu Back Brightness 5 5 value setting Contrast 5 5 value setting Sharpness 0 15 value setting B W Mode On Off Flip H Image Flip Horizontal On Off Flip V Image Flip Vertical On Off 5 NOISE...

Страница 37: ...DarkDetail 5 Select Item Change Value NR2D Level 2D Noise Reduction Off 1 5 NR2D Level 3D Noise Reduction Off 1 5 Note The higher the noise reduction level the less image detail 6 SETUP Choose and en...

Страница 38: ...only support English Protocol VISCA P D P P V Addr VISCA able to set 1 7 P D and P P able to set 1 15 Baud rate 2400 4800 9600 SpeedByz Speed by Zoom On Off optional AF Sense auto focus sense setting...

Страница 39: ...rm 8 EXIT Enter the MENU key once again you will see this interface Save Yes or No Note You need to enter the HOME key to confirm Maintenance and Troubleshooting RESTORE DEFAULT Restore No Change Valu...

Страница 40: ...Launcher etc Image effective will not be good when the light is not accordant with camera s lux Troubleshooting Image No image 1 Check whether the power cord voltage is OK power indicator light is ON...

Страница 41: ...ther camera is fixed correctly 2 If there is vibrative mechanical object Remote Controller 1 Change the battery 2 Check the camera operation mode is right Terminal 1 Check the camera operation mode is...

Отзывы: