background image

20

21

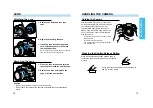
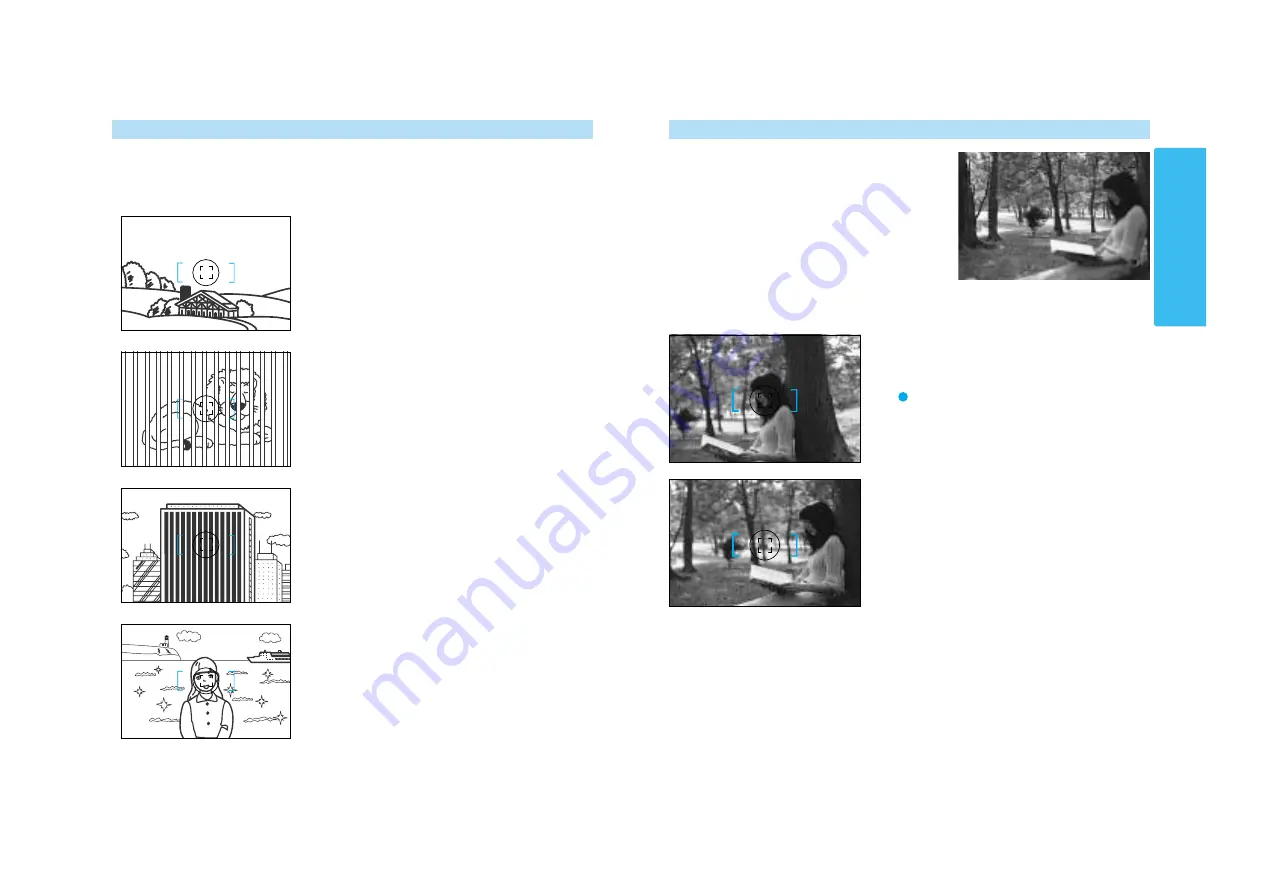
SPECIAL FOCUS SITUATIONS

The camera may not be able to focus in situations like those described below.
When the focus signal blinks, use focus hold (p.21) or manual focus (p.33). See
page 19 for an explanation of the focus signals.

If the subject within the focus frame is
very bright, or low in contrast.

If two subjects at different distances
overlap in the focus frame.

If a subject composed of alternating
light and dark lines completely fills
the focus frame.

If your subject is near a very bright
object or area.

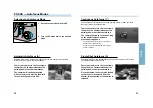
Use focus hold when your subject is outside the
focus frame or when autofocus is difficult to
confirm.

• Use AF Lock (p. 32) to lock focus on moving

subjects.

• Focus hold does not operate when continuous

autofocus mode (p.29) is selected. Use AF Lock.

FOCUS HOLD

Focus hold cannot be used for moving subjects.

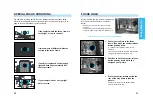
1. Center your subject in the focus

frame, then press the shutter-release
button partway down.

appears in the viewfinder when focus is

confirmed.

• Focus hold also locks the exposure settings when

14 segment metering is selected (p. 45).

2. Continue to hold the shutter-release

button partway down while you
compose your picture.

3. Press the shutter-release button the

rest of the way down to take the
picture.

• Remove your finger from the shutter-release

button to cancel focus hold.

BASIC OPERA

TION

Содержание Dynax 9

Страница 1: ...INSTRUCTION MANUAL E BASIC OPERATION DETAILED OPERATION APPENDIX ...

Страница 2: ...de 100 viewfinder 1 3 and 1 2 EV exposure compensation increments Data Memory storage of exposure information 21 Custom Functions to tailor the camera to your personal shooting style This manual has been designed to help you understand the operation of your camera and its functions Please familiarize yourself with the names of the controls and their locations on the camera then read the Getting St...

Страница 3: ...ure Warnings 107 Strap 8 Diopter Adjustment 9 APPENDIX Batteries 10 Lens 12 Handling the Camera 13 Using the Built in Flash Operation 22 Flash Signals 22 Flash Range 23 Lens Shadowing 23 Rewinding the Film Automatic Rewind 24 Manual Rewind 24 EXPOSURE P Mode 36 A Mode 37 S Mode 39 M Mode 41 METERING Selectable Metering 14 Segment Metering 45 Spot Metering 46 Center Weighted Metering 47 AE Lock 48 ...

Страница 4: ... field preview button 77 Lens mount 12 Mirror AF mode dial 28 Focus mode switch 33 Lens release 12 Mounting index Lens contacts Battery chamber lock 10 Battery chamber door 10 Vertical control grip contacts 104 Tripod socket Diopter adjustment dial 9 Viewfinder Eyepiece cup Eyepiece shutter lever 79 Main switch Eyepiece sensor 76 Film window Eye start switch 76 Flash mode switch AF button 32 AE lo...

Страница 5: ...isplay Exposure compensation Bracketing Battery condition indicator 11 Frame counter Film transport signals Focus frame Local focus areas 31 Spot metering area 46 Spot focus area 95 Flash on indicator 22 Flash ready indicator 22 High speed sync indicator 66 Wireless Remote flash indicator 70 74 Focus area indicator Focus signals 19 Shutter speed display Aperture display AE lock indicator 48 Frames...

Страница 6: ...ter adjustment dial until the focus frame appears sharpest Farsighted users turn the dial clockwise Nearsighted users turn the dial counter clockwise Before attaching the lens Look through the viewfinder at a well illuminated blank wall or clear blue sky If additional correction is needed attach a Minolta Eyepiece Corrector optional accessory to the camera s eyepiece GETTING STARTED Attach the str...

Страница 7: ...bol appears alone and the shutter locks Power is insufficient for camera operation Replace the batteries 11 10 BATTERIES Installing the Batteries Your camera uses two 3V CR123A lithium batteries to supply power for all camera operations 1 Lift and turn the battery chamber lock to OPEN then open the battery chamber door 2 Insert the batteries as indicated by the and marks 3 Close the battery chambe...

Страница 8: ...ially the lens contacts and mirror Grip the camera firmly with your right hand while supporting the lens with your left Keep your elbows at your side and your feet shoulder width apart to hold the camera steady Keep the camera strap around your neck or wrist in the event you accidentally drop the camera Do not touch the end of the lens barrel while taking a picture Do not block the AF illuminator ...

Страница 9: ...nd on page 24 to remove a partially exposed roll Load film in the shade to reduce the chances of fogging the film Do not use Polaroid Instant 35mm film Winding problems may occur 1 Turn the back cover release counter clockwise to open the back cover The shutter curtain s precision design makes it extremely sensitive to pressure Never touch it with your fingers or the film tip BASIC OPERATION Conti...

Страница 10: ...ll appear in the frame counter The correct ISO for DX coded film is set automatically blinks in the frame counter and the shutter locks when the film is loaded incorrectly Repeat steps 1 4 Non DX coded film is automatically rewound at the end of the roll or after 36 exposures Non DX coded film is set to the ISO from the previous roll Refer to page 52 to set the film speed manually Non DX Coded Fil...

Страница 11: ...s on the roll The countdown does not appear for non DX coded film The following signals appear in the viewfinder data panel to indicate the focus status when the shutter release button is pressed partway down Focus is confirmed Continuous autofocus Focus is confirmed Continuous autofocus Lens focusing Shutter is locked Focus cannot be confirmed Shutter is locked Subject is too close or is one of t...

Страница 12: ...s outside the focus frame or when autofocus is difficult to confirm Use AF Lock p 32 to lock focus on moving subjects Focus hold does not operate when continuous autofocus mode p 29 is selected Use AF Lock FOCUS HOLD Focus hold cannot be used for moving subjects 1 Center your subject in the focus frame then press the shutter release button partway down appears in the viewfinder when focus is confi...

Страница 13: ...bject is within the flash range specified in the table below Flash Range Make sure you are at least 1m 3 3 ft from your subject when using the built in flash Aperture ISO 100 ISO 200 ISO 400 f 2 8 f 3 5 f 4 f 5 6 1 0 4 3m 1 0 6 1m 1 0 8 6m 3 3 14 1 ft 3 3 20 0 ft 3 3 28 2 ft 1 0 3 4m 1 0 4 8m 1 0 6 8m 3 3 11 2 ft 3 3 15 7 ft 3 3 22 3 ft 1 0 3 0m 1 0 4 2m 1 0 6 m 3 3 9 8 ft 3 3 13 8 ft 3 3 19 7 ft ...

Страница 14: ... it is safe to open the back of the camera 3 Close the back cover 2 Open the back cover and remove the film Manual Rewind Use manual rewind to rewind the film before the current roll is finished 1 Open the control panel door then press the manual rewind button DETAILED OPERATION 2 Follow steps 1 3 from Automatic Rewind Automatic 1 or manually initiated 2 rewind p 92 Custom Function Notes Rewind th...

Страница 15: ...e predicted point of exposure Predictive focus control is always active in the Automatic and Continuous autofocus modes 27 FOCUS Predictive Focus Control FOCUS With the ability to track acceleration in all three dimensions Predictive Focus Control makes it possible for the camera to calculate where your subject will be when the shutter opens FOCUS ...

Страница 16: ...ng subjects or to lock focus on subjects outside the focus area Center your subject in the focus frame then press the shutter release button partway down to activate autofocus Once confirmed focus remains locked until pressure is removed from the shutter release button or the shutter is released Selecting the Autofocus Mode Automatic Autofocus A Designed to work well in almost any situation Automa...

Страница 17: ...s Area 1 Press the AF button and turn the front control dial to select the desired local focus area The local focus area is displayed in the focus frame and data panels 2 Release the AF button when the desired local focus area appears The focus area indicator displays the currently selected focus area The camera s standard focus mode wide focus area uses the camera s three focus sensors to automat...

Страница 18: ...rs sharp and focused appears in the viewfinder when the subject in the focus frame is in focus AF Power Zoom and xi Series Lenses Press the AF button to lock focus on moving or stationary subjects using the current focus mode The focus remains locked until the AF button is released Exposure is also locked if 14 segment metering p 45 is selected Pressing the AF button also activates the AF illumina...

Страница 19: ...AF button p 32 also activates the AF illuminator The range of the AF Illuminator is 0 7 7 0 meters 2 3 23 0 ft The AF illuminator will not fire in continuous autofocus mode The AF illuminator may not operate with 300mm or longer single focal length lenses The AF illuminator will not operate with 3x 1x Macro Zoom When an accessory flash is attached its AF illuminator may be active in place of the c...

Страница 20: ...is within the flash range p 23 Press the depth of field button to confirm the range of focus in your image p 77 If 12000 or 30 blinks in the viewfinder and the data panel the required setting is beyond the camera s shutter speed range Turn the control dial until the blinking stops In A mode Aperture Priority you select the aperture and the camera automatically sets the shutter speed required for p...

Страница 21: ... select the aperture Refer to the Flash Range table on page 23 to determine the range of the built in flash at the selected aperture If 300 blinks in the viewfinder and the data panel the light level is too bright for the selected aperture Turn the control dial until the blinking stops or cancel the flash Push the built in flash down or turn the accessory flash off to cancel the flash In S mode Sh...

Страница 22: ...ow your settings compare to the exposure determined by the camera s metering system The aperture and shutter speed settings change in 1 2 or 1 3 EV increments depending on the current exposure compensation dial setting 1 Turn the exposure mode dial to M 2 Turn the front control dial to select the shutter speed Manual Shift Manual shift lets you shift to equivalent aperture shutter speed combinatio...

Страница 23: ... or an attached accessory flash is on it will fire each time the shutter is released The camera s TTL flash metering system will ensure correct exposure 1 Raise the built in flash appears in the viewfinder when the flash is charged 2 Turn the front control dial to select any shutter speed up to 1 300th of a second 3 Turn the rear control dial to select the desired aperture Refer to the flash range...

Страница 24: ...ble segment is then evaluated to determine the degree of spot lighting or backlighting present in your scene The local focus area LED momentarily displays the sensor being used when the shutter release button is pressed partway down Fourteen Segment Honeycomb Pattern Metering is the camera s standard metering mode and is appropriate for most photographic situations METERING Turn the metering mode ...

Страница 25: ...ing Center Weighted Average Metering Center weighted average mode bases the exposure on an average of the readings from each of the honeycomb segments with emphasis placed on the center of the image Care should be taken when photographing backlit spotlit or off center subjects as non subject areas may be included in the exposure calculation Turn the metering mode switch to Selecting Center Weighte...

Страница 26: ...exposure 3 Press and hold the AE lock button AEL appears in the viewfinder 4 Recompose the scene as desired The meter index indicators display the EV difference between the locked exposure and the exposure for the subject area currently inside the spot metering area The second indicator in the exposure index does not appear when slow sync is selected 5 Press the shutter release button all the way ...

Страница 27: ...exposure compensation dial is not seated properly The meter index scale changes to 1 3EV increments Shutter speed and aperture will change in 1 3 EV increments 4 Set the desired compensation value 1 Unlock the exposure compensation dial Especially helpful when using the spot or center weighted metering patterns exposure compensation lets you manually adjust the metered exposure 3 EVs in 1 2 or 2 E...

Страница 28: ...before the ISO can be changed 1 Open the control panel door and press the ISO button 2 Turn either control dial to set the desired ISO value The ISO can be changed manually from 6 to 6400 in 1 3 EV increments 3 Press the shutter release button partway down to enter the new ISO DRIVE Setting 2 DX Memory On p 94 Applies ISO changes to future rolls with the same DX coded ISO Custom Function Notes DRI...

Страница 29: ...zoom lenses cannot be zoomed when continuous advance mode is selected The shutter can not be released until the camera has focused on your subject The maximum drive speed drops to 5 frames per second when Data Memory is activated The optional Quartz Data Back QD 9 may imprint the date or time only on the first frame of a motor advanced series The maximum drive speed is 4 5 fps when the Data Memory...

Страница 30: ... second self timer cannot be cancelled 2 Open the control panel door and press the adjust button 1 Place the camera on a tripod then turn the drive mode lever to Use the self timer to delay the shutter release for 2 or 10 seconds approx after the shutter release button is pressed all the way down In addition to delaying release of the shutter the 2 second delay pops the mirror up two seconds befor...

Страница 31: ...and aperture priority A mode exposures are bracketed by changing the shutter speed Shutter priority S mode exposures are bracketed by changing the aperture 2 Open the control panel then press the adjust button 4 Turn the rear control dial to set the size of the bracket 3 5 or 7 frames Continuous Hold the shutter release button down until the series is finished Removing your finger from the shutter...

Страница 32: ...ne Some testing may be necessary to produce the desired results Exposure can be compensated in 1 2 or 1 3 EV increments using the exposure compensation function p 51 2 Compose the scene then press the shutter release button all the way down to take the first exposure appears in the data panel after the first exposure is taken 1 Turn the drive mode lever to ME appears in the frame counter The multi...

Страница 33: ... Switch to setting 3 to spot meter your flash exposures p 102 Custom Function Notes Maxxum Program Flash 5400HS Note When used with the 5400HS a preflash is fired before the main exposure The preflash is metered 14 segment and fed back to the flash exposure system to more accurately determine the flash exposure The 5400HS will not fire a preflash if does not appear in the flash data panel or when ...

Страница 34: ...atural because the motion blur precedes the subject in the final image Use rear flash sync to create more natural looking slow shutter speed flash exposures that leave a blur of motion behind the subject Rear Flash Sync Conventional Flash 1 Slide the flash mode switch to REAR Rear flash sync can be used with the built in flash and accessory flashes attached to the accessory shoe or PC terminal 3 S...

Страница 35: ...t meter the flash when high speed sync is selected Pressing the depth of field button in HSS flash mode prevents release of the shutter HSS is not available in wireless remote flash mode or when the 2 second self timer has been selected If you attach a filter whose stop s increase is not 0 i e ND the proper exposure will not be obtained Press the flash s HSS button to cancel the HSS Refer to the 5...

Страница 36: ...e of the series 9 Repeat steps 7 and 8 until the series is complete The bracket number is indicated in the data panel Turn the main switch to LOCK change the drive mode push the built in flash down or turn off the accessory flash to cancel the bracketed series Film can be changed in the middle of the bracketed series Flash Bracketing with PC Connected Flash Units 1 Set the camera to M mode p 41 2 ...

Страница 37: ... When remote ratio flash is selected the off camera flash provides 2 3 of the full exposure while the built in flash provides the remaining 1 3 Flash and color meters can not be used to meter wireless remote off camera flash The shutter speed will be set to 1 60 sec or slower When using 5400HS or Wireless Remote Controller as a controller instead of built in flash off camera flash will not fire if...

Страница 38: ... the off camera flash is charged its AF illuminator will blink Press the data panel illuminator when taking the picture Both flashes will fire when the shutter is release at a 2 1 ratio The built in flash will provide 1 3 and the accessory flash will provide 2 3 of the total exposure Wireless Remote Ratio Flash Test firing the flash will activate slow shutter sync p 64 if Cust 10 setting 2 is sele...

Страница 39: ...Remote Flash Mode 1 Attach the accessory flash to the camera then turn the camera and flash on 2 Select another flash mode 3 Detach the accessory flash ADDITIONAL FEATURES FLASH Wireless Remote Off Camera ADDITIONAL FEATURES ...

Страница 40: ...rn the main switch to ON The grip sensor and data panel are activated When an object is detected near the viewfinder the camera s systems are activated to set the focus and exposure as you frame your subject Autofocus and exposure systems shut down approx five seconds after eye or grip sensor contact is broken Infrared absorbing sunglasses gloves or dry hand may affect eye start operation Eyepiece...

Страница 41: ...e and focus on your subject If the scene is too dark for autofocus to operate slide the focus mode switch to M and focus the lens manually p 33 5 Close the eyepiece shutter The eyepiece shutter prevents light from entering through the viewfinder and affecting the metered exposure 6 Press and hold the shutter release button to take the picture The shutter remains open as long as the shutter release...

Страница 42: ...not work on this camera Contact a Minolta Service Facility if your flash has a low trigger voltage 2 Plug the PC connector into the camera s PC socket The flash unit may fire unexpectedly if it is on when the sync cord is plugged into the PC terminal The PC terminal is compatible with both center positive normal polarity and center negative positive polarity flash units 1 Slide the remote control ...

Страница 43: ...ons Slide the data panel illuminator switch as shown The data panel illuminator shuts off approx five seconds after the last camera operation SPECIAL FUNCTIONS Select setting 2 to extend the display duration to 10 seconds Switch to setting 3 to extend the display duration to 30 seconds p 98 Custom Function Notes SPECIAL FUNCTIONS ...

Страница 44: ...n up to seven 36 exposure rolls Data is stored in seven separate film areas Area 1 stores the data from the first roll area 2 the second etc When all the data areas are full new data is written to area 1 erasing the previous data Data area assignments are not user selectable Only the data for the first exposure of a multiple exposure is stored Data is not stored unless film is loaded Selecting Dat...

Страница 45: ...just button to view the first data area blinks in the data panel Continued on the following page Overwriting appears in the data panel before the data for the first exposure in Area 1 is overwritten disappears after the first exposure Old data is erased one frame ahead of the current frame Area appears only when the film area changes from 7 to 1 and disappears after the data from the first exposur...

Страница 46: ...the adjust button again to return to data memory 8 Turn either control dial to select data memory or then press the shutter release button partway down to enter the selection Press the shutter release button partway down twice to return to standard operation mode with data memory on 6 Press the AE lock button at step 4 or 5 to display the metering mode flash compensation flash bracketing increment...

Страница 47: ...ton then the adjust button CUSTOM FUNCTIONS 1 Open the control panel door Use the custom functions to tailor the camera to your shooting style or preferences The customizable functions are explained on pages 92 102 3 Turn the front control dial to select the custom function number To reset the custom functions to their default setting 1 1 Turn the main switch to LOCK 2 Open the control panel door ...

Страница 48: ...nce the film a minimum of two frames past the last exposed frame 5 Press the adjust button The film is automatically advanced to the desired frame Cust 1 AF Release priority 1 AF priority Shutter will not release until or appears in the viewfinder 2 Release Priority Shutter releases even if the focus cannot be confirmed Use release priority when photographing moving subjects RP will appear in the ...

Страница 49: ...N position Use this setting when the grip sensor is not being tripped user wearing gloves Slide the main switch to LOCK when the camera is not being used Cust 4 DX Memory 1 DX Memory Off Film speed is always set to the DX coded ISO Non DX coded film is set to the previous roll s ISO 2 DX Memory On Changes to the film speed for a DX coded roll are saved and applied to future rolls with the same DX ...

Страница 50: ...e AF button and turn the control dial to specify the desired local focus area See page 31 for details 2 Spot Focus Press the AF button to focus using the center focus sensor p 31 Cust 10 AE Lock Button 1 Press to activate release to cancel 2 Press once to activate press again to cancel Turning the built in flash on or off cancels AE lock AEL appears in the viewfinder when AE lock button is active ...

Страница 51: ...ens to a non coupling lens mount telescope microscope etc Cust 17 AF Drive Speed 1 Speed priority 2 Silent drive Autofocus drive speed will be slower than setting 1 Cust 13 Meter Data Panel Illuminator Display Duration 1 5 sec 2 10 sec 3 30 sec Selecting longer display durations reduces battery performance Cust 14 AF Area Display 1 Focus Area LEDs display the active focus area for 0 1 sec after th...

Страница 52: ...pensation Creative program control PA Ps lets you override the exposure settings selected by the camera in P mode A and S mode operation does not change The exposure compensation value is displayed in the meter index Exposure compensation dial must be set to 0 Compensation range is 3 EV for both 1 2 and 1 3 EV increments Lower viewfinder indicators will disappear when the rear control dial is oper...

Страница 53: ... evenly 3 Spot Metering Flash is metered by the segment corresponding to the currently selected Local Focus Area Do not recompose the image after locking focus Flash exposure is TTL metered by the segment used to lock focus Cust 21 Exposure Compensation Display 1 No display Exposure compensation value is not displayed in the data panel 2 Display Exposure compensation value is displayed in the data...

Страница 54: ...n the center of the focusing screen Designed for users of large aperture lenses the M and ML type screens use the super spherical acute matte surface for greater light dispersion and sharper focus control The edges of the viewfinder may appear dark when some telephoto lenses are used with the type G S and L focusing screens The final image will not be affected Another Maxxum Dynax 9 exclusive the ...

Страница 55: ...rmance or damage the camera and accessories Lenses All Minolta AF lenses can be used with this camera MD and MC series lenses manual focus cannot be used with this camera Compatibility of Accessories Flashes All Minolta i si and HS series flash units and the Vectis SF 1 flash are compatible with this camera The flash will always fire when the flash unit is on The Flash Shoe Adapter FS 1100 is requ...

Страница 56: ...t be at least 1m 3 3ft when the built in flash is used Remove and reinstall the batteries If normal camera operation does not resume or the camera malfunctions repeatedly contact an authorized Minolta Service Facility 10 PROBLEM CAUSE No display appears when the camera is switched on Batteries are loaded incorrectly Batteries are exhausted Autofocus does not work when shutter release button is pre...

Страница 57: ...to 50 C 4 to 122 F Never leave your camera where it may be subjected to extreme temperatures such as the glove compartment of a car Data panel response time will be slow at colder temperatures The display will temporarily darken at higher temperatures but will restore when the temperature normalizes This camera is not waterproof or splashproof When using the camera in the rain protect the camera a...

Страница 58: ...nt metering EV 0 20 ISO 100 f 1 4 lens Center weighted average EV 0 20 Spot metering EV 3 20 Film speed Setting Automatic ISO 25 to 5000 for DX coded film Manual ISO 6 to 6400 in 1 3 EV increments Flash ISO 25 1000 Film Transport Loading Auto load Drive Modes Single frame and Continuous advance 2 or 5 5 frames sec 4 5 in continuous AF mode self timer 10 or 2 second exposure bracketing single frame...

Страница 59: ...ium Branch Prins Boudewijnlaan 1 B 2550 Kontich Belgium Minolta Schweiz AG Riedstrasse 6 CH 8953 Dietikon Switzerland Minolta Svenska AB Albygatan 114 S 171 54 Solna Sweden Finland Branch Niittykatu 6 PL 37 SF 02201 Espoo Finland Minolta Portugal Limitada Av do Brasil 33 A P 1700 Lisboa Portugal Minolta Corporation Head Office 101 Williams Drive Ramsey New Jersey 07446 U S A Los Angeles Branch 111...

Отзывы: