

,
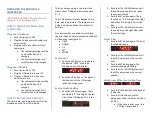
Switch from Celsius to Fahrenheit
1.
Push the TIME button on the back of
the device.
2.
Push the DOWN button to switch
between degrees Celsius and
degrees Fahrenheit.
Set the Alarm
1.
Push the TIME button on the back of
the device.
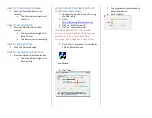
2.
Push the MODE button on the back
of the device. The LCD display
should read like the following:
3.
Push the SET button on the back of
the device. The hour should be
blinking.
4.
Push the UP or DOWN button to set
the hour for which you want the
alarm to sound.
5.
Push the SET button again. The
minutes should be blinking.
6.
Push the UP or DOWN button to set
the minute for which you want the
alarm to sound.
7.
Push the SET button again. The LCD
display should read with a “01.”
•
This is the snooze.
•
Snooze can last from
1 – 60 minutes.
8.
Push the UP or DOWN button to set
the snooze time.
9.
Push the SET button again. The LCD
display should read with a “1.”
•
This is the alarm ring.
•
There are 6 rings from which
to choose
•
Rings 1 – 5 are nature sounds
•
Ring 6 is a repetitive buzz.
10.
Push the MODE button on the back
of the device to exit the alarm.
NOTICE: You have only
set
the alarm with
these steps
Turn On the Alarm
1.
Push the TIME button on the back of
the device.
2.
Push the MODE button on the back
of the device.
3.
Push the UP button on the back of
the device. The alarm light —
located directly beneath the PM
light — on the LCD display should be
lit.
4.
Push the MODE button to exit the
alarm.
5.
Repeat steps 1 – 4 to turn the alarm
off.
6.
To stop the alarm after it sounds,
press the button on top of the
device.
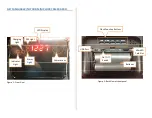
PREPARING THE DEVICE FOR USE
1.
Be sure the small white switch—
located beneath the plastic battery
panel and to the left of the power
input — is switched from OFF to ON.
2.
Insert a MicroSD card into the slot
located to the left of the on / off
switch.
3.
Make sure your mini clock camera
pro has been fully charged.
4.
Place the device where you want to
record.
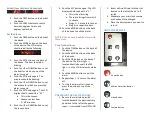
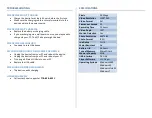
USING THE REMOTE
Power Button
Motion Detection Button
Video Button
Camera Button